

Online shopping doesn't allow customers to feel and look at the products physically... so they rely on product photos.
This means that product photos play a role in their decision-making process. But what if your product photos don't entice them that much?
The good news is... you can totally do something about it— even if you don't have a huge budget to hire professional photographers.
Are you wondering how to create product images for your website?
- Prepare the things you need
- Set up your equipment
- Take different angles
- Use different lighting
- Highlight product features
- Enhance the images
- Choose the right ratio
Wait, there's more. Stay tuned because you'll learn...
- What are product images?
- Why are product images important for your eCommerce store?
- How to create great e-commerce product images in 7 easy steps.
If you're eager to learn how, let's get started!
What are product images?
Product images are a visual representation of your products through photos. This is an example of a product image:
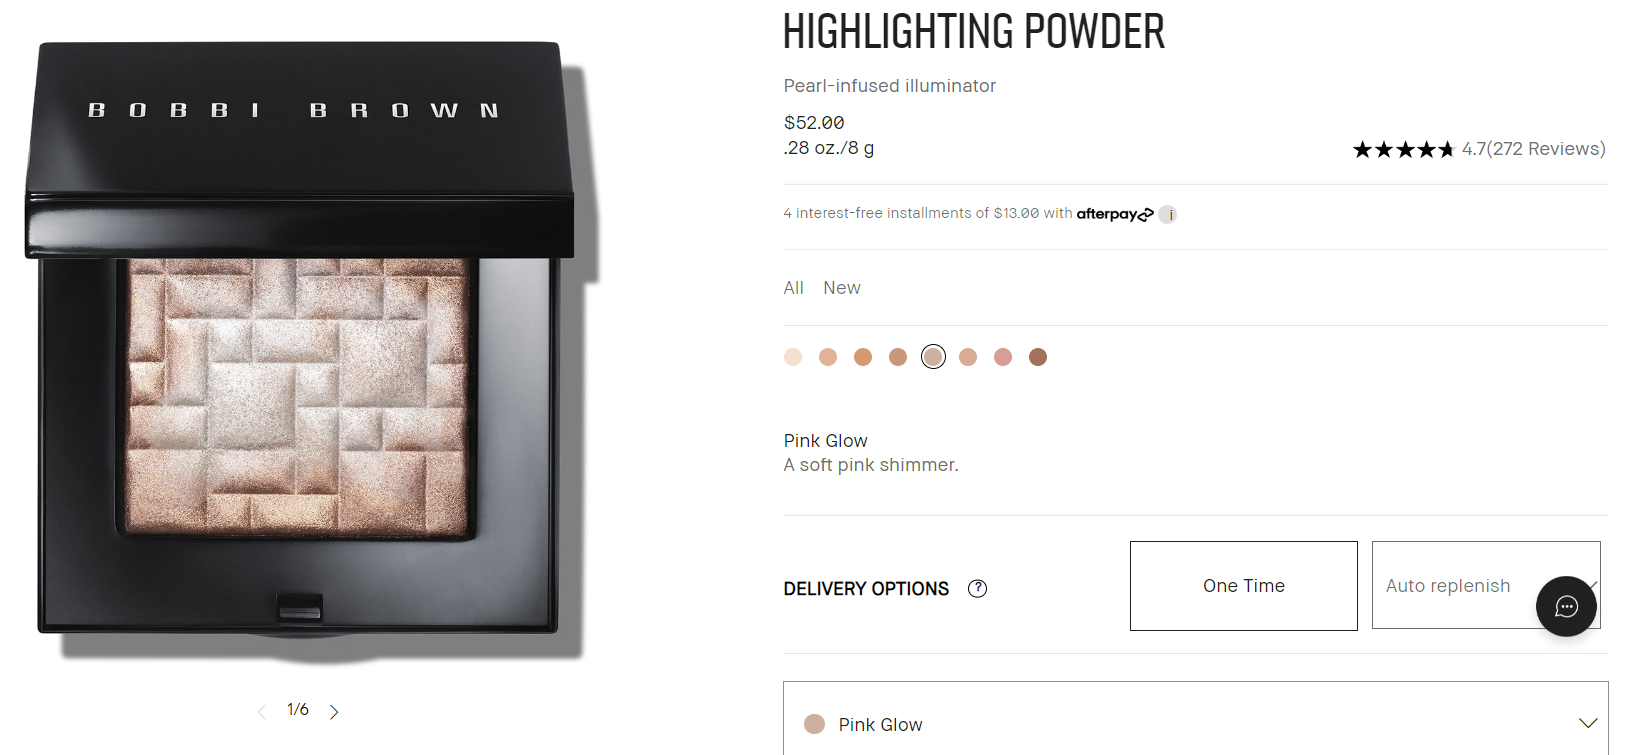
This is a product photo from Bobbi Brown. As you can see, it shows the product's texture. This is important in creating eCommerce product images, which we'll discuss later.
So, product images are usually used in different channels. You can use them on your website, social media, emails, and more.
Now, let's talk about...
Why are product images important?
Product images are essential for your eCommerce strategy because you can...
1. Highlight product features
You can highlight your product features by taking great and high-quality product images. This helps show your customers what your products are capable of.
Product images can also...
2. Build brand identity
If you want your potential and existing customers to notice your brand on every platform you use, product images can help.
Another thing is that your photos can appear on Google searches when a prospect searches for a specific product. This can also help...
3. Entice customers to buy
Will you buy products if the images don't look good, highlight the features, and are low-quality? The chances are low, right?
So, having high-quality product images can entice your customers to buy your products. And I'm sure you're already wondering...
How to create great product images for your eCommerce website?
The first you need to do is...
1. Prepare the things you need for the shoot
Preparation is key when it comes to product photography. This way, you can avoid wasting time and you will have a clear concept of the things you need to achieve during the shoot.
So, you should prepare these things beforehand:
- Moodboard
- Concept
- Checklist of the shots you need to have
- Shoot location
- Props
- Permits (if needed)
- Stock images for inspiration
Through preparation, you can ensure you're not missing anything before and after the product photography shoot. You will be able to finish everything and not waste your time and resources.
The next thing you need to do is...
2. Set up your photography equipment
Your equipment should be ready before the shoot. Again, this will help you save time and maximize your schedule for shooting the products.
You also need to ensure your product photography equipment will work properly to avoid technical difficulties throughout the shoot.
Here are some equipment you need to prepare:
- Tripod
- Lighting or lightbox
- White background or any color of your choice
- Cameras
- Chargers
- Phones with high-quality cameras for backup
Set them up beforehand so you can take product images seamlessly. And when you're already starting the product shoot, make sure to...
3. Take different angles
Taking different angles will showcase your products from various points of view. This will also leave you with more options before you decide which photos to use on your eCommerce website.
But wait... what are these angles, anyway?
A. Front angle
(Source)
This is one of the most common angles used in product photography. And probably one of the first angles you'll see when browsing product photos online.
This angle shows a glimpse of the product as a whole. It is also easy to take because you only need to focus on the front view.
B. Profile angle
(Source)
Profile angle highlights the side view of the products. This angle will help potential customers see what the product looks like on the side.
C. 45-degree angle
(Source)
The 45-degree angle will showcase two parts of the products, which are the front and the side. This is a great angle if you want to show your customers more product details.
D. Back angle
(Source)
Obviously, the back angle focuses on the back of your products. This is an important angle if the back of your product has specific details your customers need to see.
E. Top shot
(Source)
The top angle showcases your product from a bird' s-eye view. Flat lays can also be considered top-view shots.
This helps your customers see what your product looks like from the top. This angle will also give your potential customers an idea of what size your products are.
So, having different angles gives you more options on which photos to use... and will also help your customers see what your products look like from different perspectives.
Another thing you should do is...
4. Use different lighting techniques
Good lighting is not just great for selfies. You also need them to take your product photos and make them look better.
Lighting can also set the mood of your products. And that can affect how the customers view or feel about your products.
When you shoot product photos, it's best to have natural light. The sunlight will make your product photos look more natural.
Just like when taking our self-portraits... natural light can highlight our features, skin tones, hair colors, etc.
You can also use a lightbox if you want to achieve professional product photography looks and feels. Here are some lighting techniques you can look into:
- Natural lighting
- Backlighting
- Fill light
- Practical light
- Bounce lighting
Remember, lighting will set the mood and tone of your photos. It will also be easier for you to enhance your photos once you use proper lighting.
Another thing to remember when you have a DIY product photography shoot is to...
5. Highlight the product features
Remember to take close-up shots of your products to highlight their features! Not just close-ups, but experiment with different angles that will showcase the features.
You need to take detailed images if you want to entice your potential customers into buying your products.
And one of the essential product photography tips is...
6. Enhance the images
This doesn't mean you need to manipulate the images. You just need to enhance them so they will look better.
Photo enhancements mean improving the photos. You can do this by changing the colors, increasing the brightness or exposure, or adding filters that align with your brand identity.
Some tools you can use are:
- Adobe Photoshop
- Adobe Lightroom
- Skylum Luminar
If you're willing to invest, make sure to check out these tools to create high-quality images for your online store.
And last but not least...
7. Choose the right ratio
Using the wrong ratio will look awkward on other eCommerce websites. I mean, imagine using a landscape image when your e-commerce platform encourages a 1:1 ratio or square images.
That's a no-no! Your photos will look unpleasant on your website. So, it's vital to choose the right ratio when editing and uploading your product photos.
Not only that... but you should also choose the right pixels when exporting your images. This will ensure that your images will not have poor quality.
But you also need to check what your eCommerce platforms allow. Some files may be too big.
Another tip is to compress your images if they're too big. This will not sacrifice your website speed and preserve the quality of your product photos.
So, how to know if you're using the right image sizes?
- Check what your eCommerce platform prefers. It depends on what your eCommerce platform prefers. Some may prefer 1:1 and some may not.
- Use what looks right for your photos. Make sure your photos won't look awkward if you try to fit them into certain sizes.
Now, are you ready?
Use these product photography tips and create the best product photos!
Learning how to create product images for a website takes some effort. But you will definitely reap the benefits once they entice your website visitors to purchase!
The good news is? You don't even need to hire a professional photographer! Of course, that is still an ideal choice if you have the budget.
But if you don't, there are still many options without using a professional camera.
Like using your phone! Are you curious? Here's...


