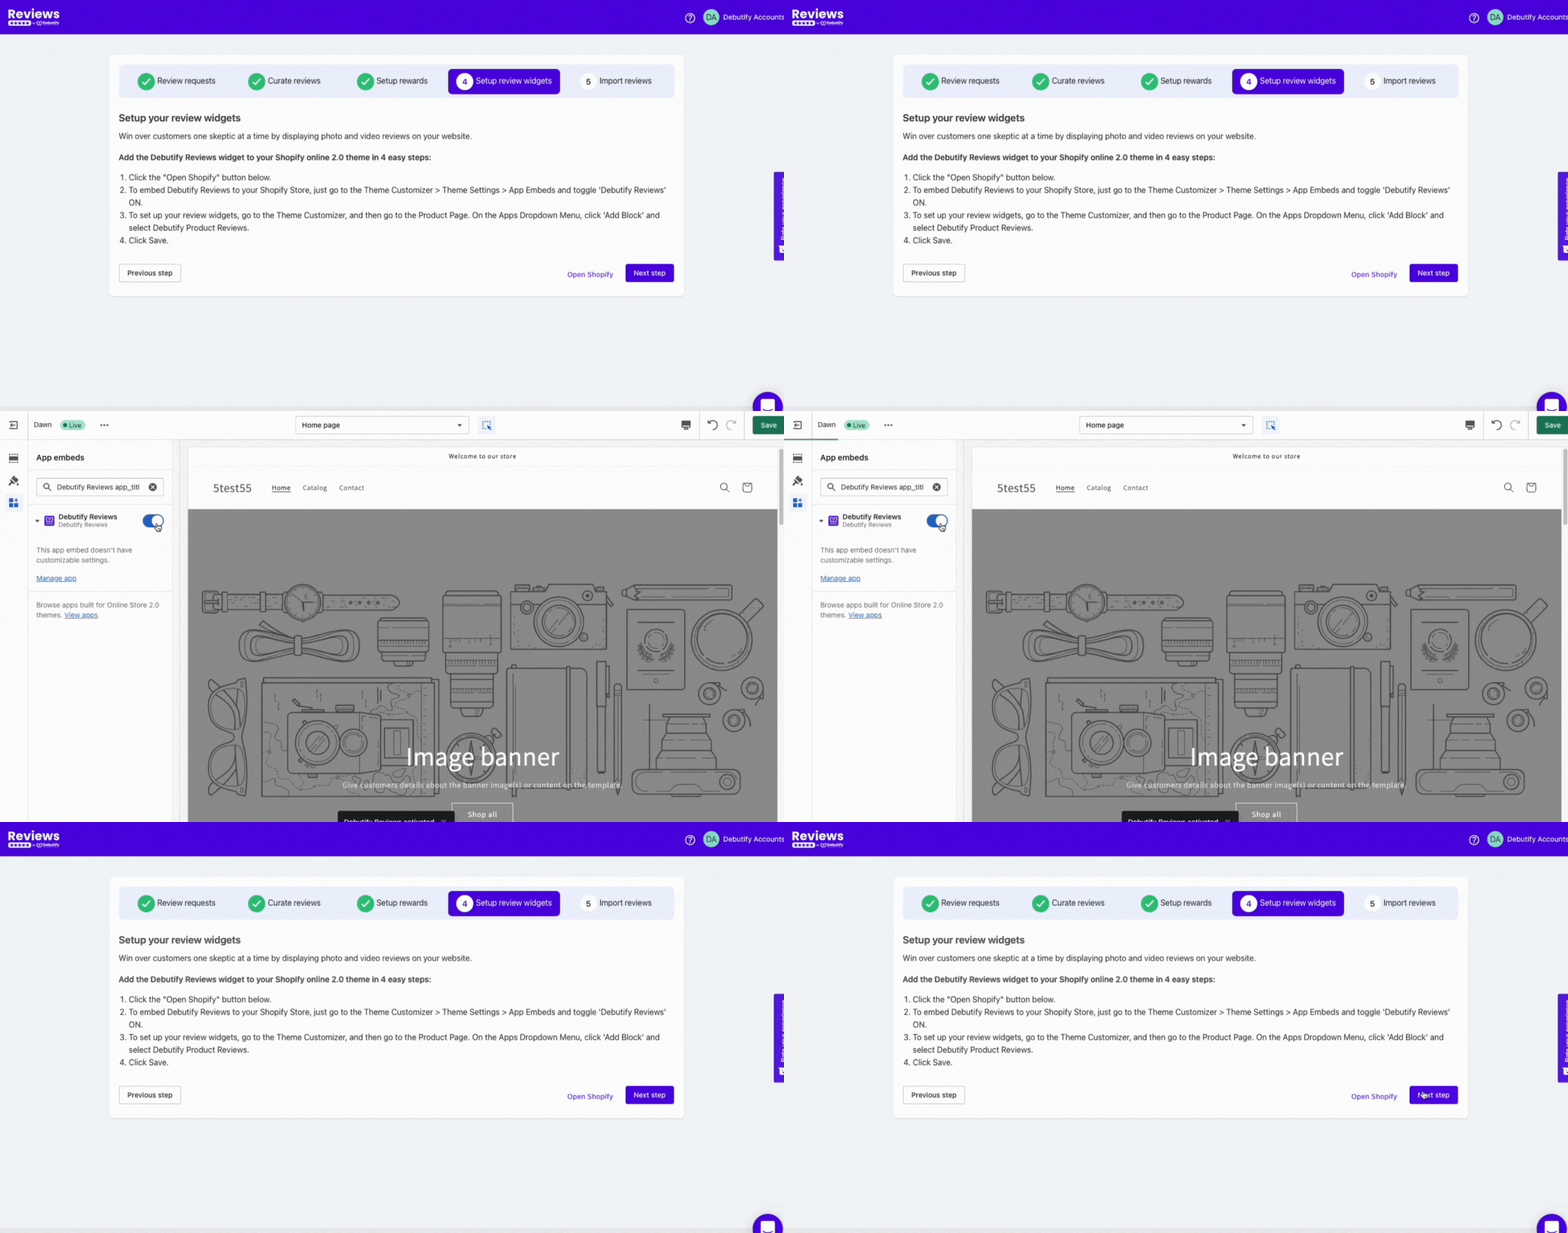
In case you missed it, you can access Debutify Reviews if you go to Shopify Store's Admin dashboard > Apps > Debutify Reviews.
.gif)
1. Dashboard
The dashboard is where you'll manage everything in one place. If you weren't able to fully set up Debutify Reviews earlier, you could access everything here and more. Here's what you can see.
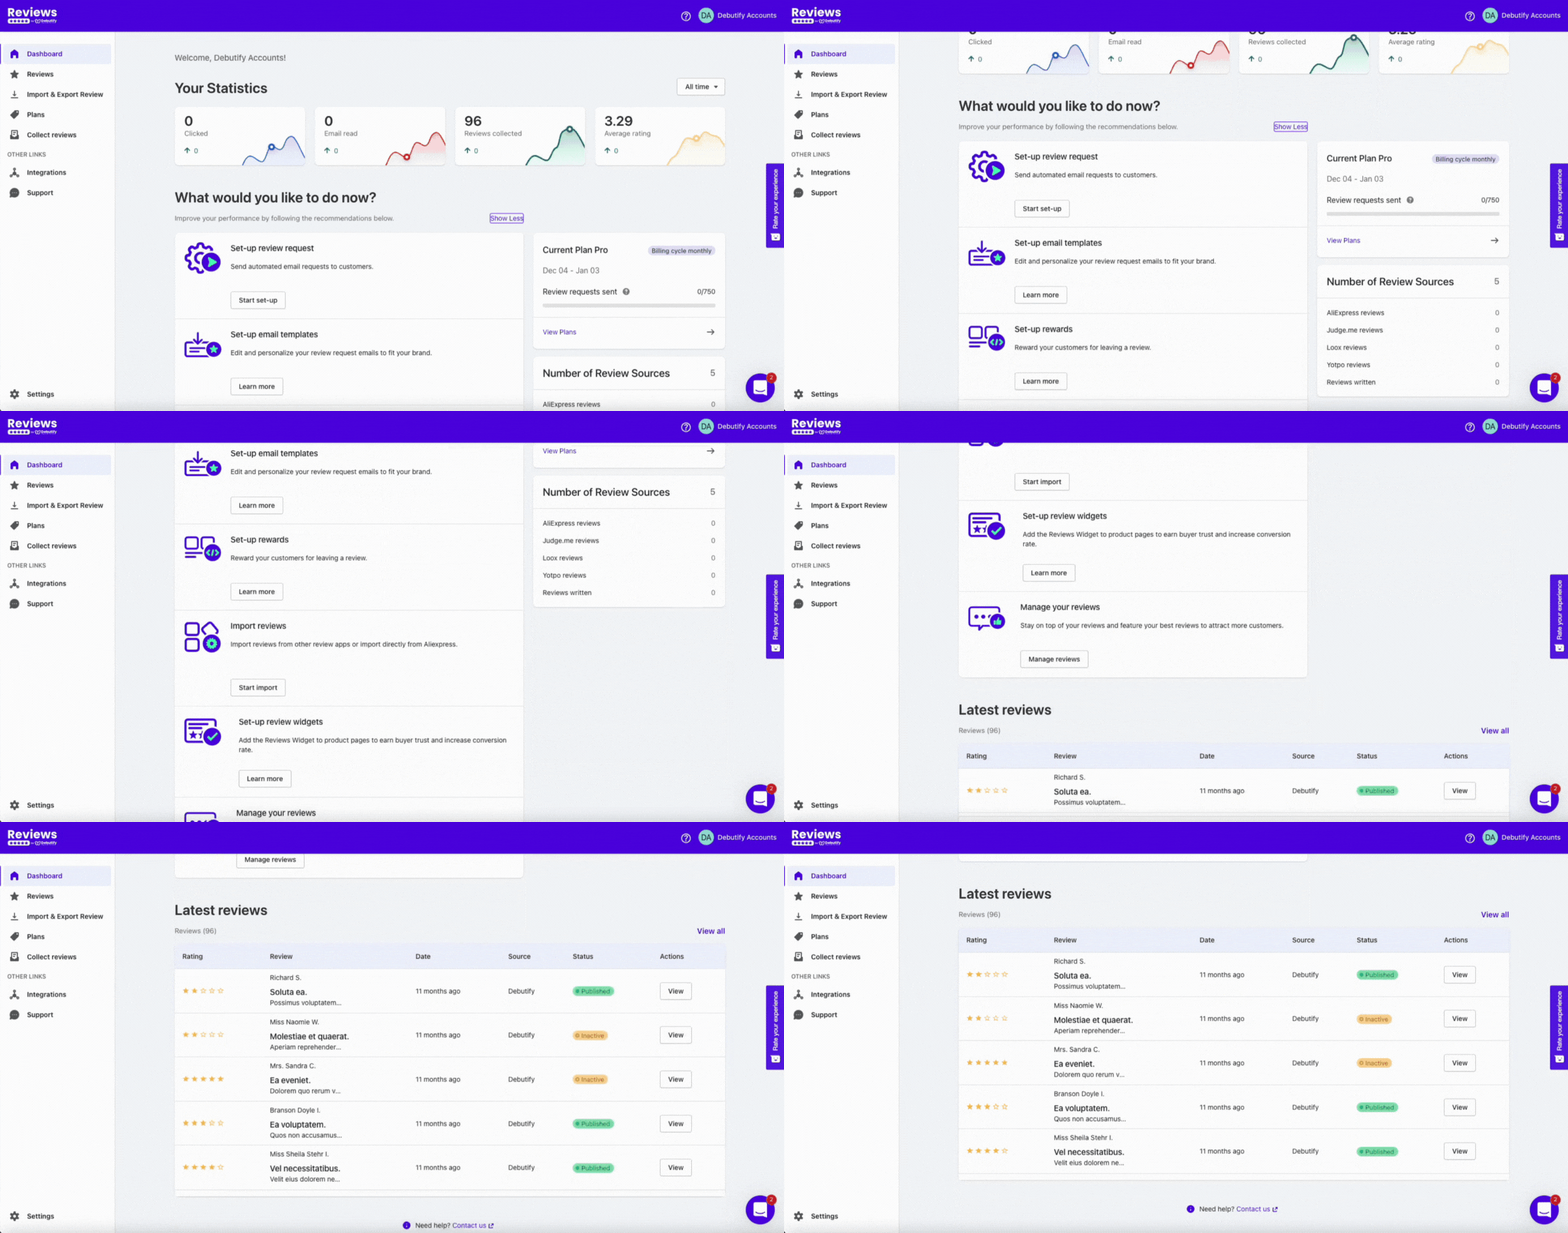
Basically, you'll also see the ones we set up at the start. But again, this dashboard allows you to update settings and customize more.
You can also have an overview of the statistics. This is where you can see how many emails were sent, scheduled, opened, and read.
So, what would you like to do now? Let's start by exploring the review request features.
2. Review request
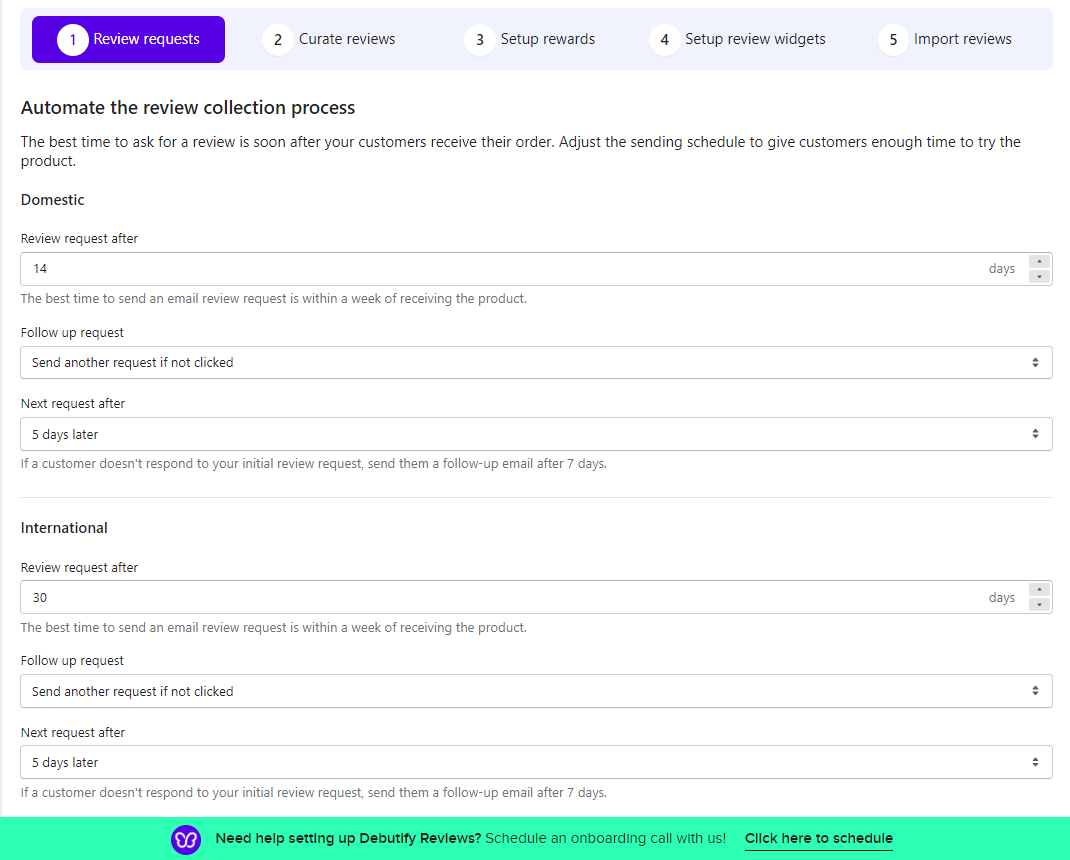
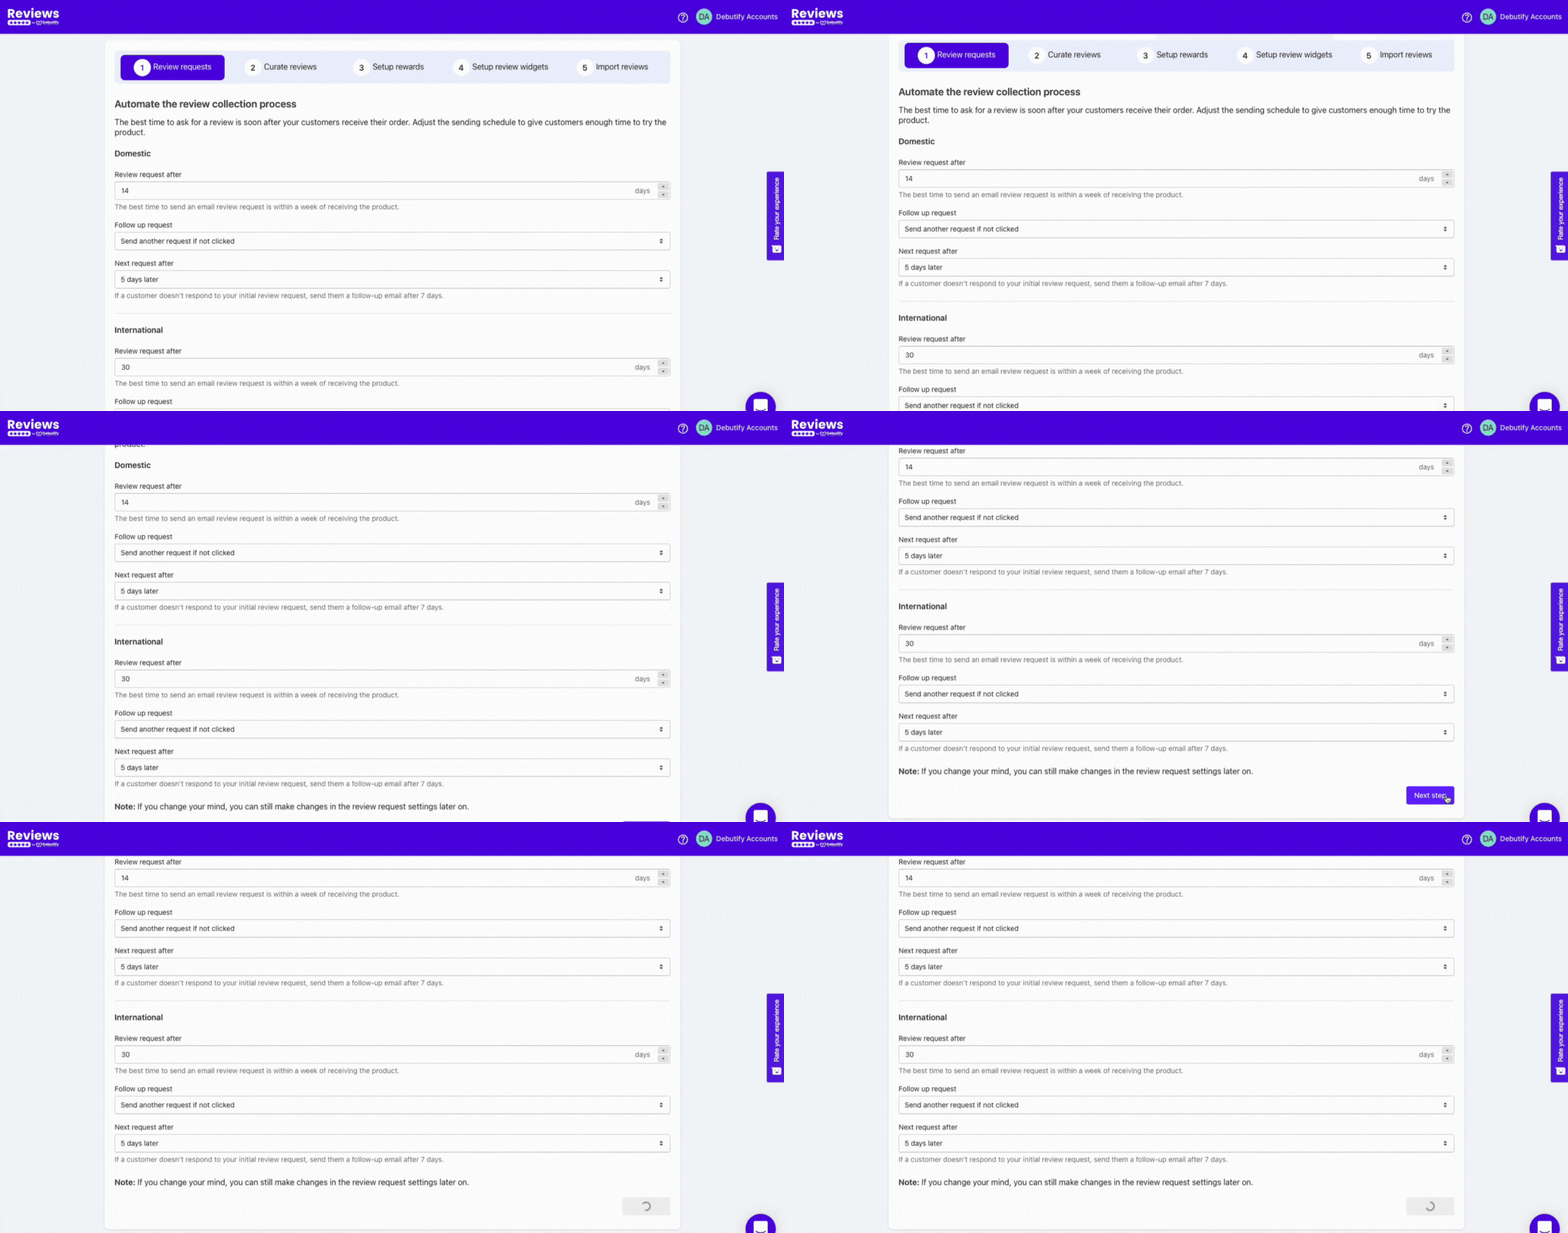
When you click "Set up review request" on the dashboard, you'll be redirected to this. You can customize your setting on the initial setup we did earlier.
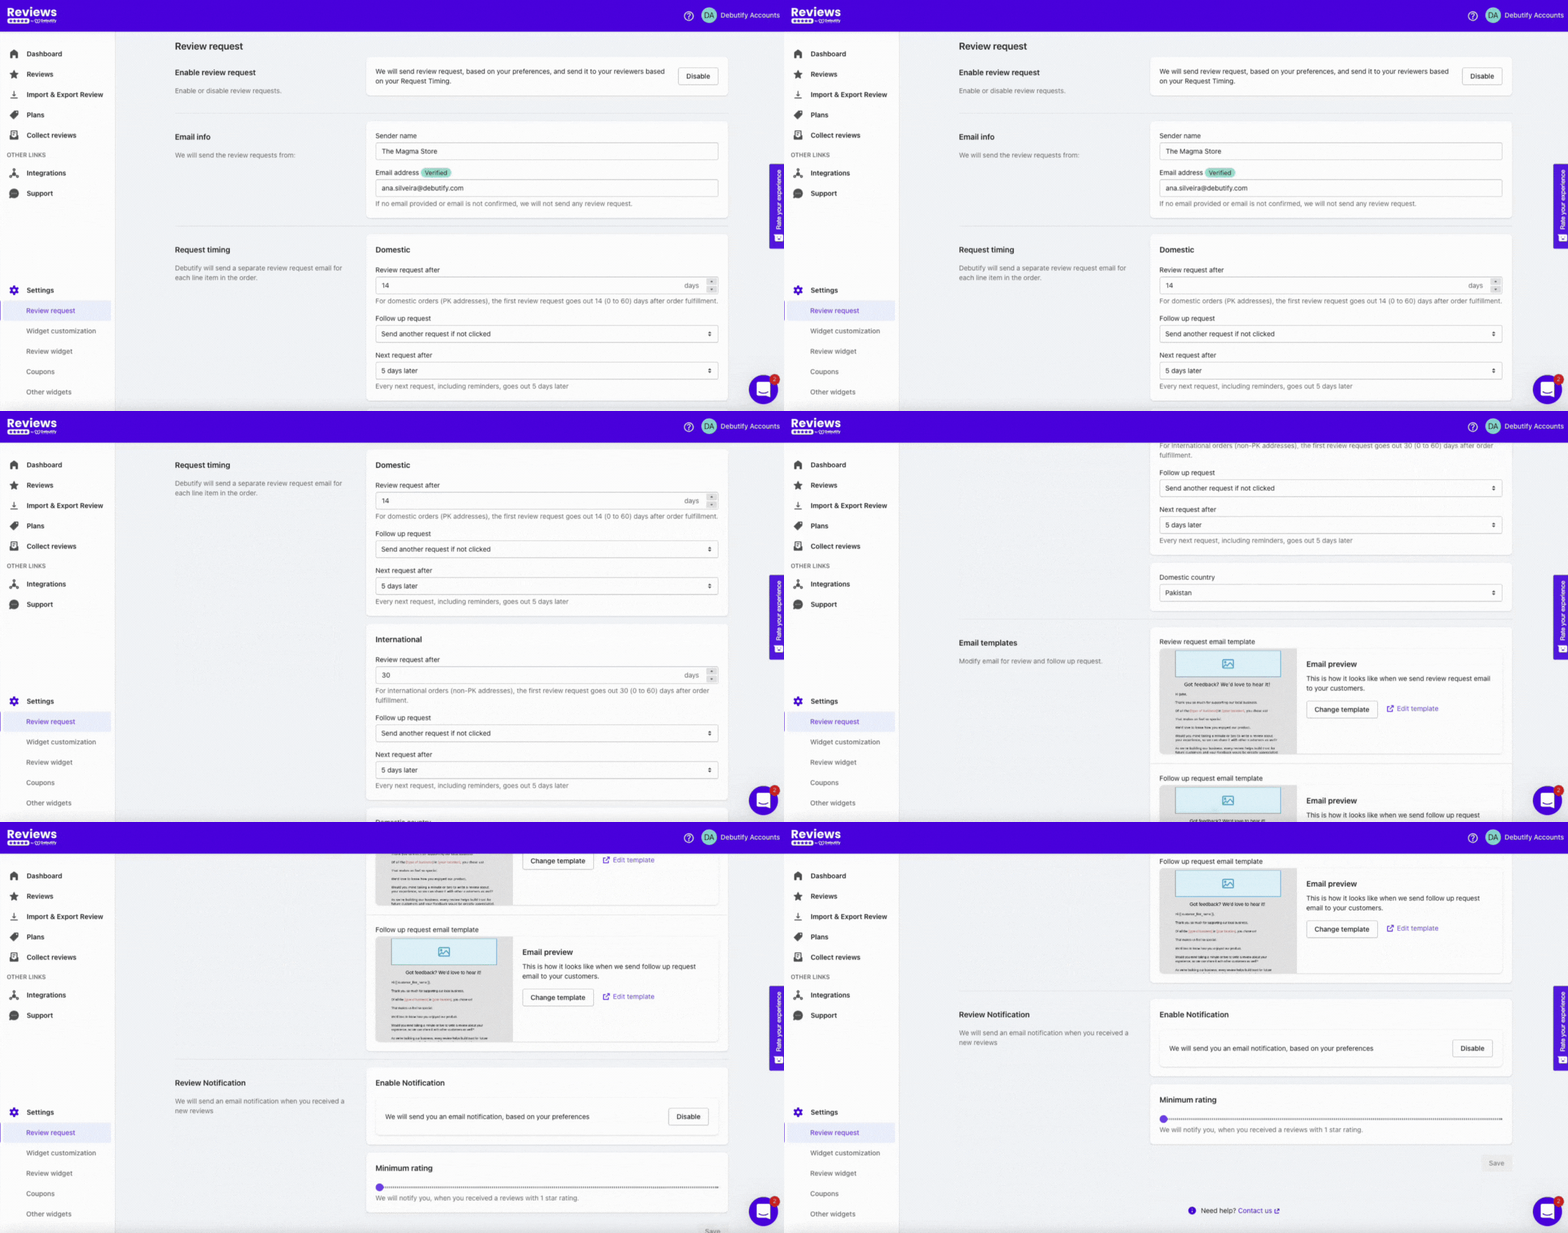
Here's an important reminder. Make sure to check your email because Debutify Reviews will ask you to confirm your email sender's signature.
You can edit your email information in this setting, like the sender's name and address. You can also edit the email templates, request timing, and review notifications.
Email templates
There are ready-to-use email templates for different purposes. But if you want to make them on-brand, you can edit the email templates by clicking Edit email template to go to the template editor.
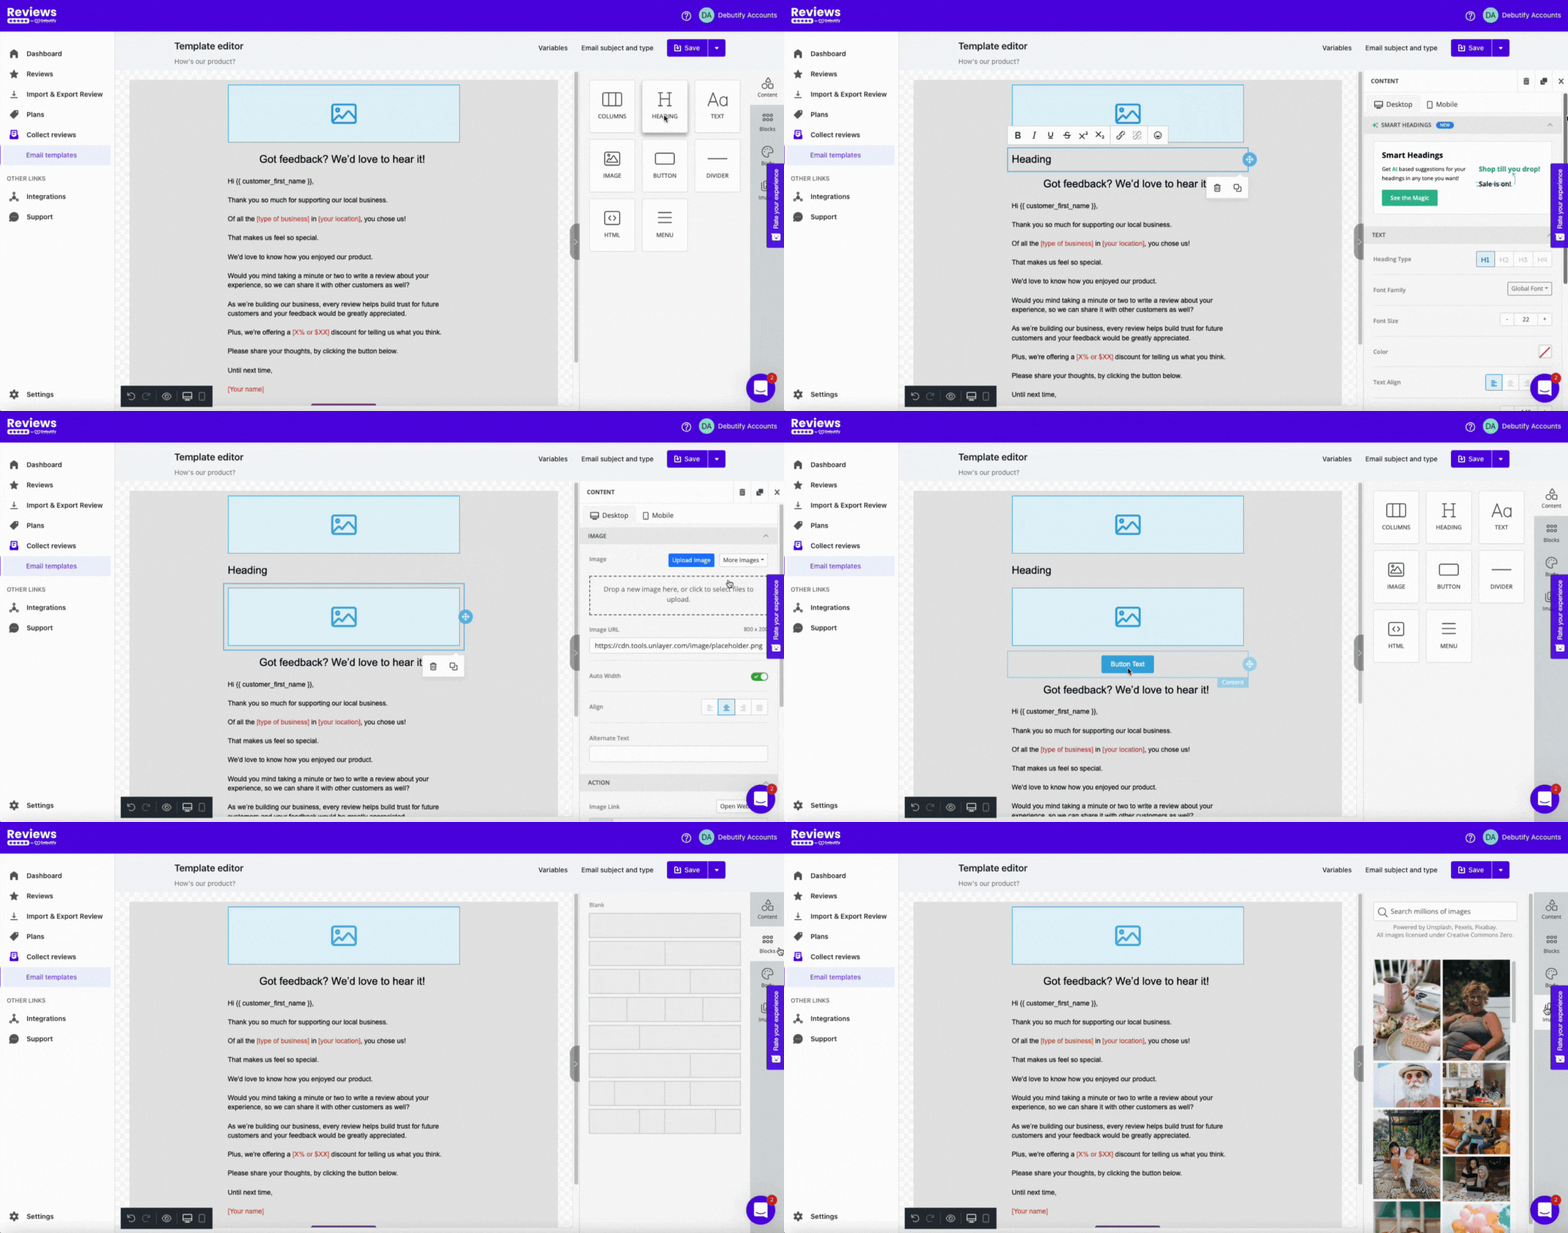
The content of the email can be customizable, which means you can edit the columns, headings, text, images, buttons, and dividers and insert HTML tags.
You can edit the blocks, colors, and images on the right side. Using your branding to enforce brand identity through emails is essential for colors.
Don't forget to check the links and buttons to make sure you'll redirect customers to the right landing pages. And, of course, save your template.
You can also click Collect reviews on the left sidebar, where you can see all your existing email templates.
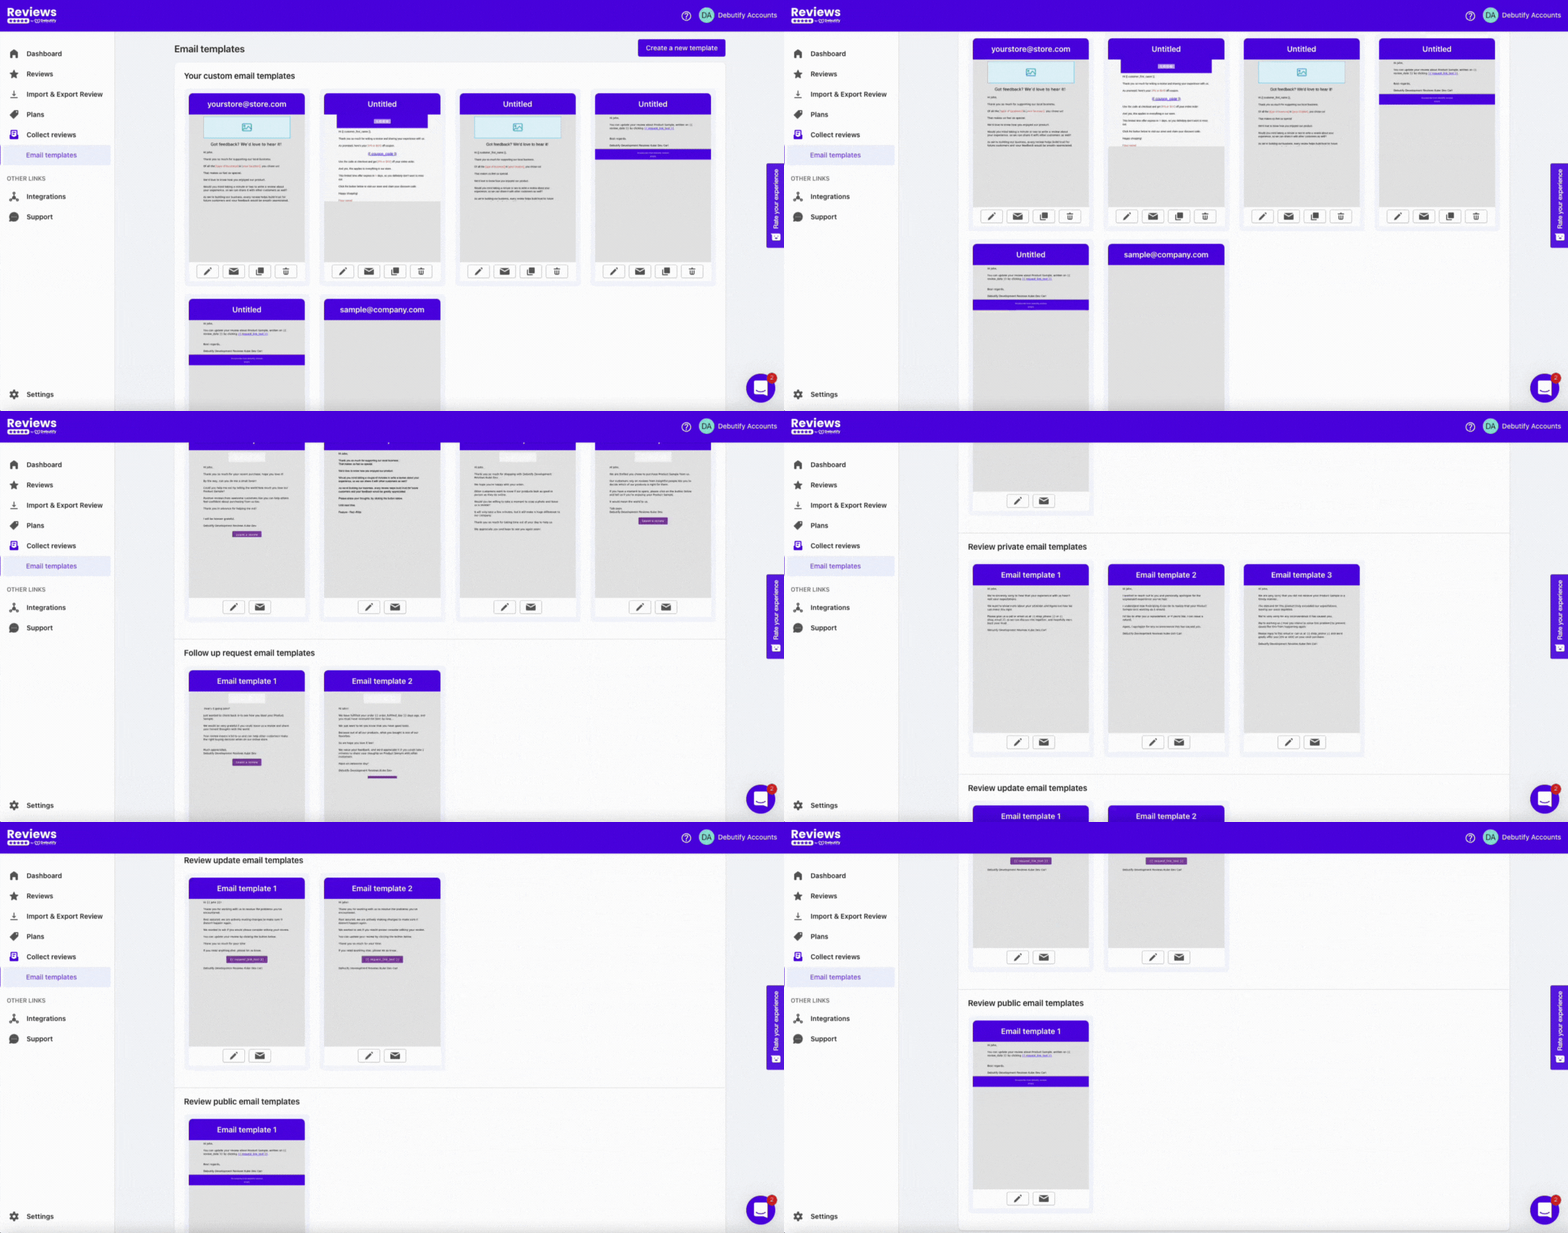
Here are the types of email templates you can create:
- Request email. This is the template you can use for requesting reviews.
- Follow-up email. This template is for asking for follow-ups if they didn't send reviews after the initial request.
- Coupon email. This email template is for sending coupons.
- Review update email. This is the template to allow customers to update their reviews.
- Review public email. This is the template when you comment on customer reviews.
- Review private email. You can use this email template when you receive a bad review.
Again, you can customize the templates for each of their purposes.
Review notification
You can enable your review notification setting if you want to keep updated with the reviews you receive.
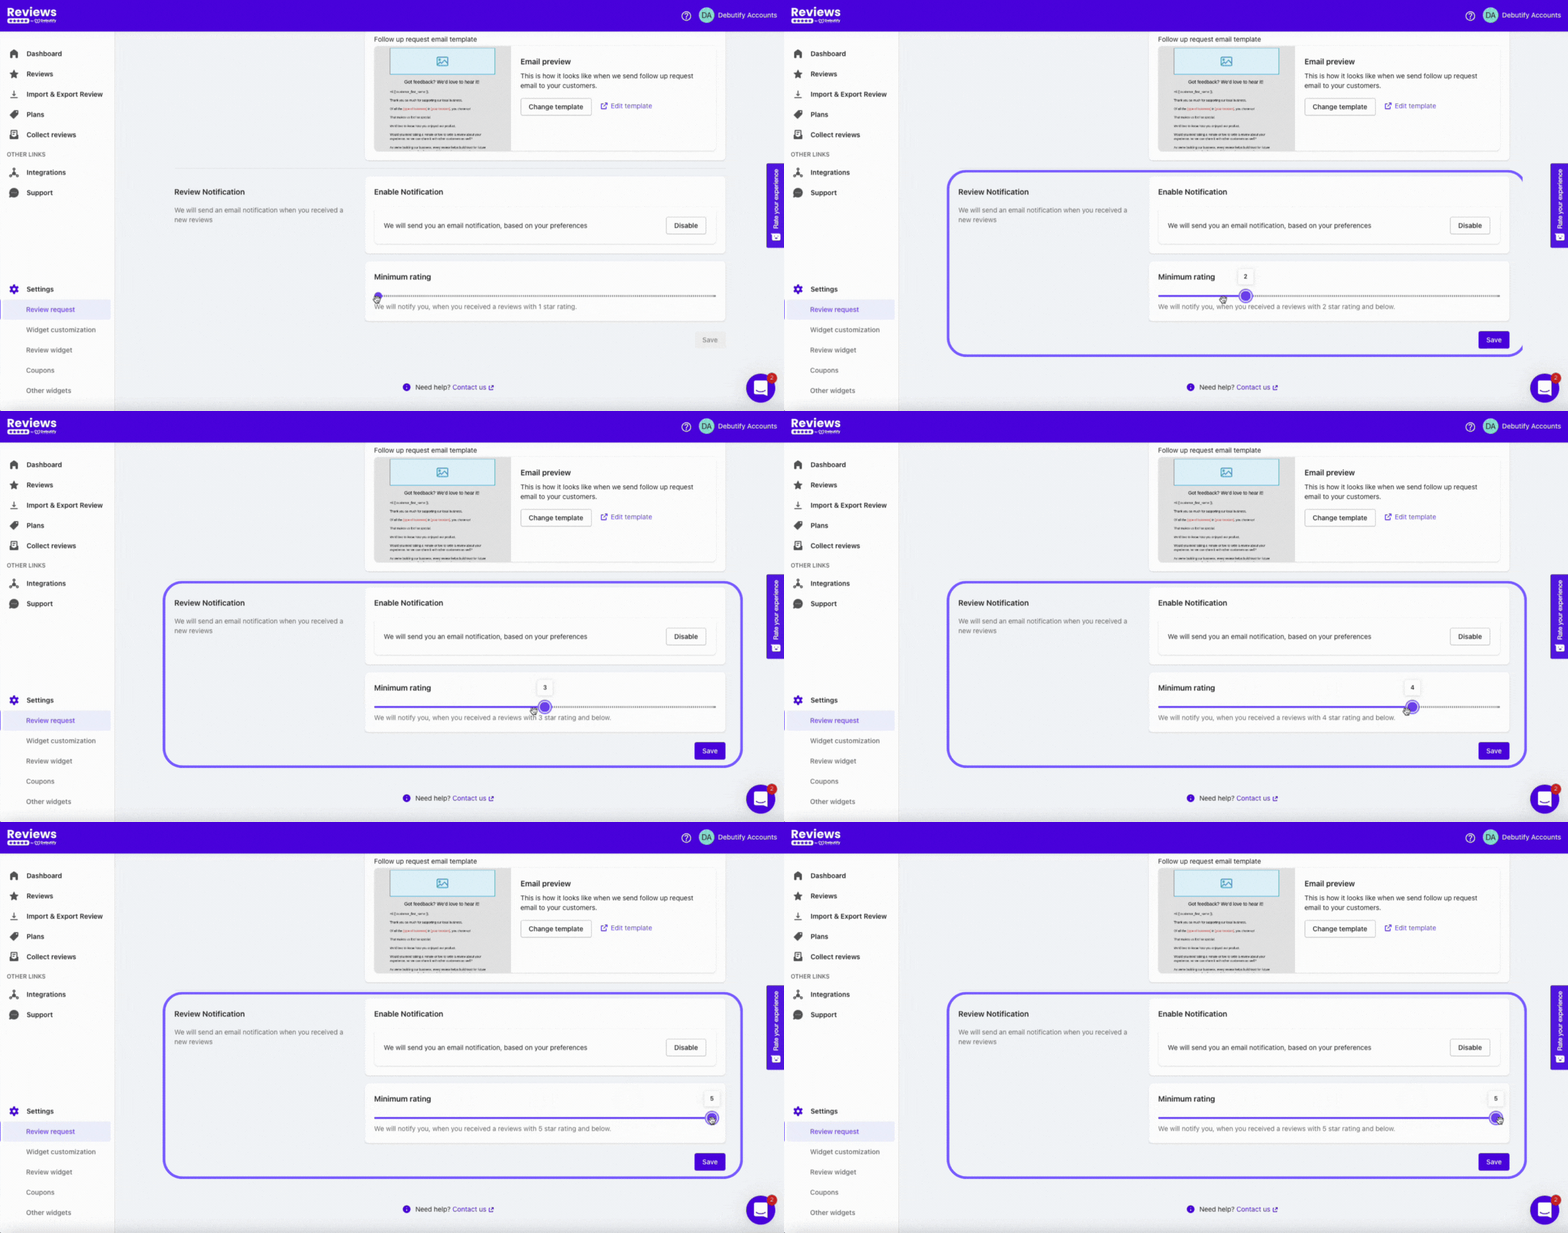
You can set the minimum rating of reviews that Debutify Reviews will notify you of.
3. Import reviews
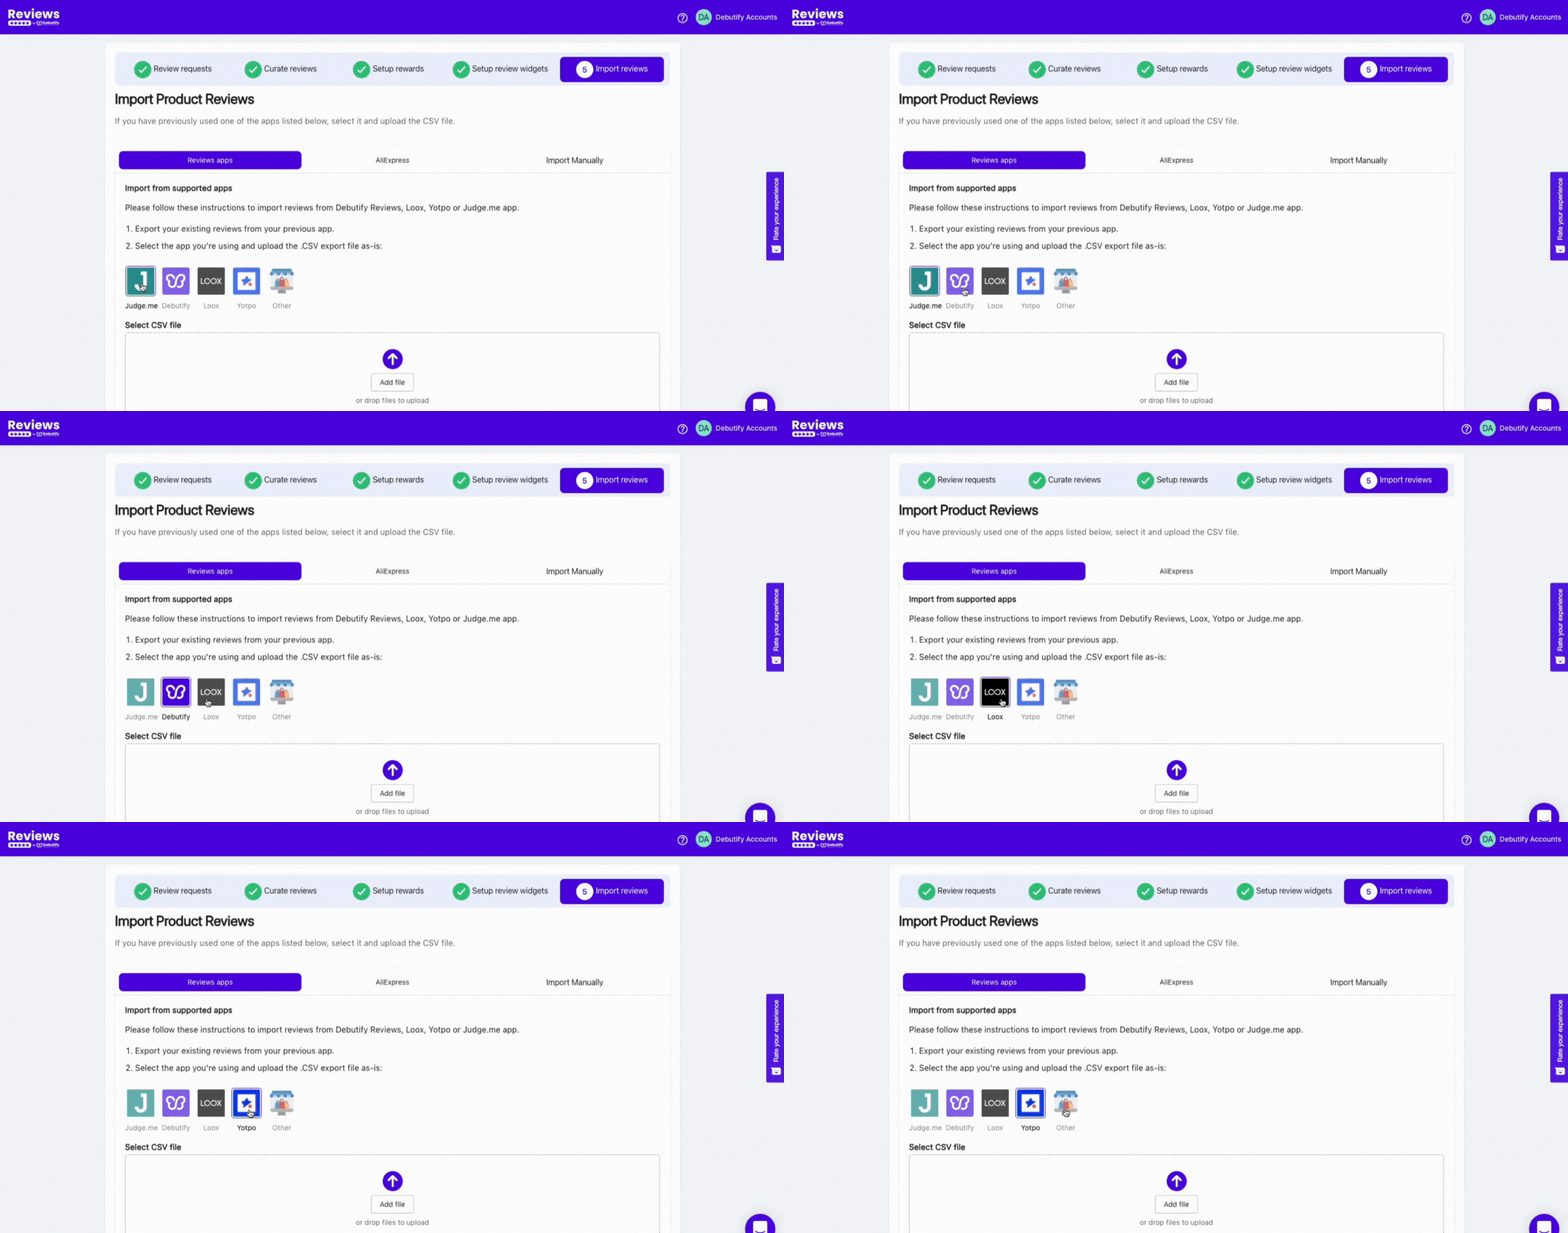
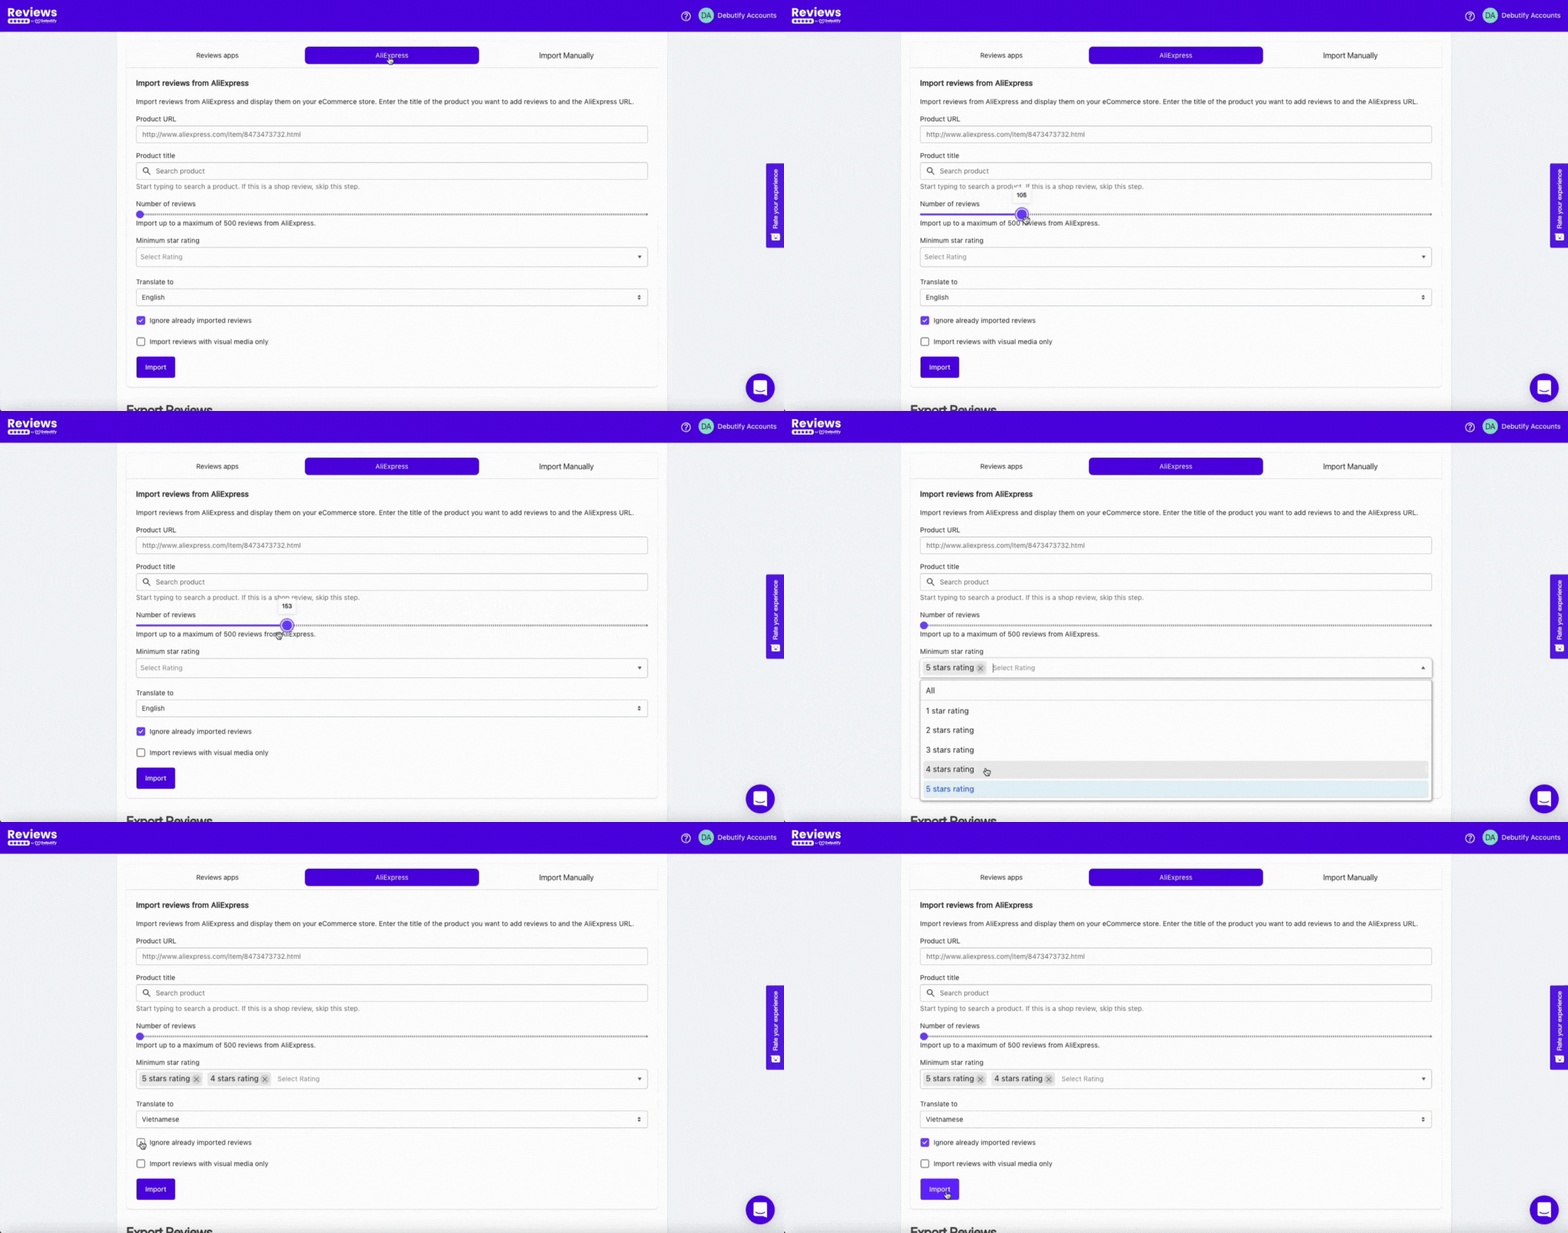
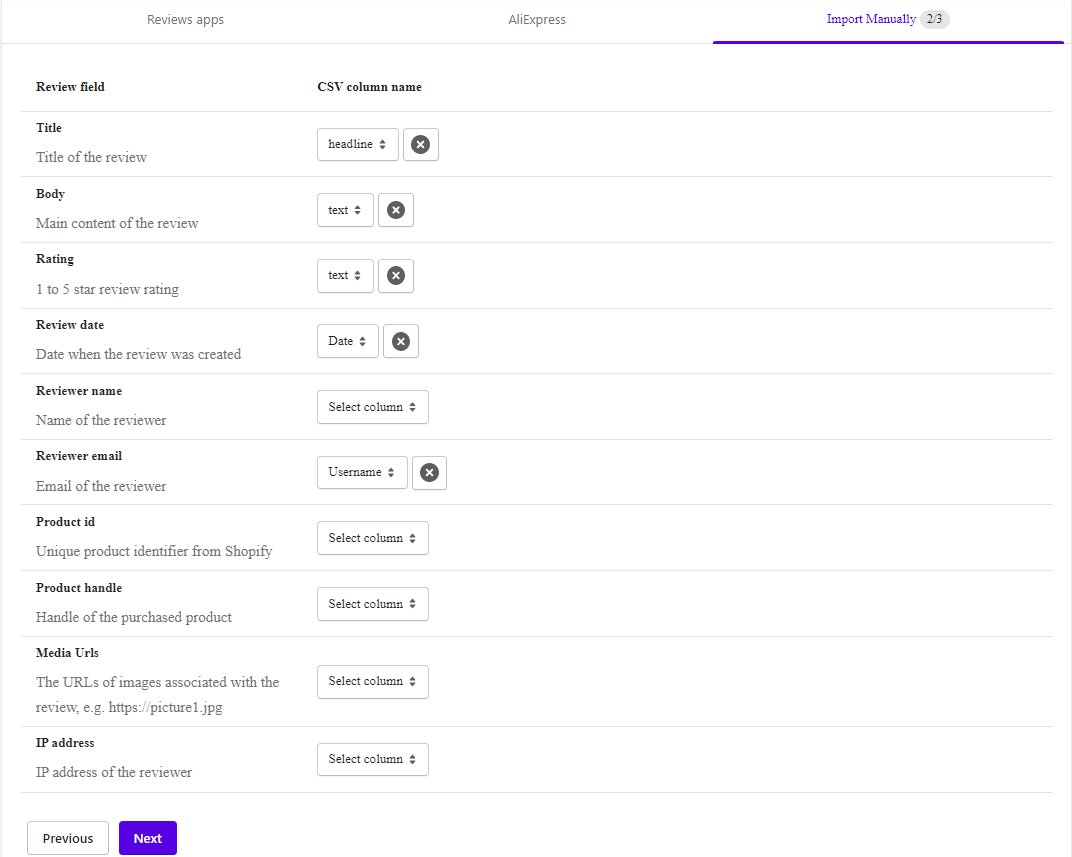
If you didn't get to import reviews during the initial setup, don't worry! Because you can still do it by going to the import and export setting.
.gif)
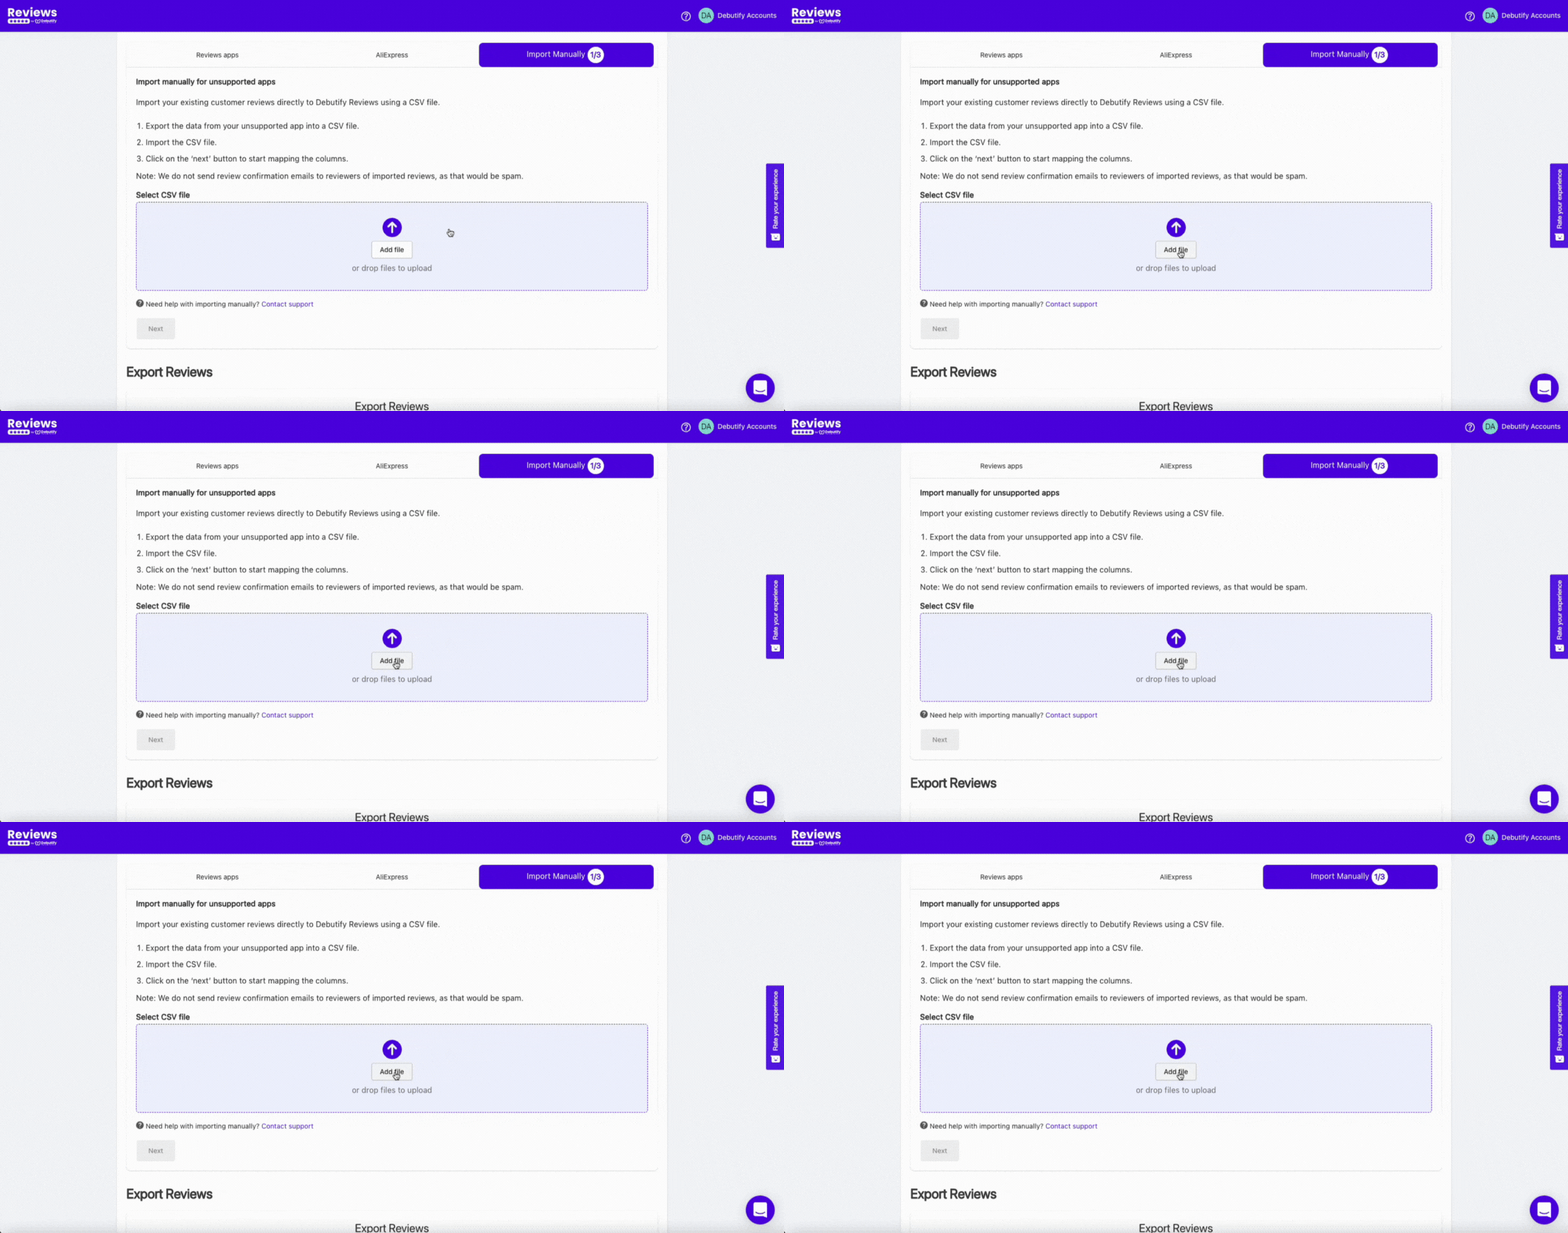
Once you click the Import & Export Review setting, you will see this...
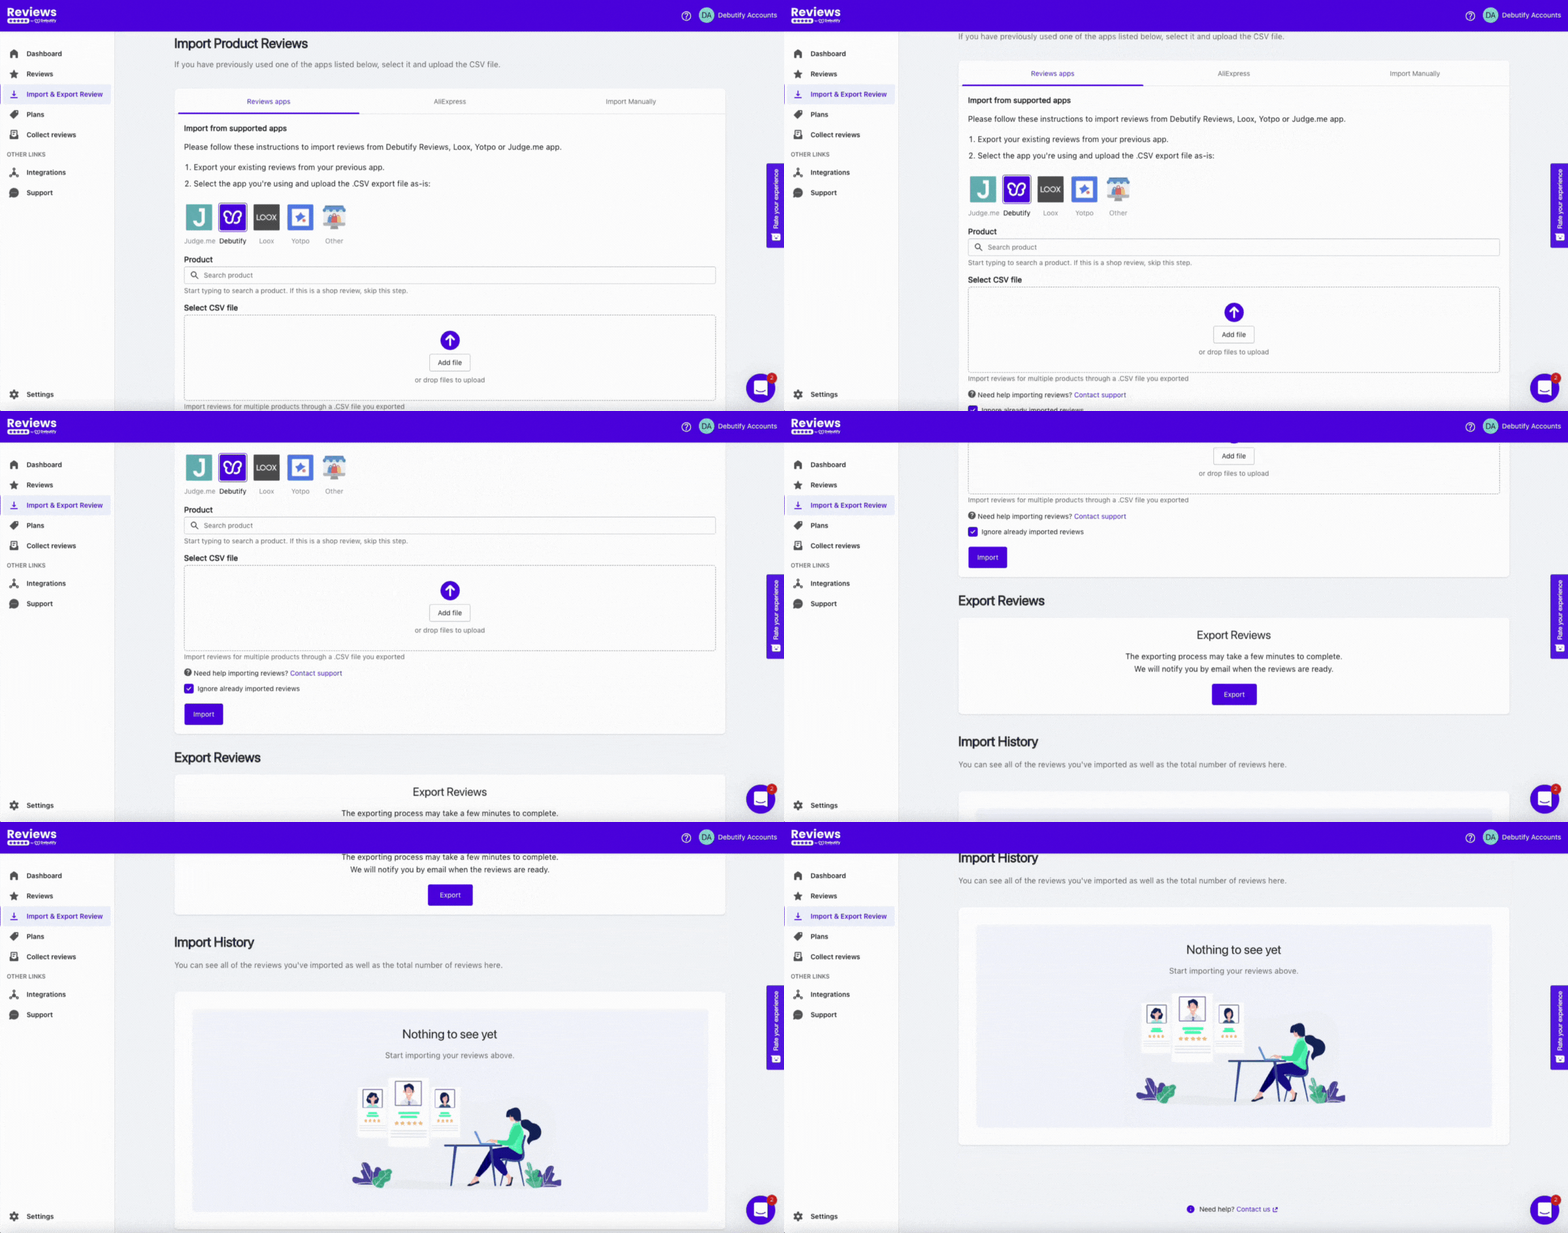
As we discussed earlier, you can manually import your reviews if they don't come from the platforms mentioned. Just make sure it's a .csv file.
Aside from importing the reviews from other platforms and apps, you can also export your existing reviews.
4. Widget customization
Another way to establish your brand identity is by customizing your review widgets. You can access this setting by clicking Settings on the left sidebar.
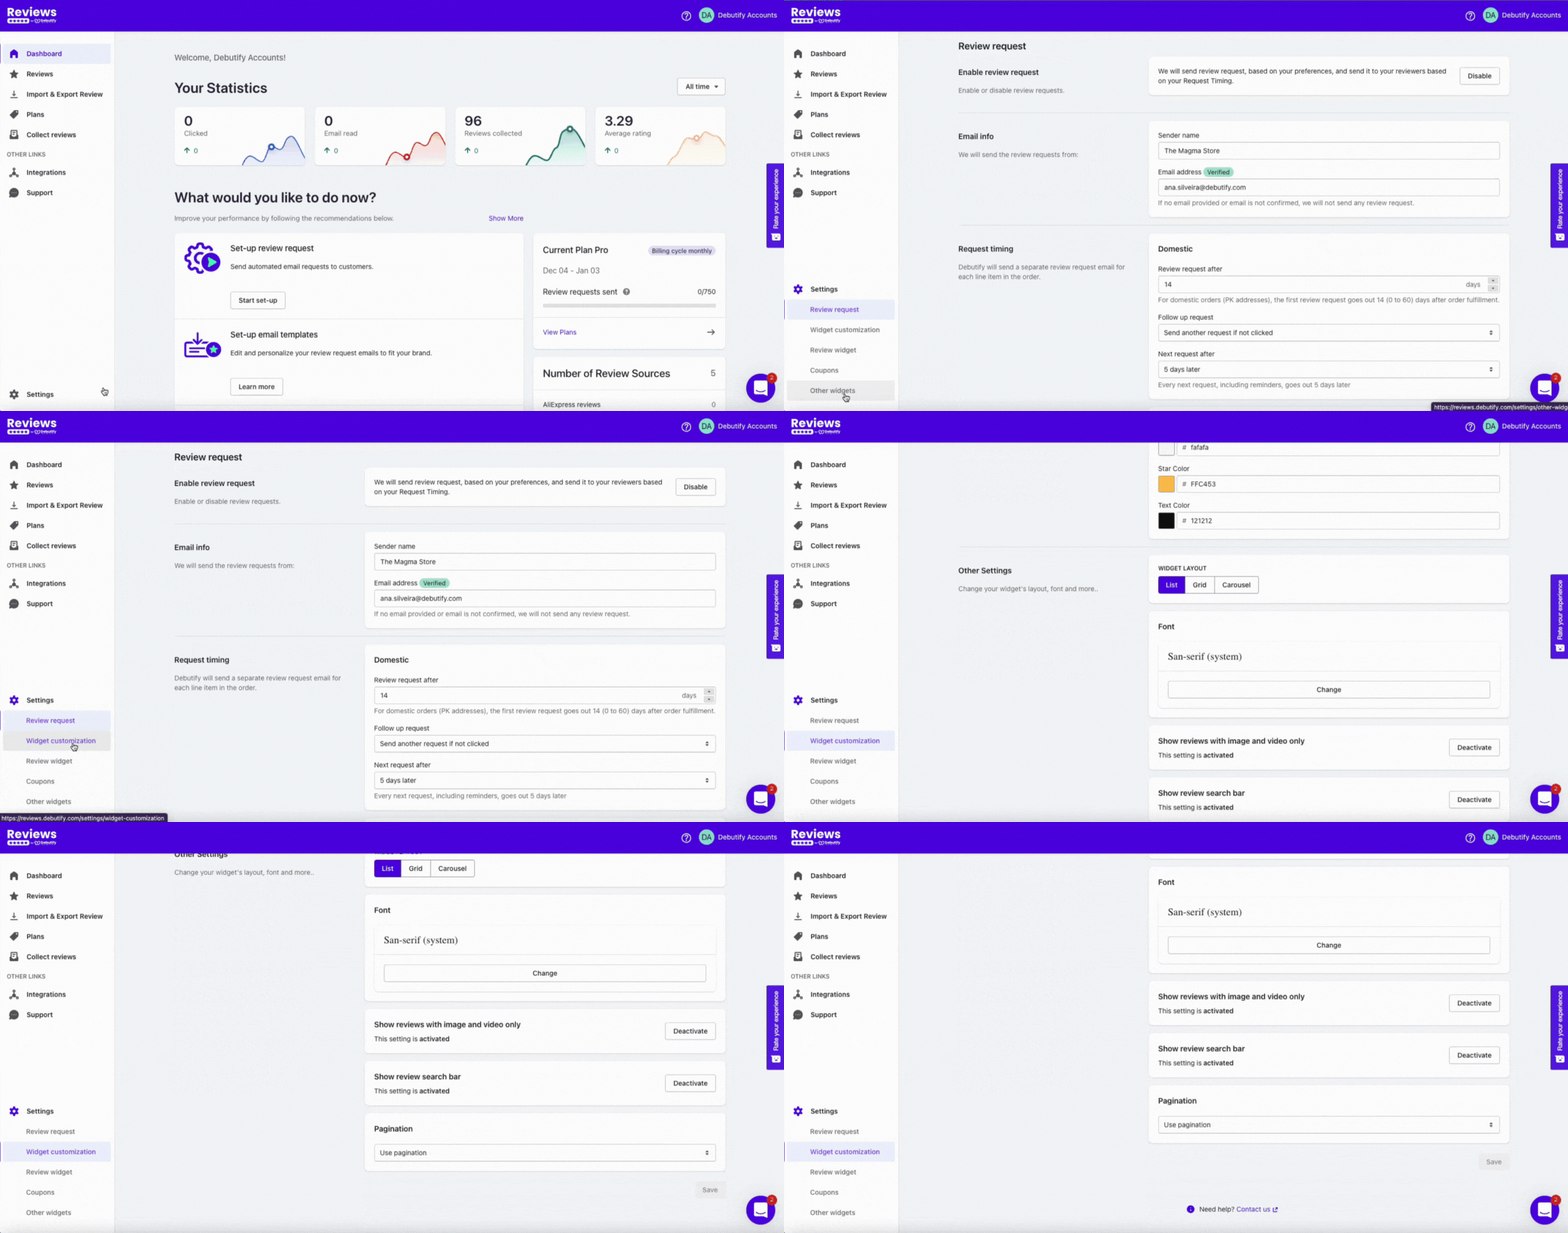
The layouts available for widget customization are:
- List. This option displays the reviews as a list.
- Grid. This displays customer reviews in a grid layout.
- Carousel. This displays reviews in a carousel layout.
Widgets are highly-customizable. You can edit the colors and change them to your brand colors. You can also change the layout, and different fonts are available.
5. Review widget
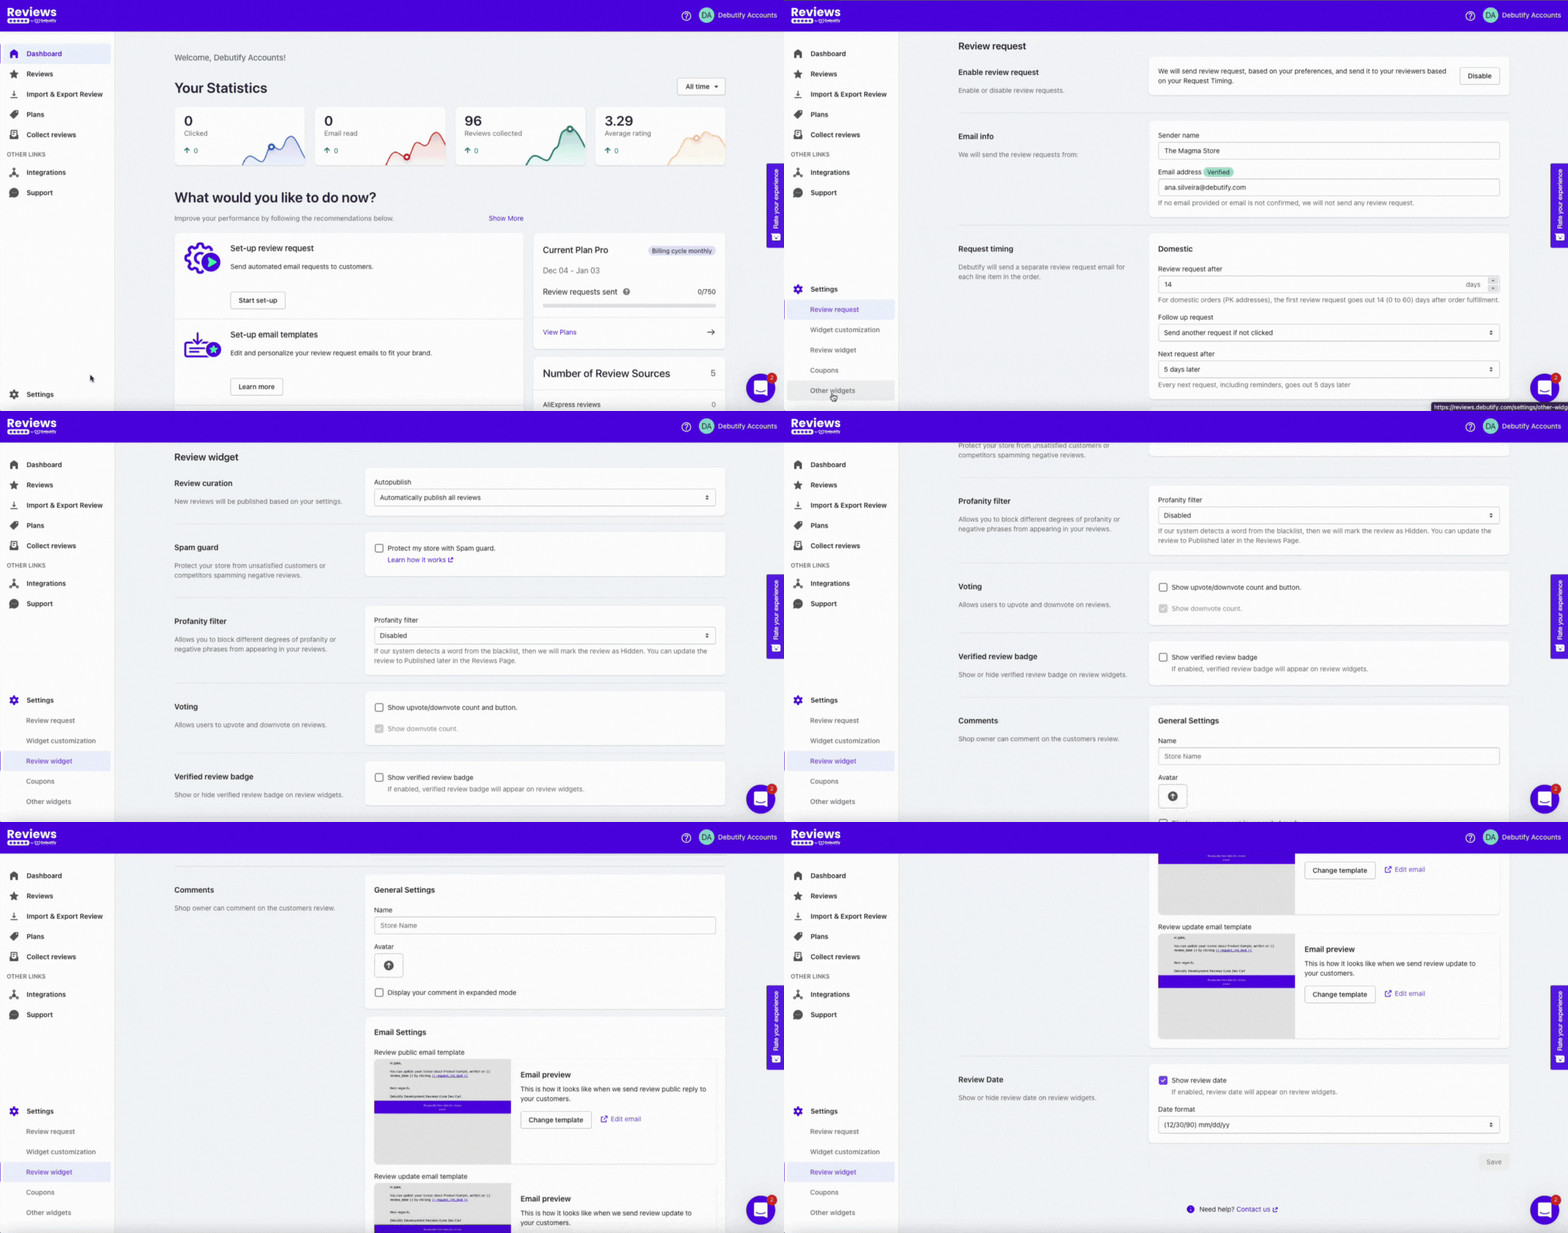
Let's go over each section.
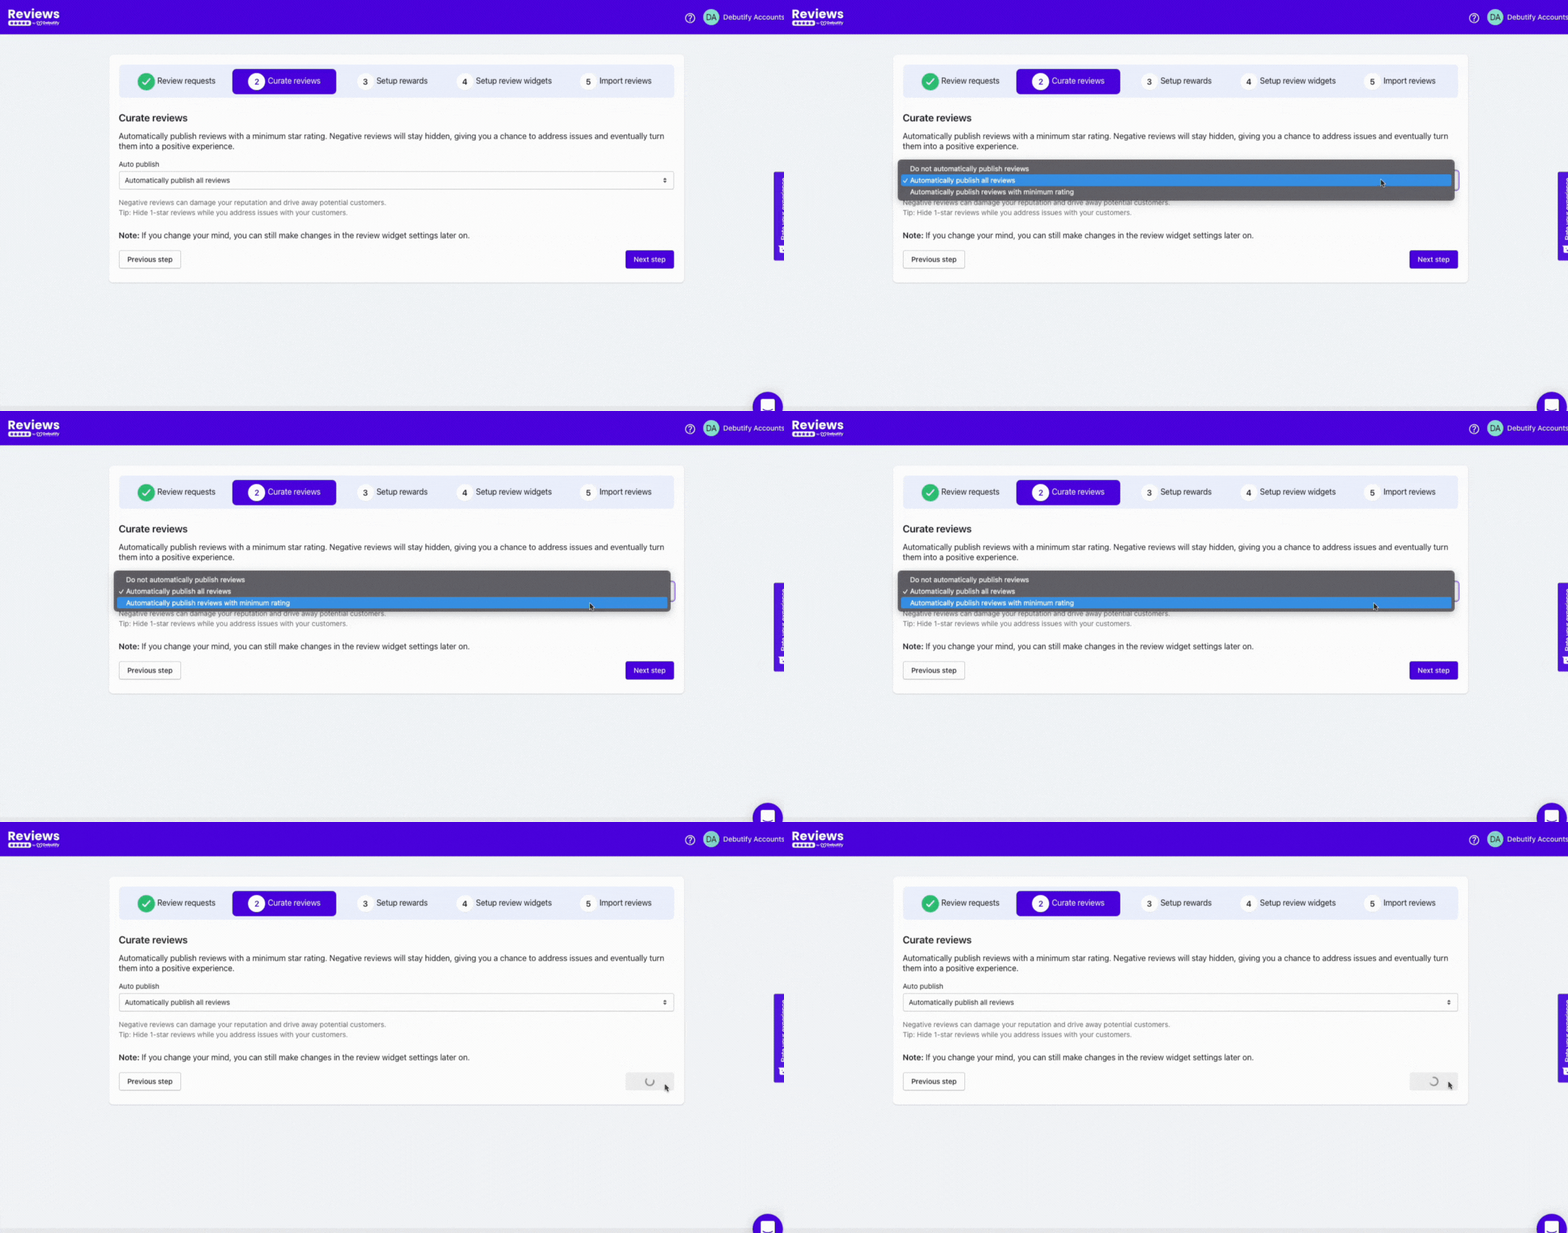
Review curation
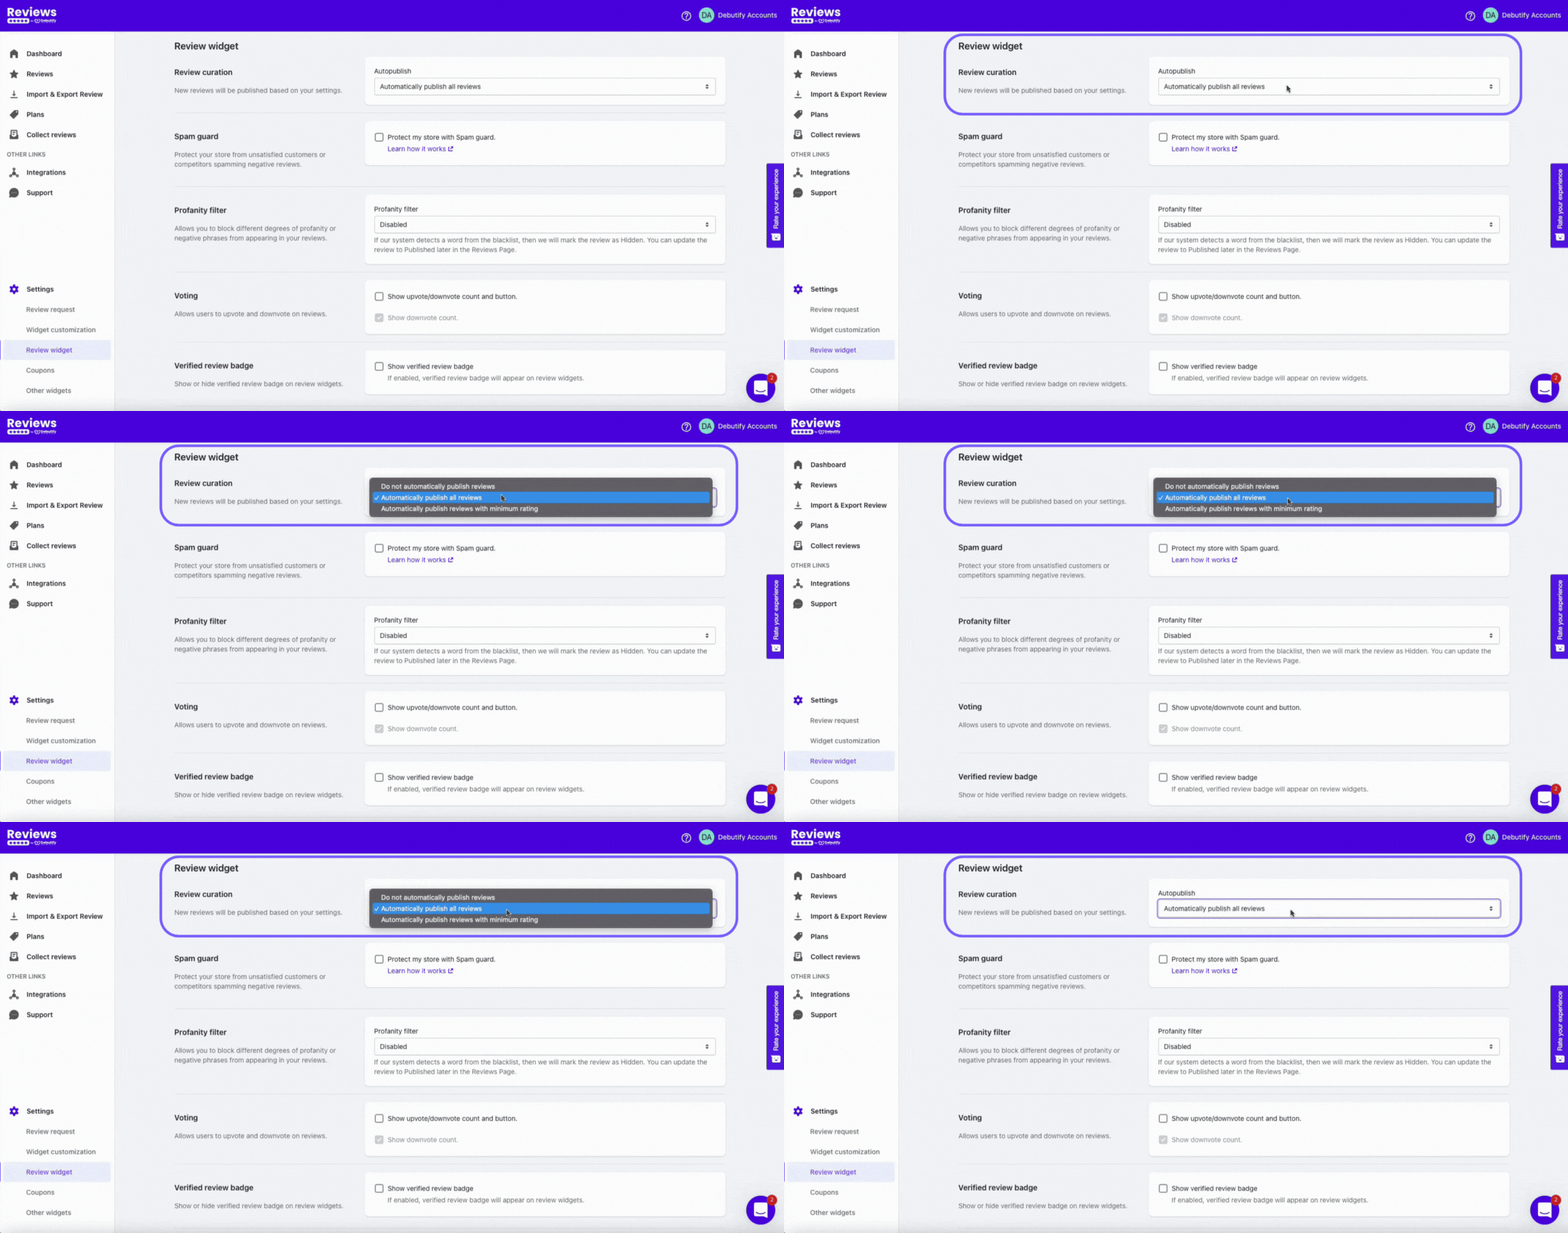
There are three options for the auto-publish setting:
- Do not automatically publish reviews. This means reviews will not publish on your review widget.
- Automatically publish all reviews. This option publishes ALL reviews regardless of their rating.
- Automatically publish reviews with a minimum rating. For example, if a customer leaves 1-star, you can hide them in the meantime.
If you do the initial setup, you probably already set the minimum rating to publish automatically. But you can update the setting if you haven't yet or have changed your mind.
Spam Guard
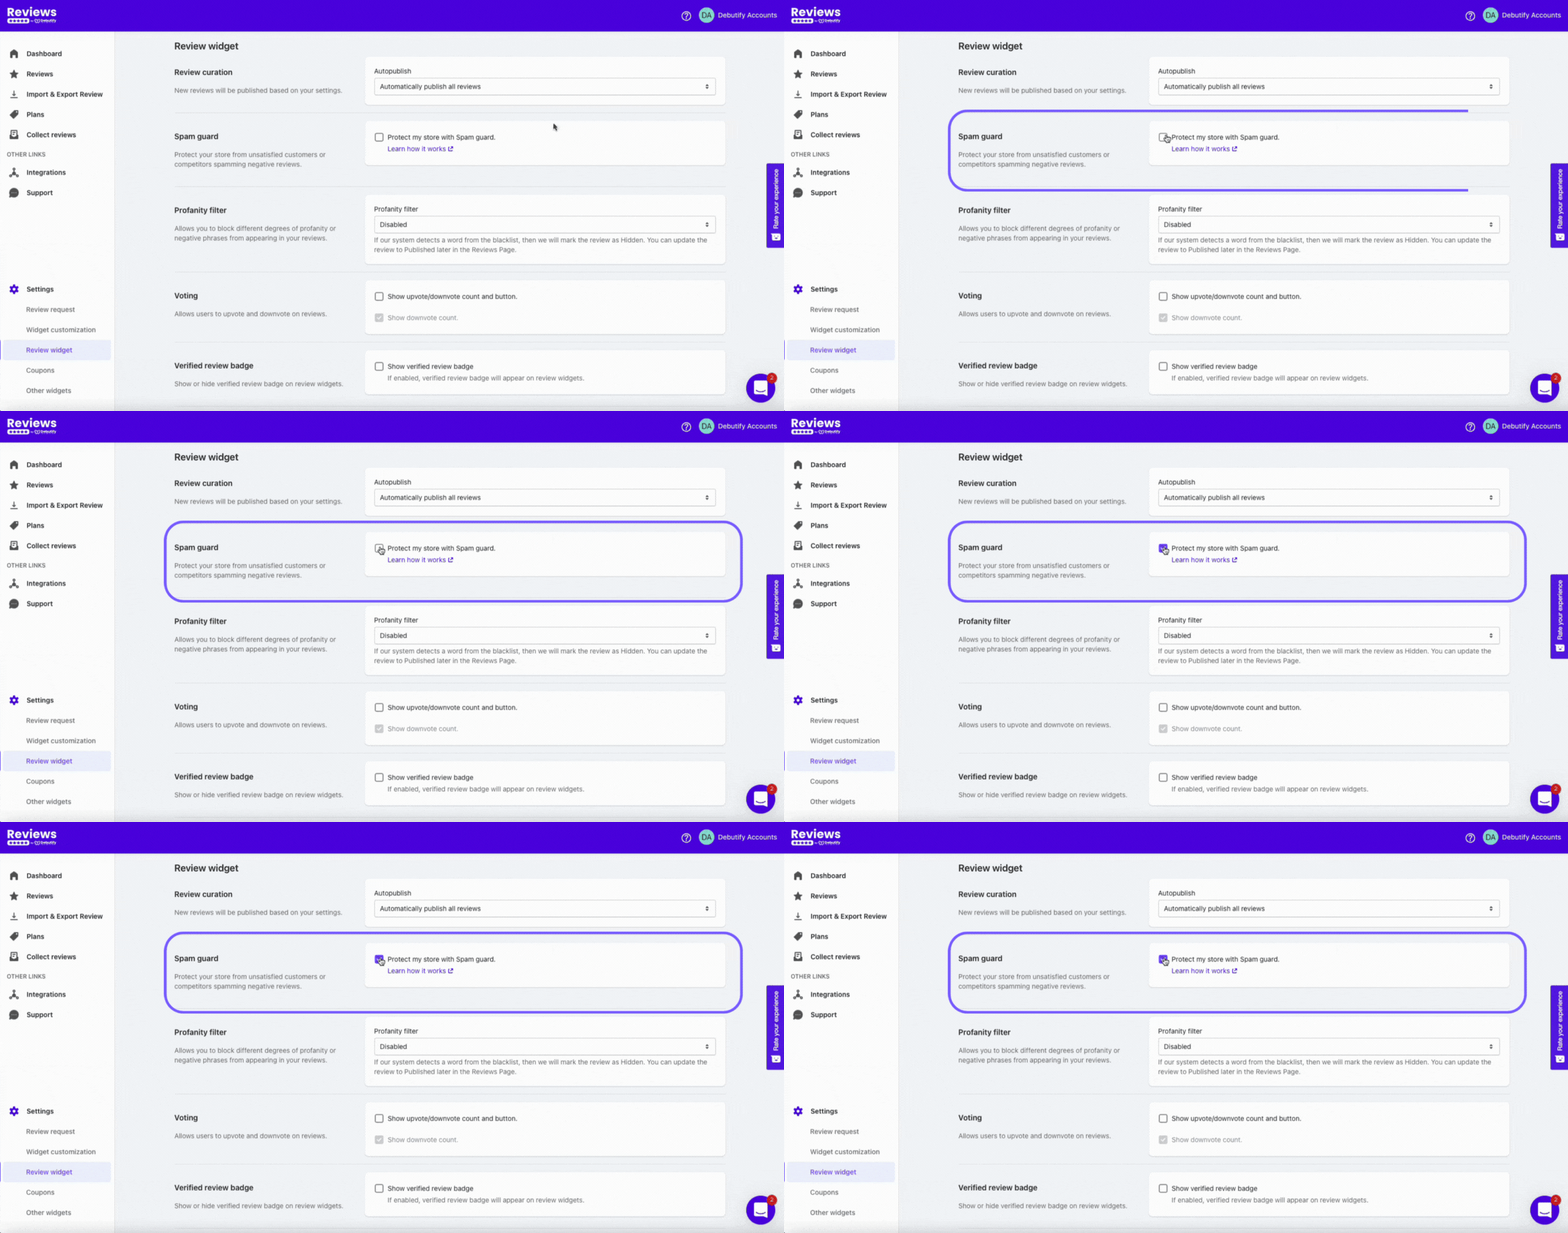
You can protect your brand from people who spam reviews. Spam guard will mark a user as SPAM if they post 3 reviews using the same IP address within a minute.
Another factor is if a user only leaves one or 2-star ratings in less than one week. If they do these, their IP address will be blocked.
Profanity filter
This feature allows you to hide negative phrases and profanity in your reviews, which works wonders for your brand reputation.
So, how does this work? You need to list the keywords you want to add to your block list.
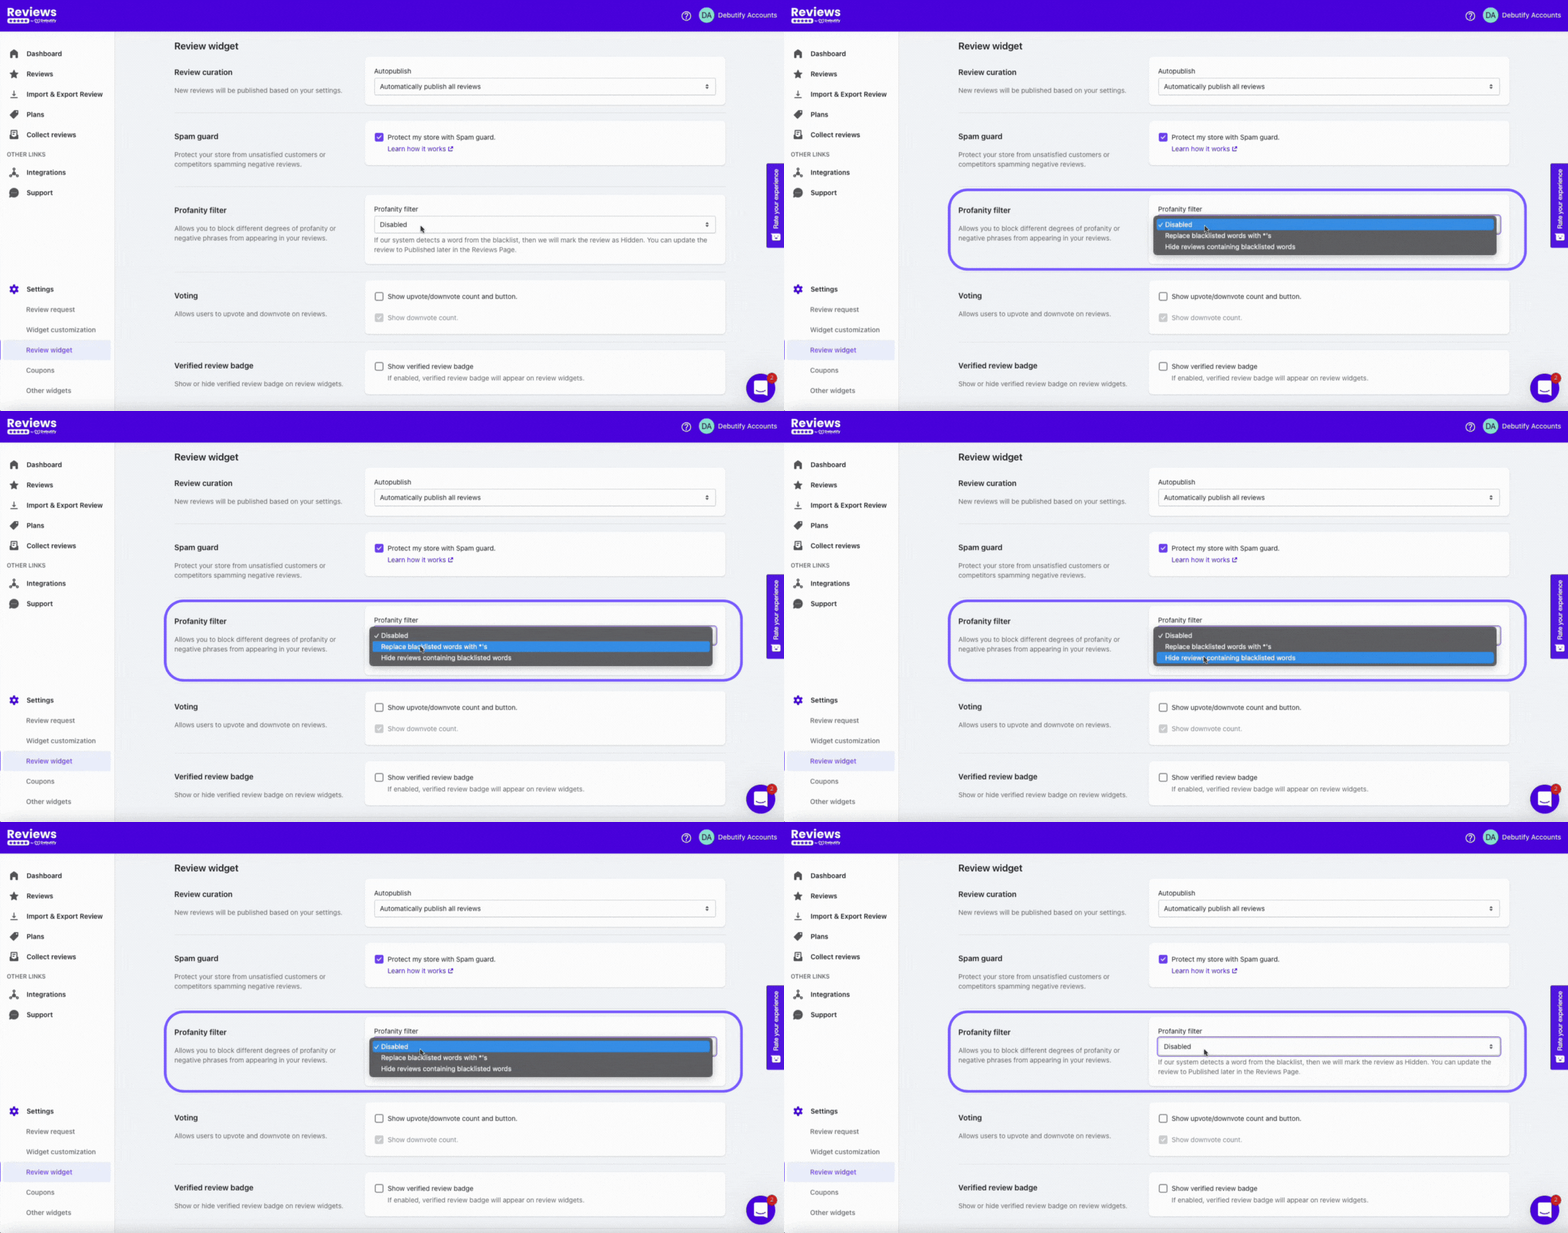
The keywords can be negative phrases about your products or obscene language. You can also opt to disable the profanity filter, replace the blocklisted keywords with asterisks, or automatically hide them.
Let's talk about these options.
- Disabled. This option will disable the entire profanity filter feature.
- Replace blocklisted keywords with *'s. This option will not hide reviews with obscene language or negative phrases from your blocklist but will replace them with asterisks (*).
- Hide reviews containing blocklisted words. Reviews with blocklisted keywords will be marked as Hidden. But you can manage the reviews and publish them on the Reviews Page.
Voting
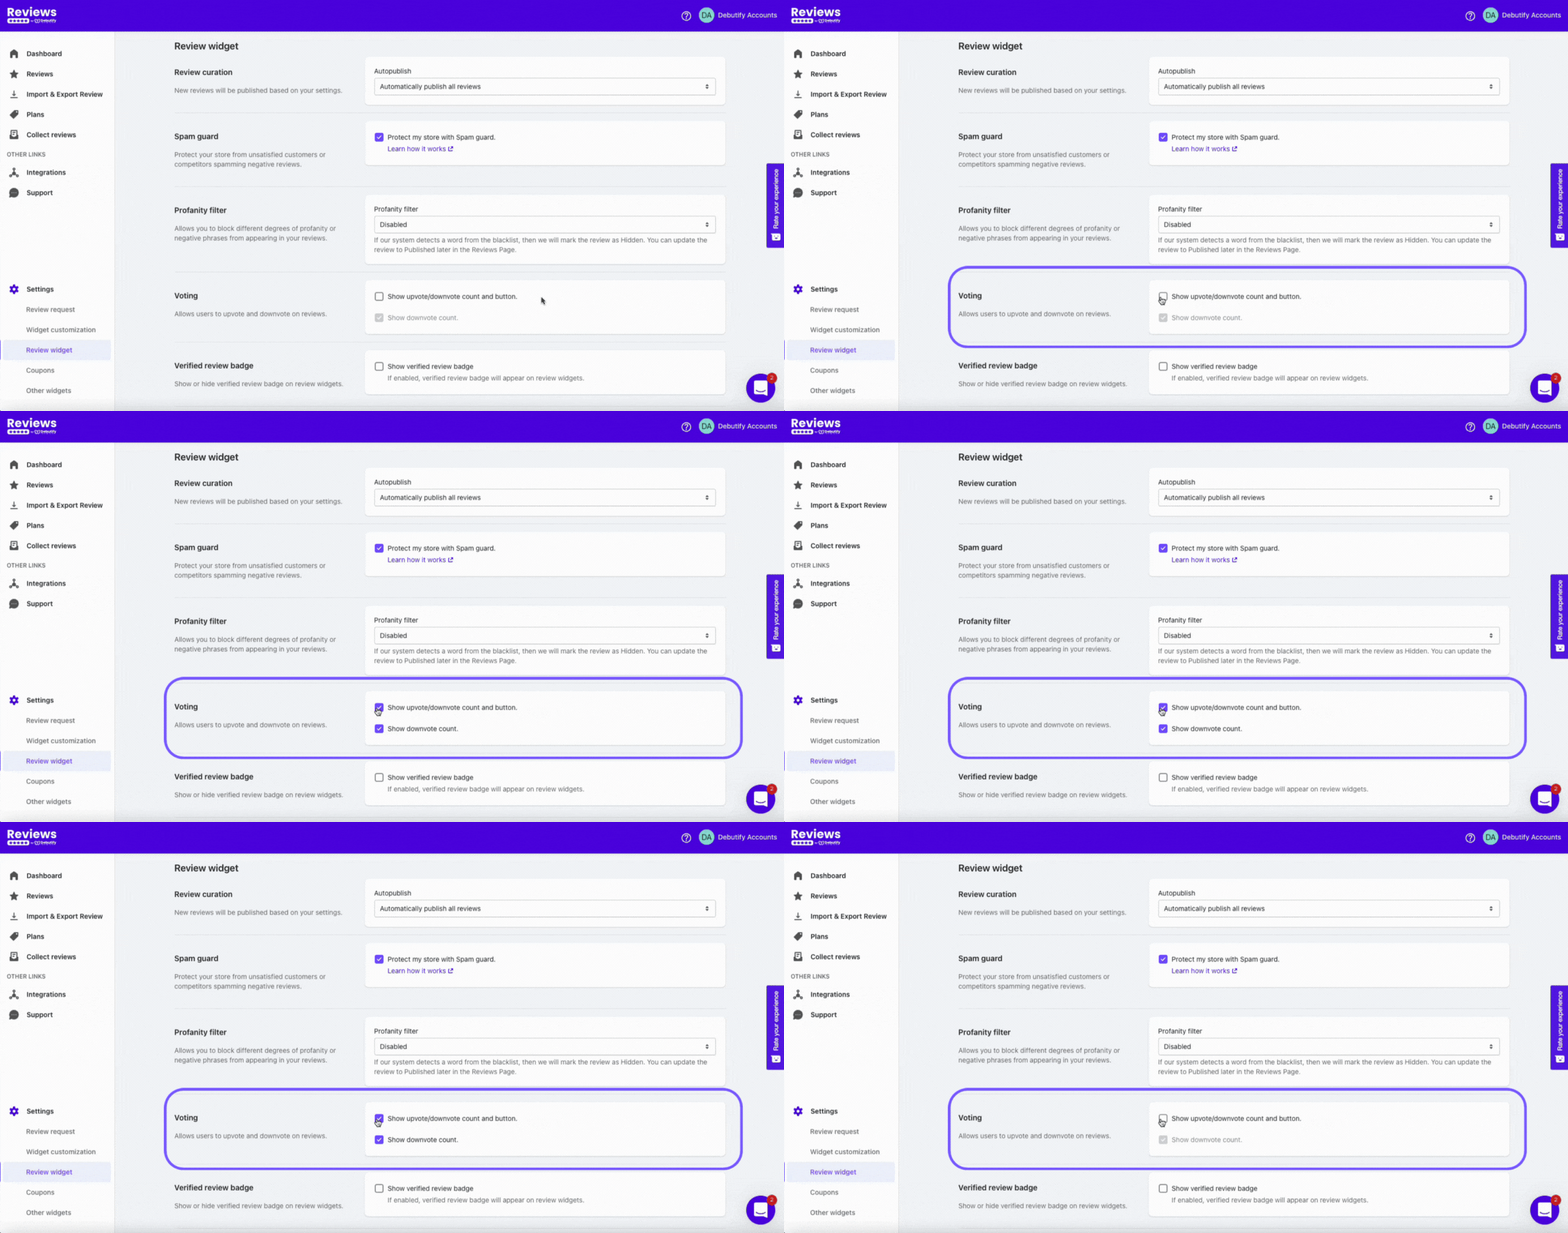
This feature will help you showcase your most helpful reviews, helping potential customers decide if they want to purchase your products.
Voting allows customers or users to upvote or downvote reviews they find helpful.
Verified review badge
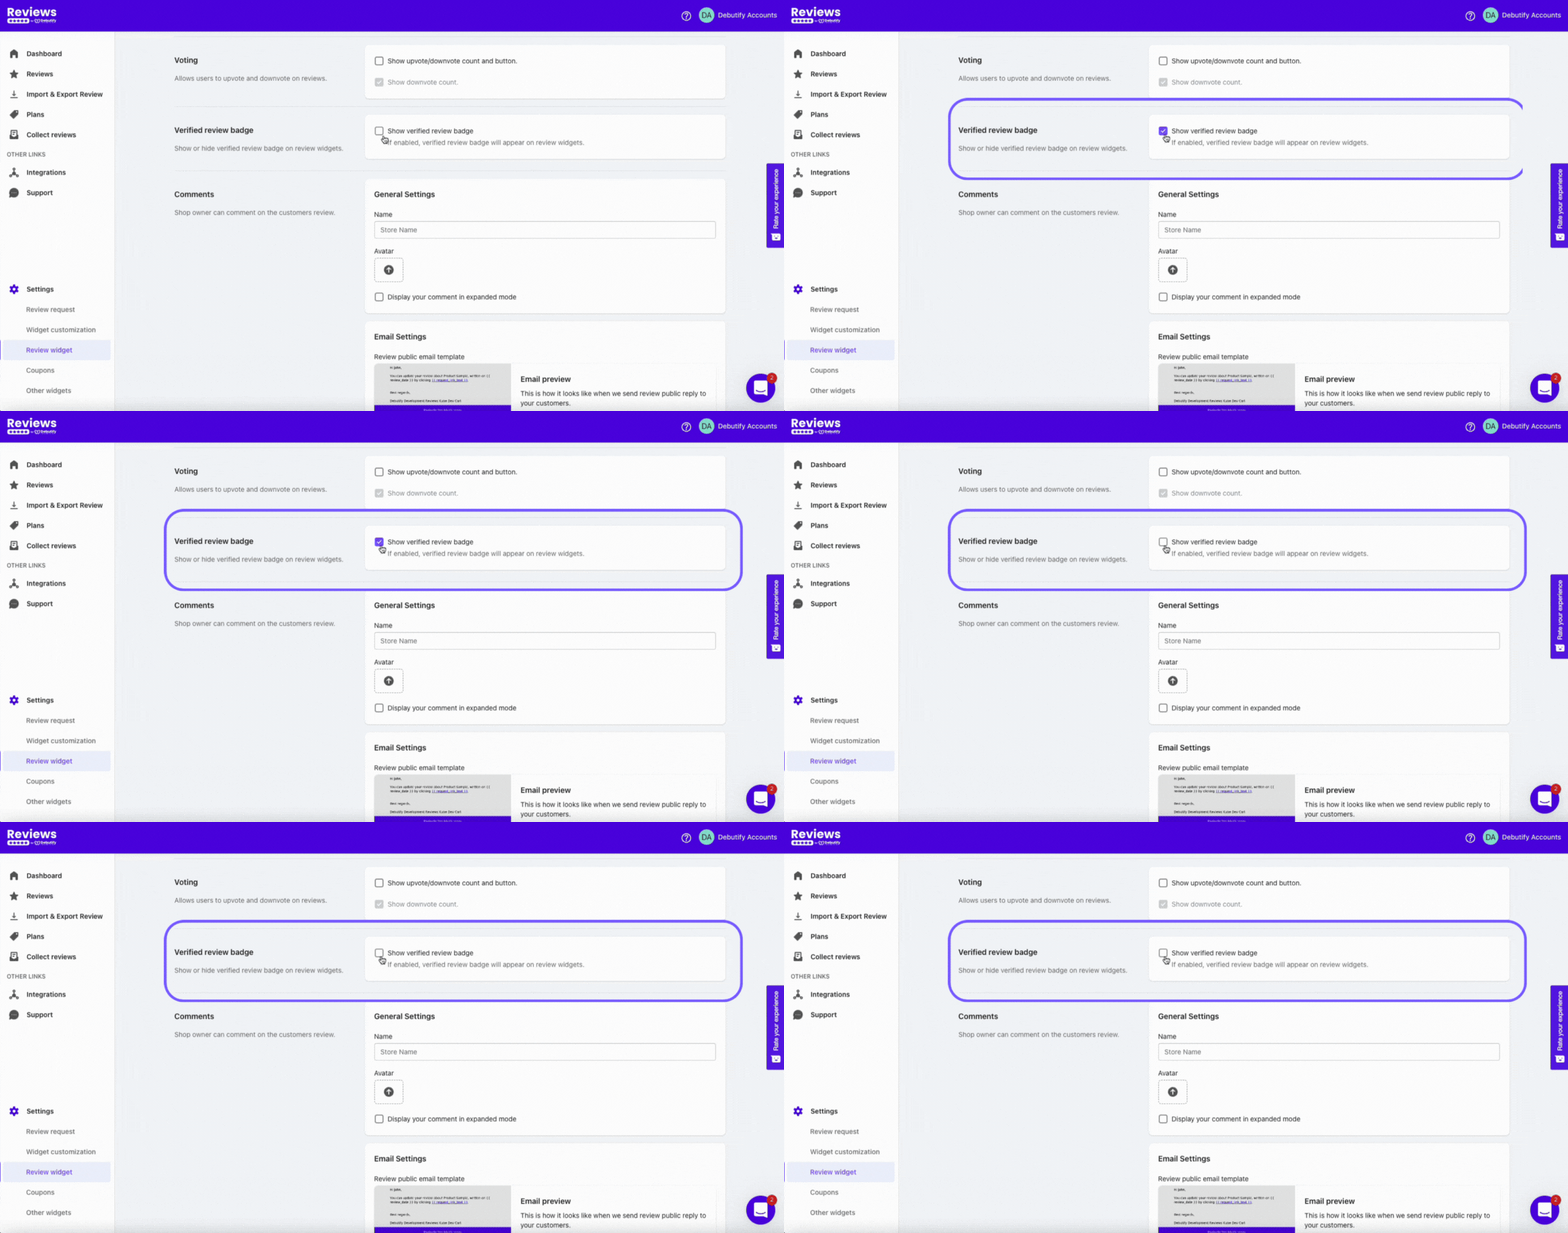
This will make your reviews more reliable because this badge will verify customers. You can enable this if you want to display a verified review badge on review widgets.
Comments
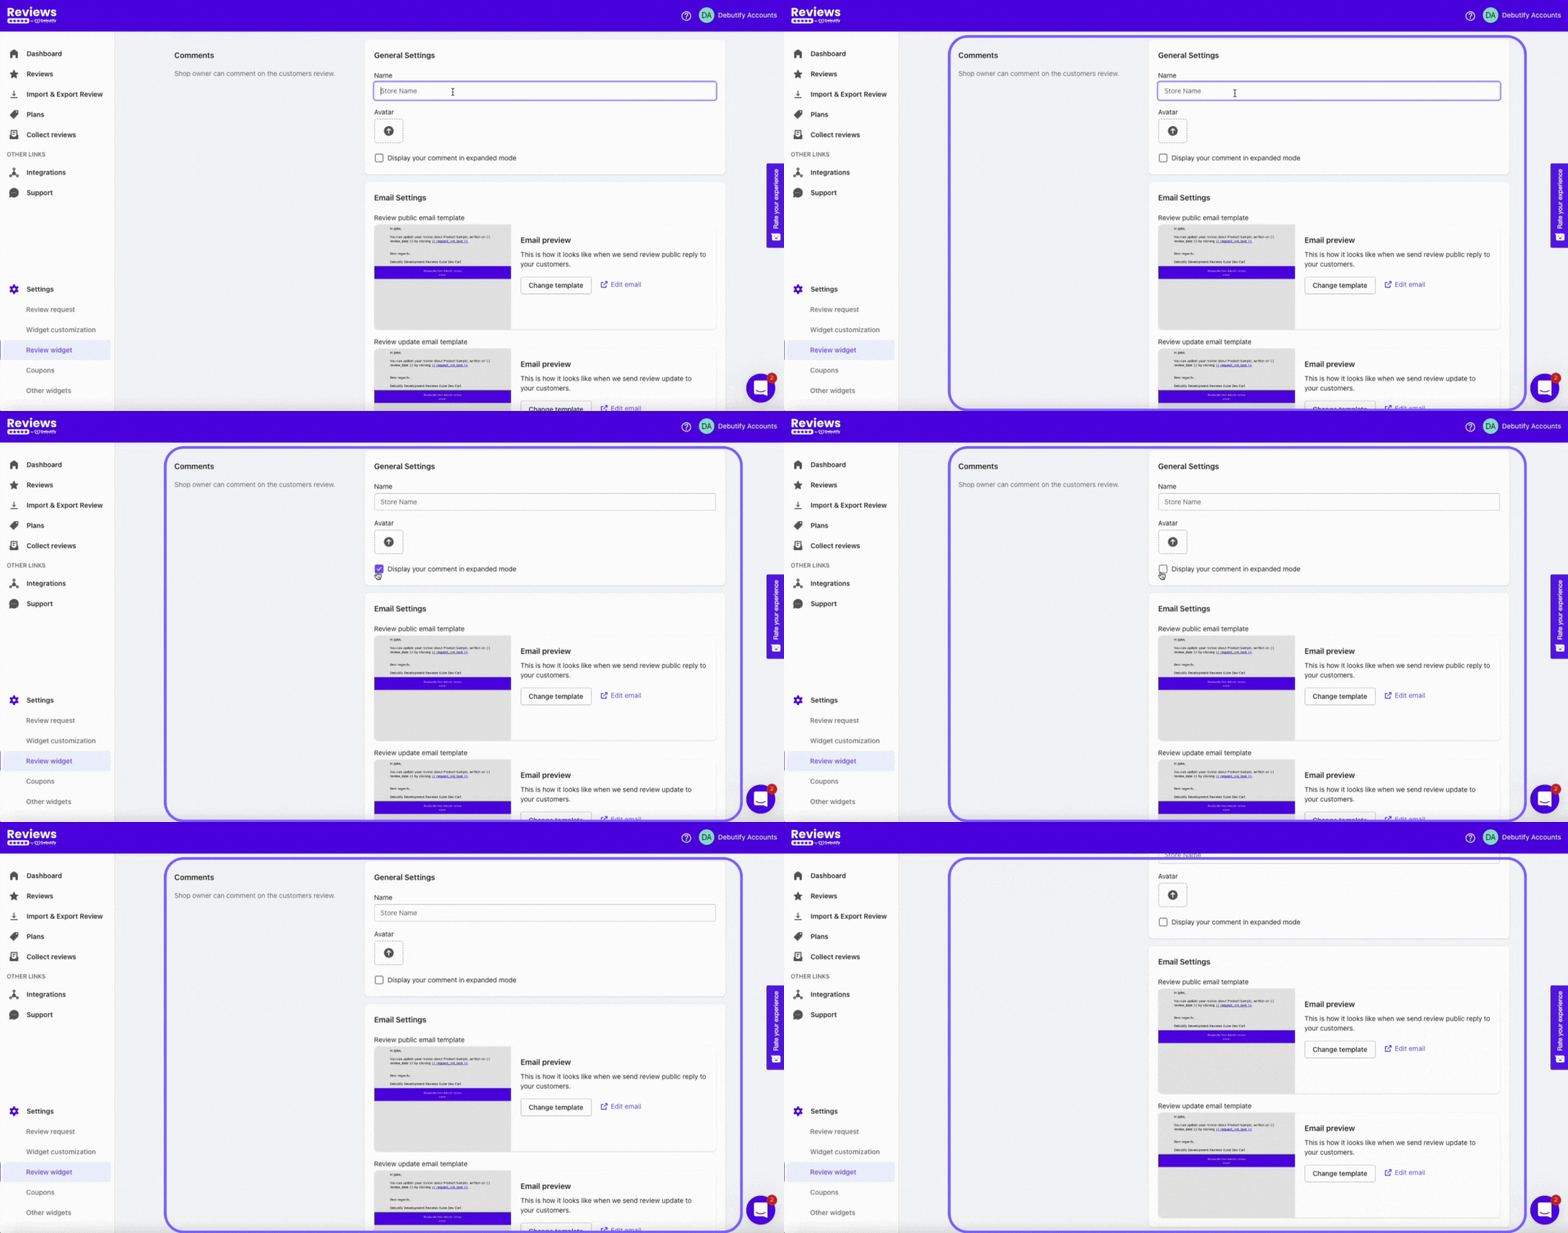
You can interact with your customers by replying to their reviews. You can do it by replying publicly through the widgets or sending emails.
You need to enter your store name and an avatar. The avatar can be your logo. You can also change the email templates when Debutify Reviews alerts users about your replies.
Review Date
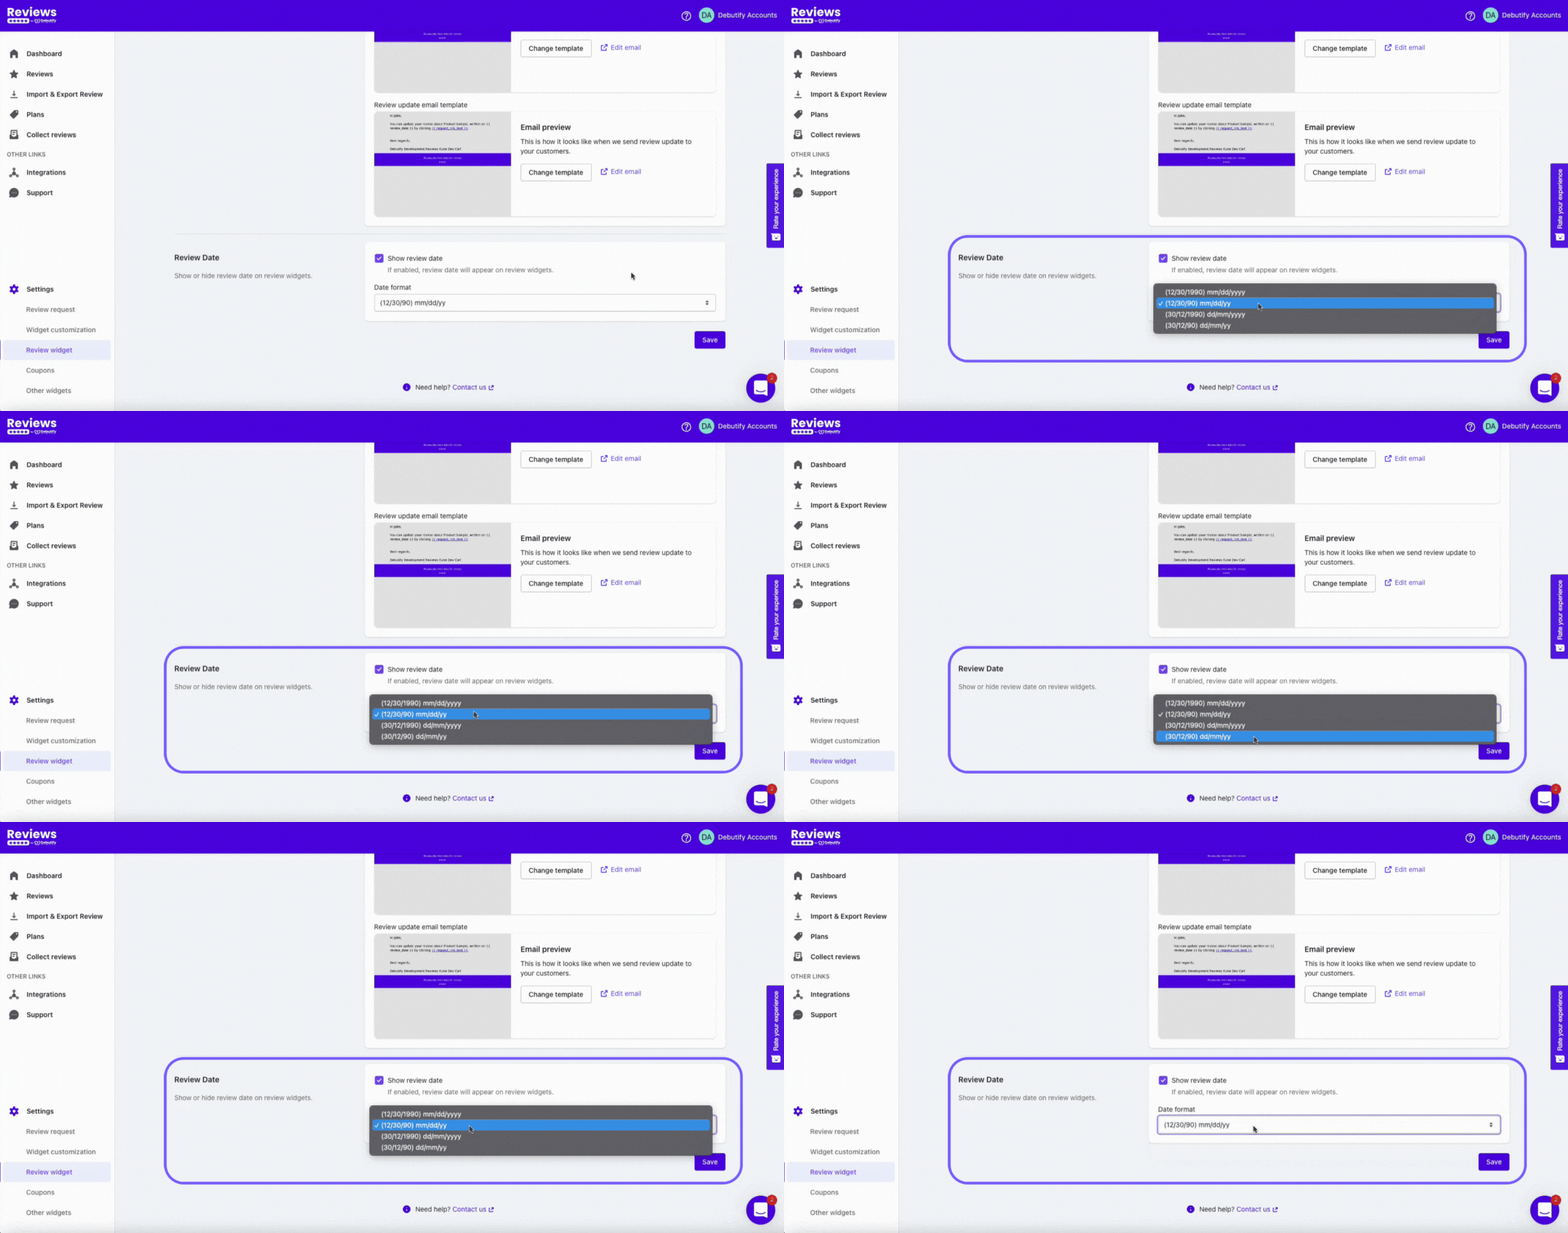
Review Date will show or hide the date of reviews on review widgets. If you enable this setting, there are different date formats to choose from:
- (12/30/1990) mm/dd/yyyy
- (12/30/90) mm/dd/yy
- (30/12/1990) dd/mm/yyyy
- (30/12/90) dd/mm/yy
You can choose based on your preference and what suits your brand.
6. Coupons
Coupons will help you generate more sales. So, let's deep dive.
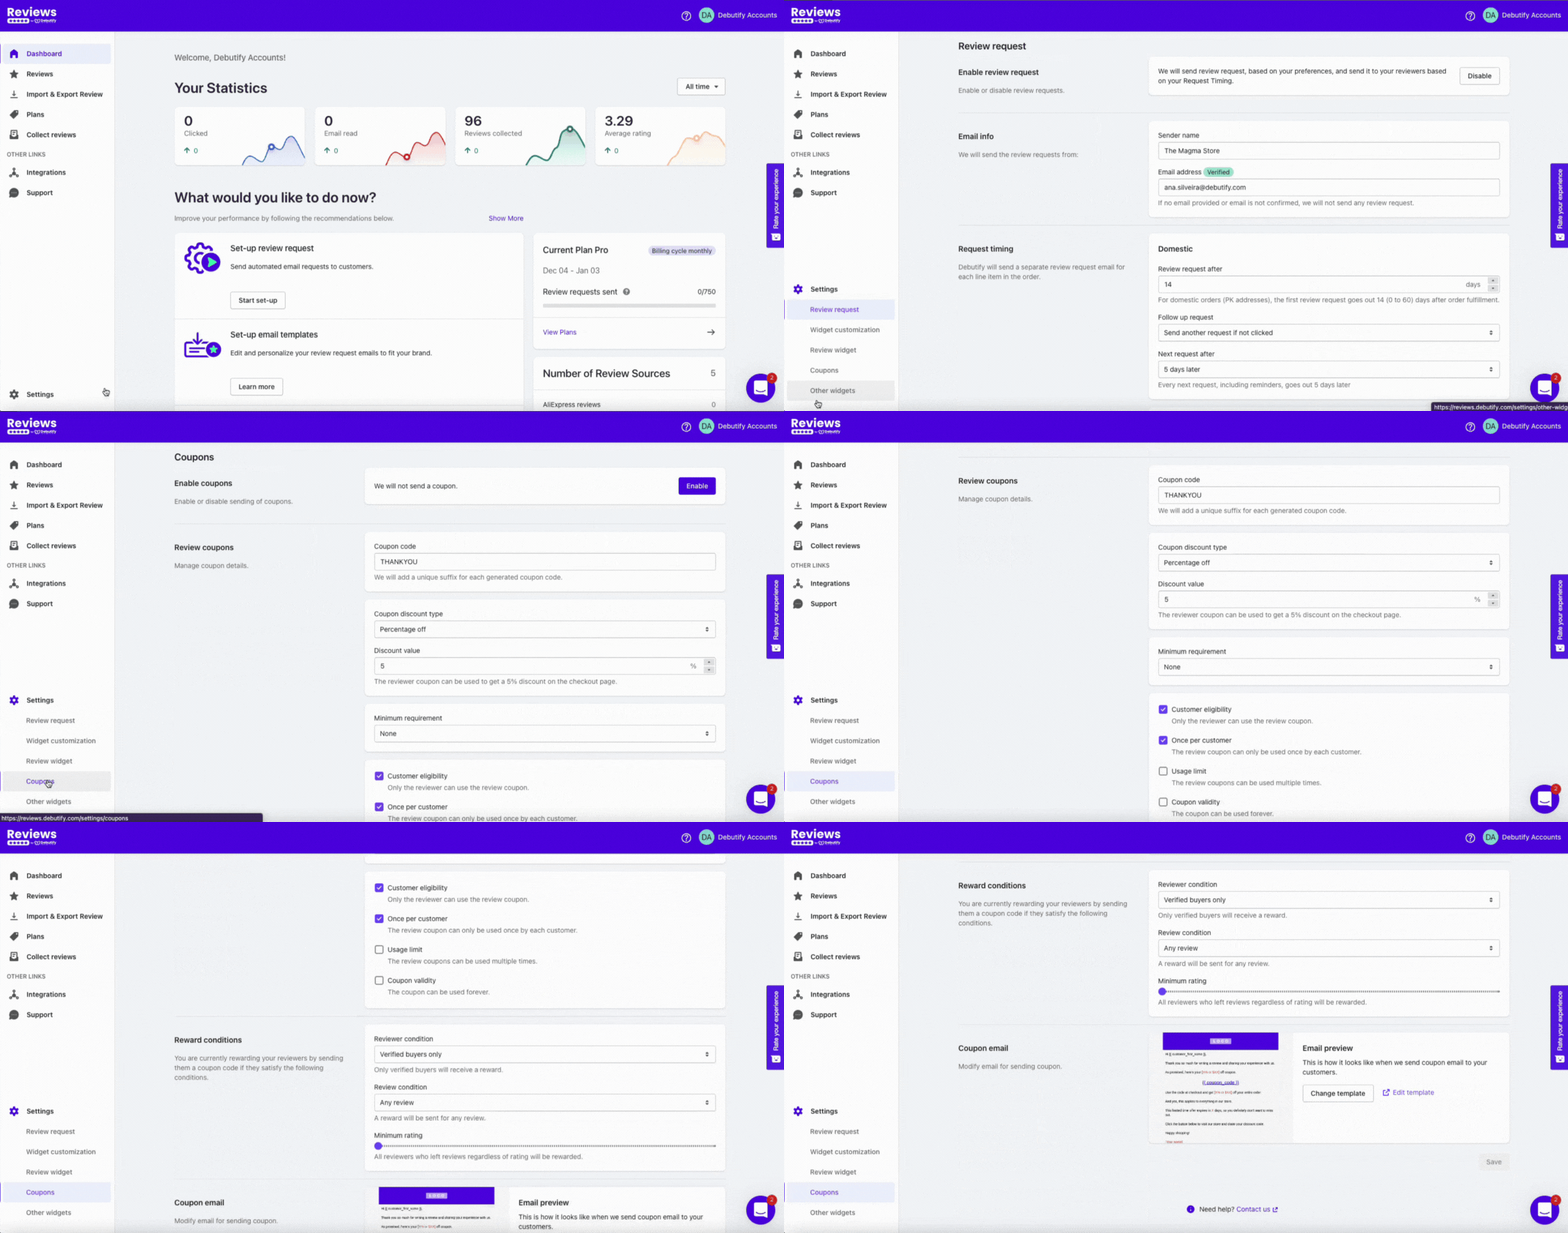
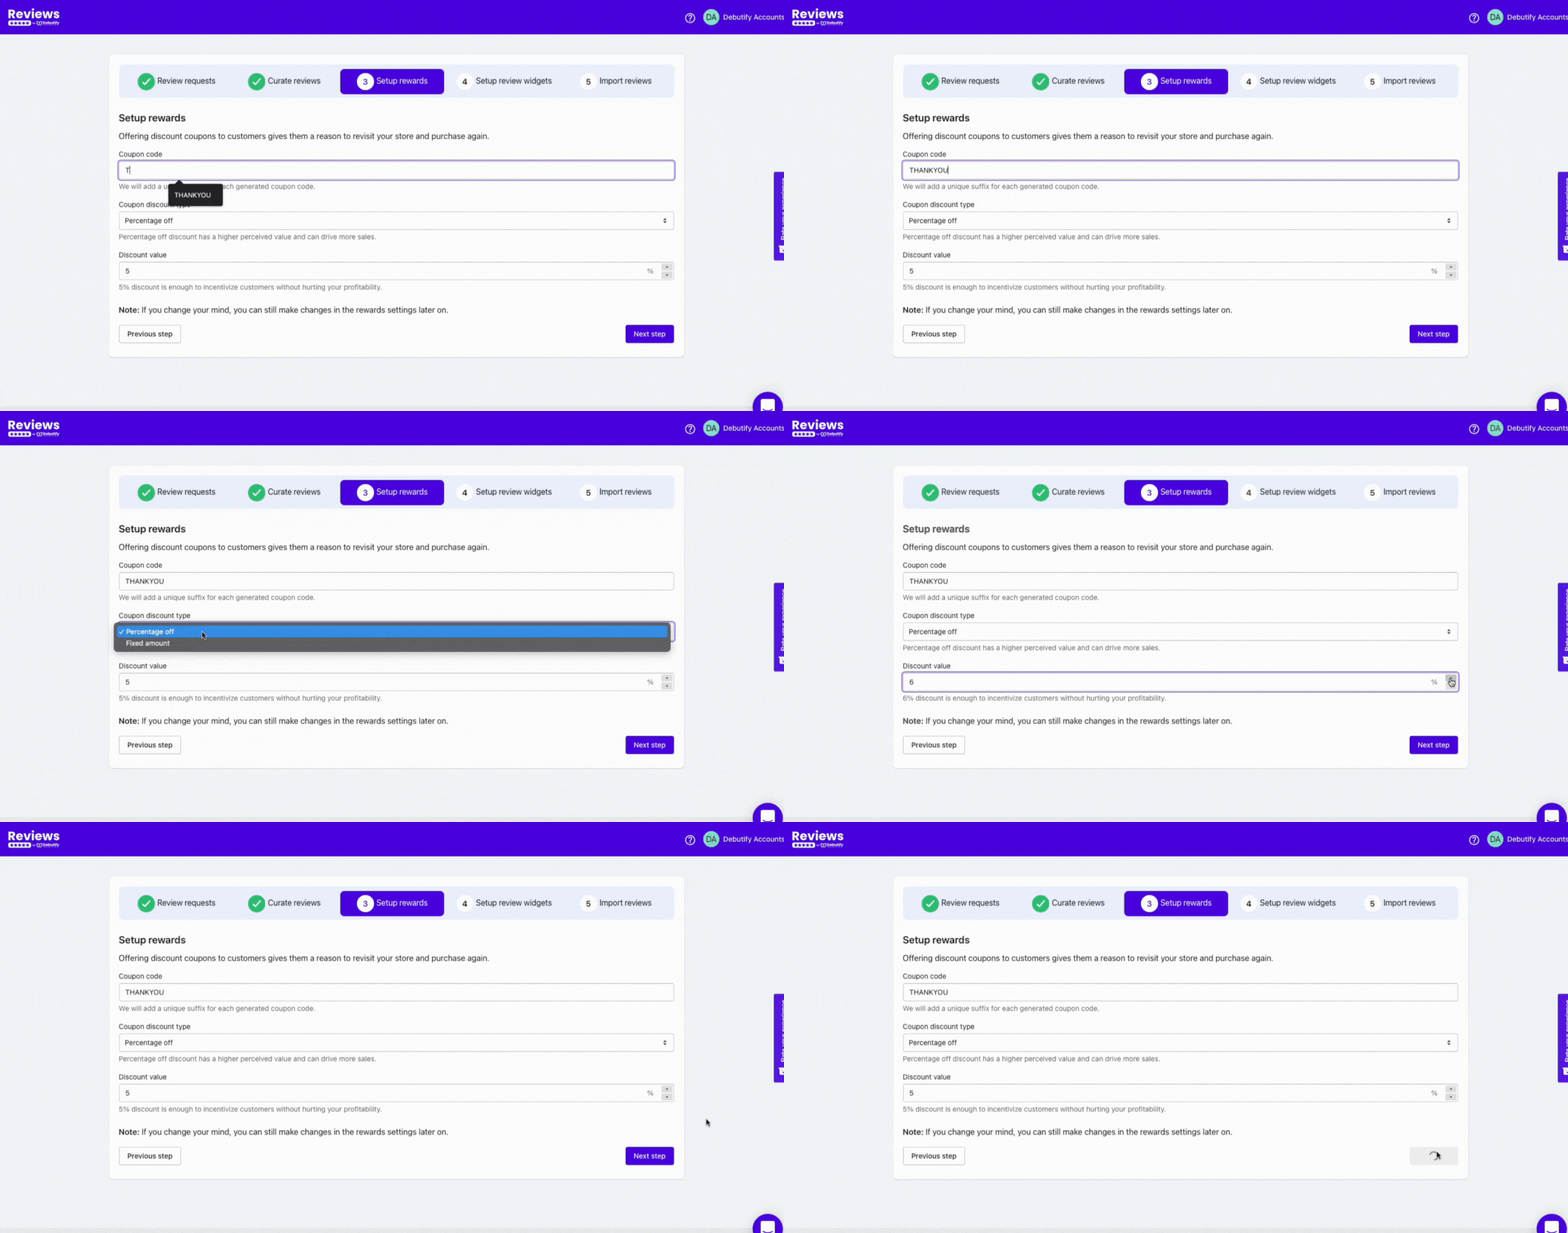
This is where you can customize the settings of your coupon codes. First, you need to enable it.
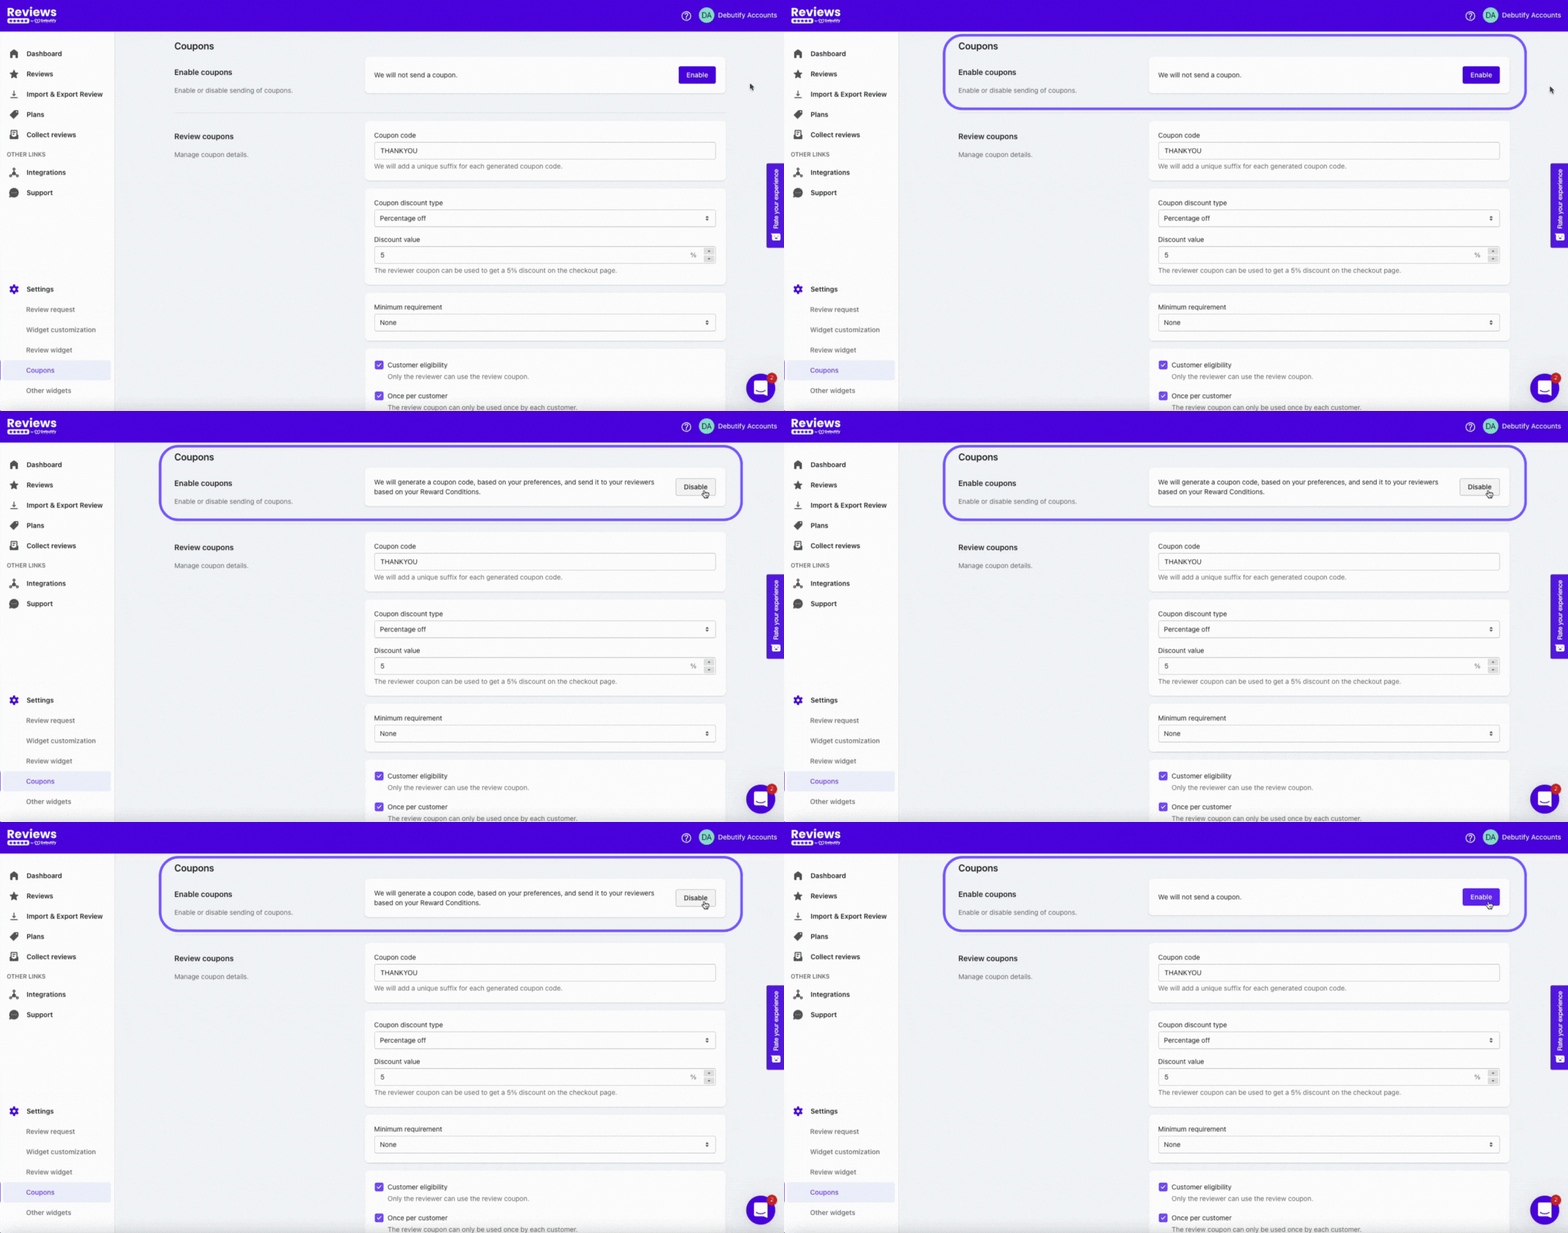
Once you have enabled it, you can manage the Review coupons setting.
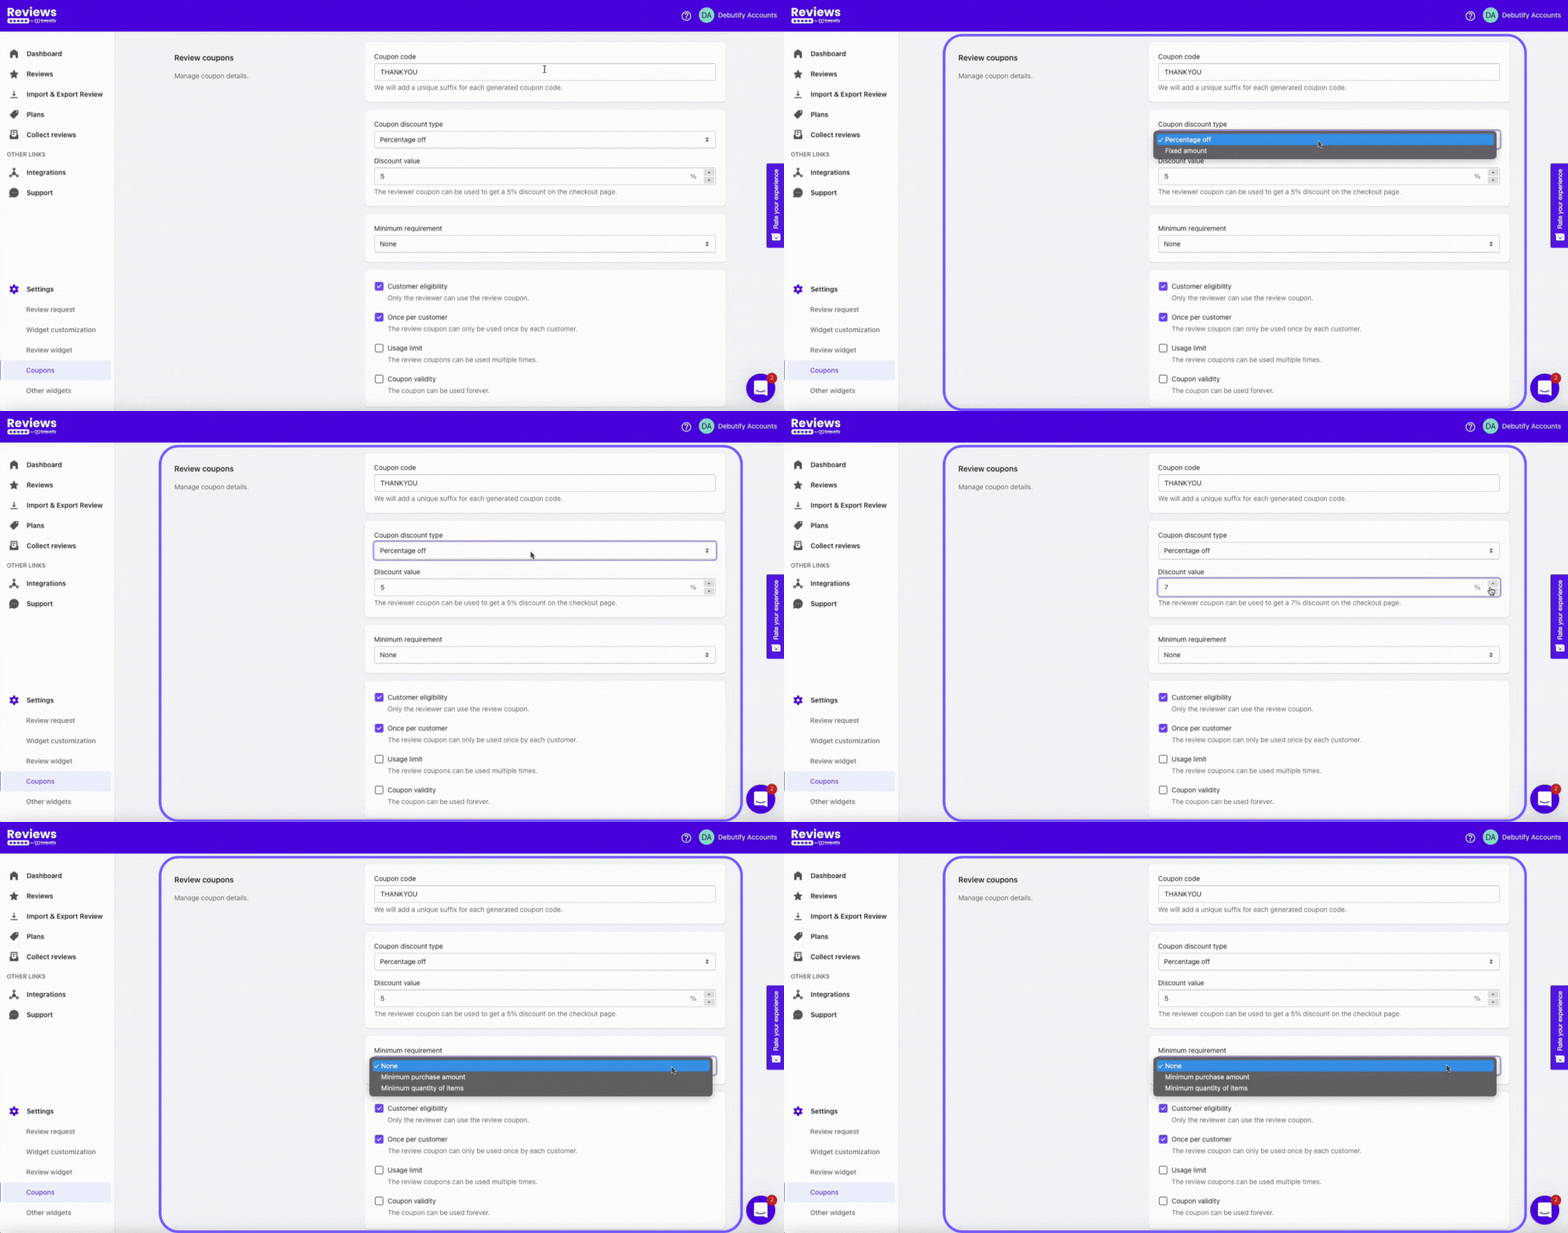
You can select the coupon discount type, discount value, coupon code, minimum requirement, and more.
Let's discuss the minimum requirement options.
- Minimum purchase means they need to achieve a certain amount before using the coupon. None means users or customers can use the coupon without any conditions.
- Minimum quantity of items means they need to purchase a certain number of items before they can use the coupon.
Coupon discount type options:
- Percentage off means customers will get a percentage off their purchase when they reach your minimum requirement.
- Fixed amount means you can choose if customers will get $10 off their orders when they reach your minimum requirement. You will set it based on your currency.
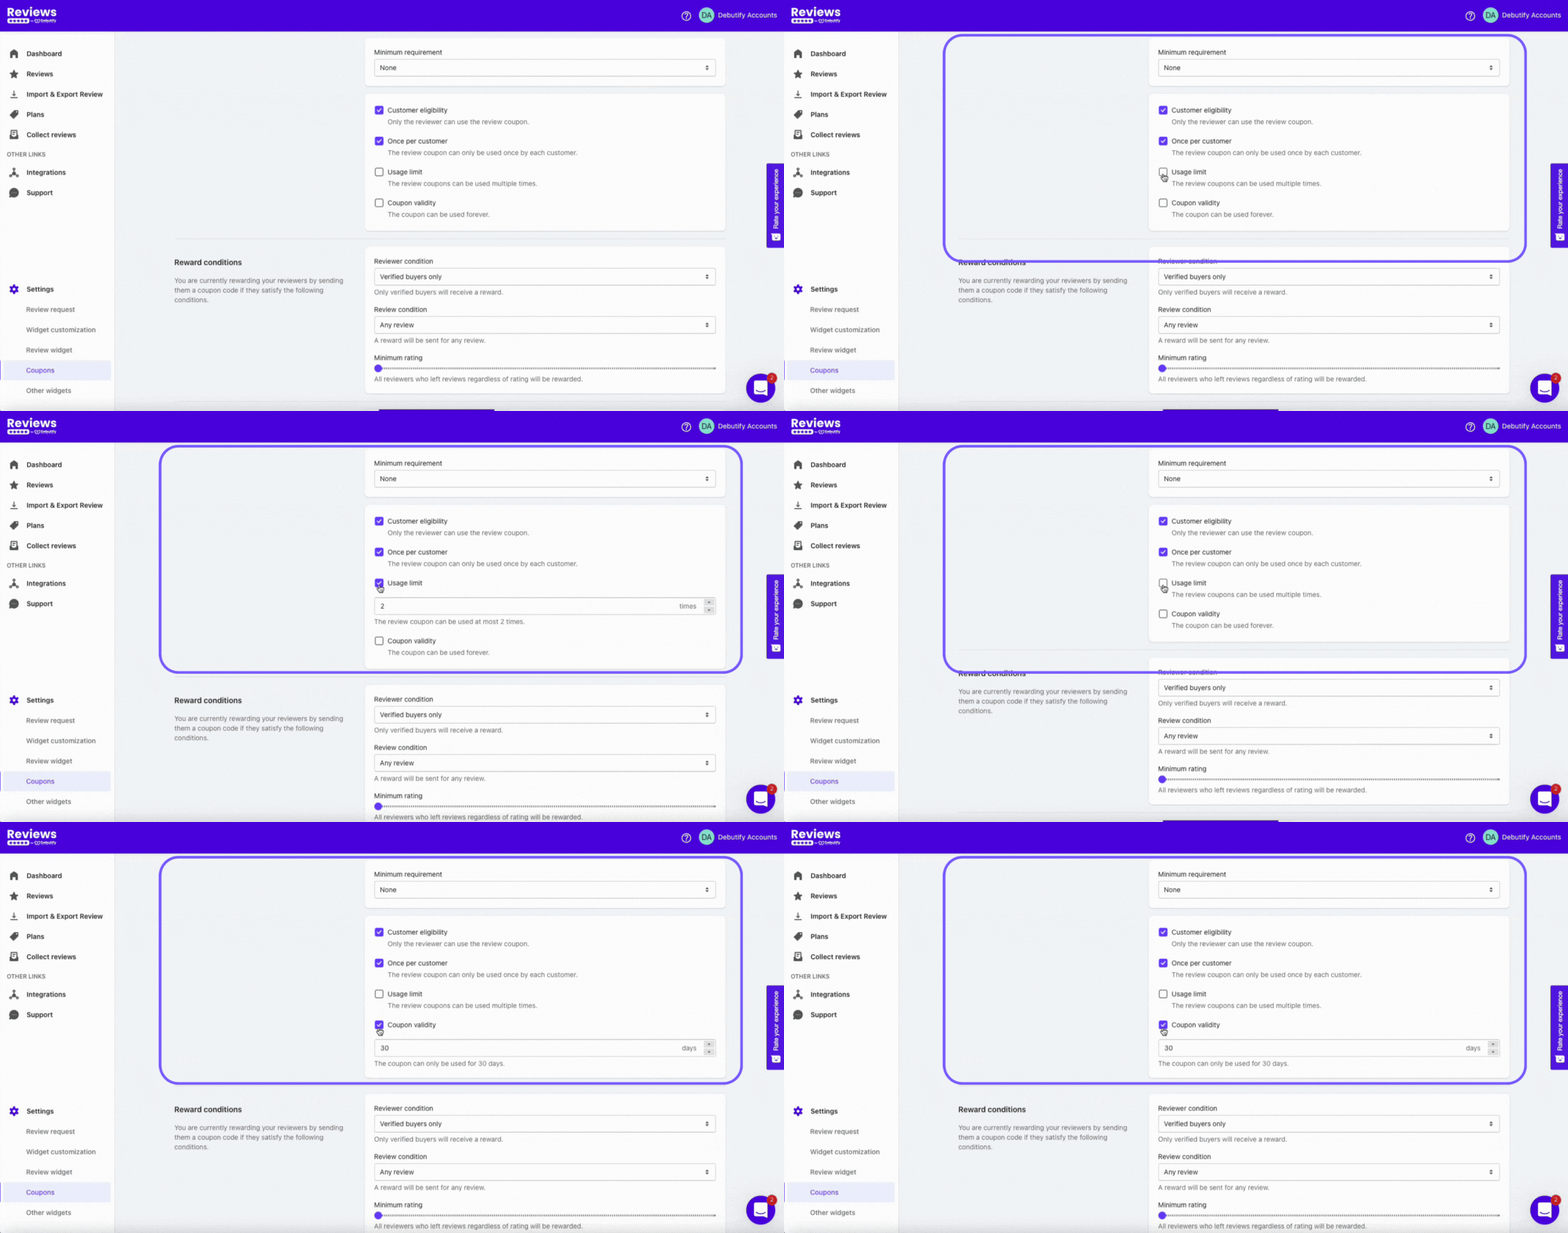
You can also change how many times a coupon can be used, who can use it, and when it is valid.
Reward conditions
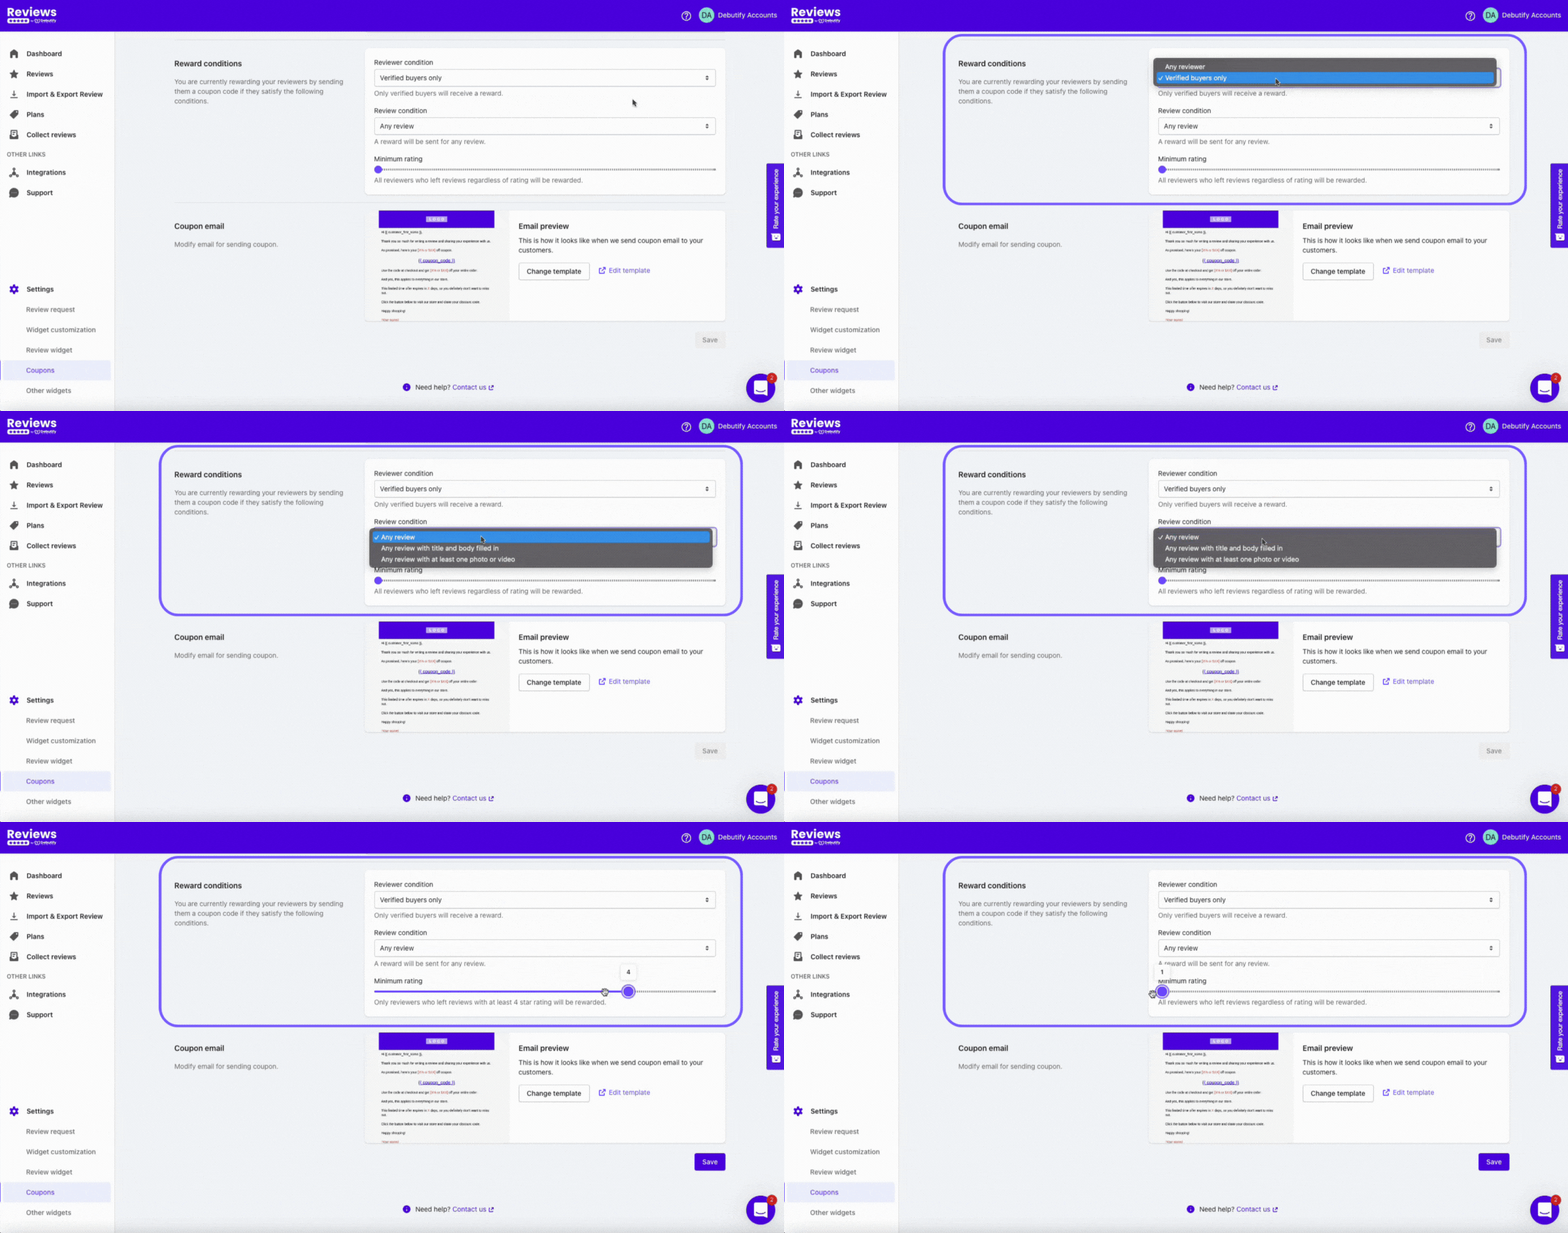
If you're not yet able to reward all your customers who leave reviews, you can set your reward conditions.
- Any reviewer. This means you will give coupons or rewards to any reviewer.
- Verified buyers. Only verified users who leave reviews will receive rewards.
You can also choose which types of reviews to reward.
- Any review. You can give coupons for any review.
- Any review with title and body filled in. The user must enter a title and body before receiving a reward.
- Any review with at least one photo or video. You can reward customers who leave at least one photo or video in their review.
Setting your reward conditions is vital because it gives you the advantage of choosing who is eligible for rewards.
Coupon email
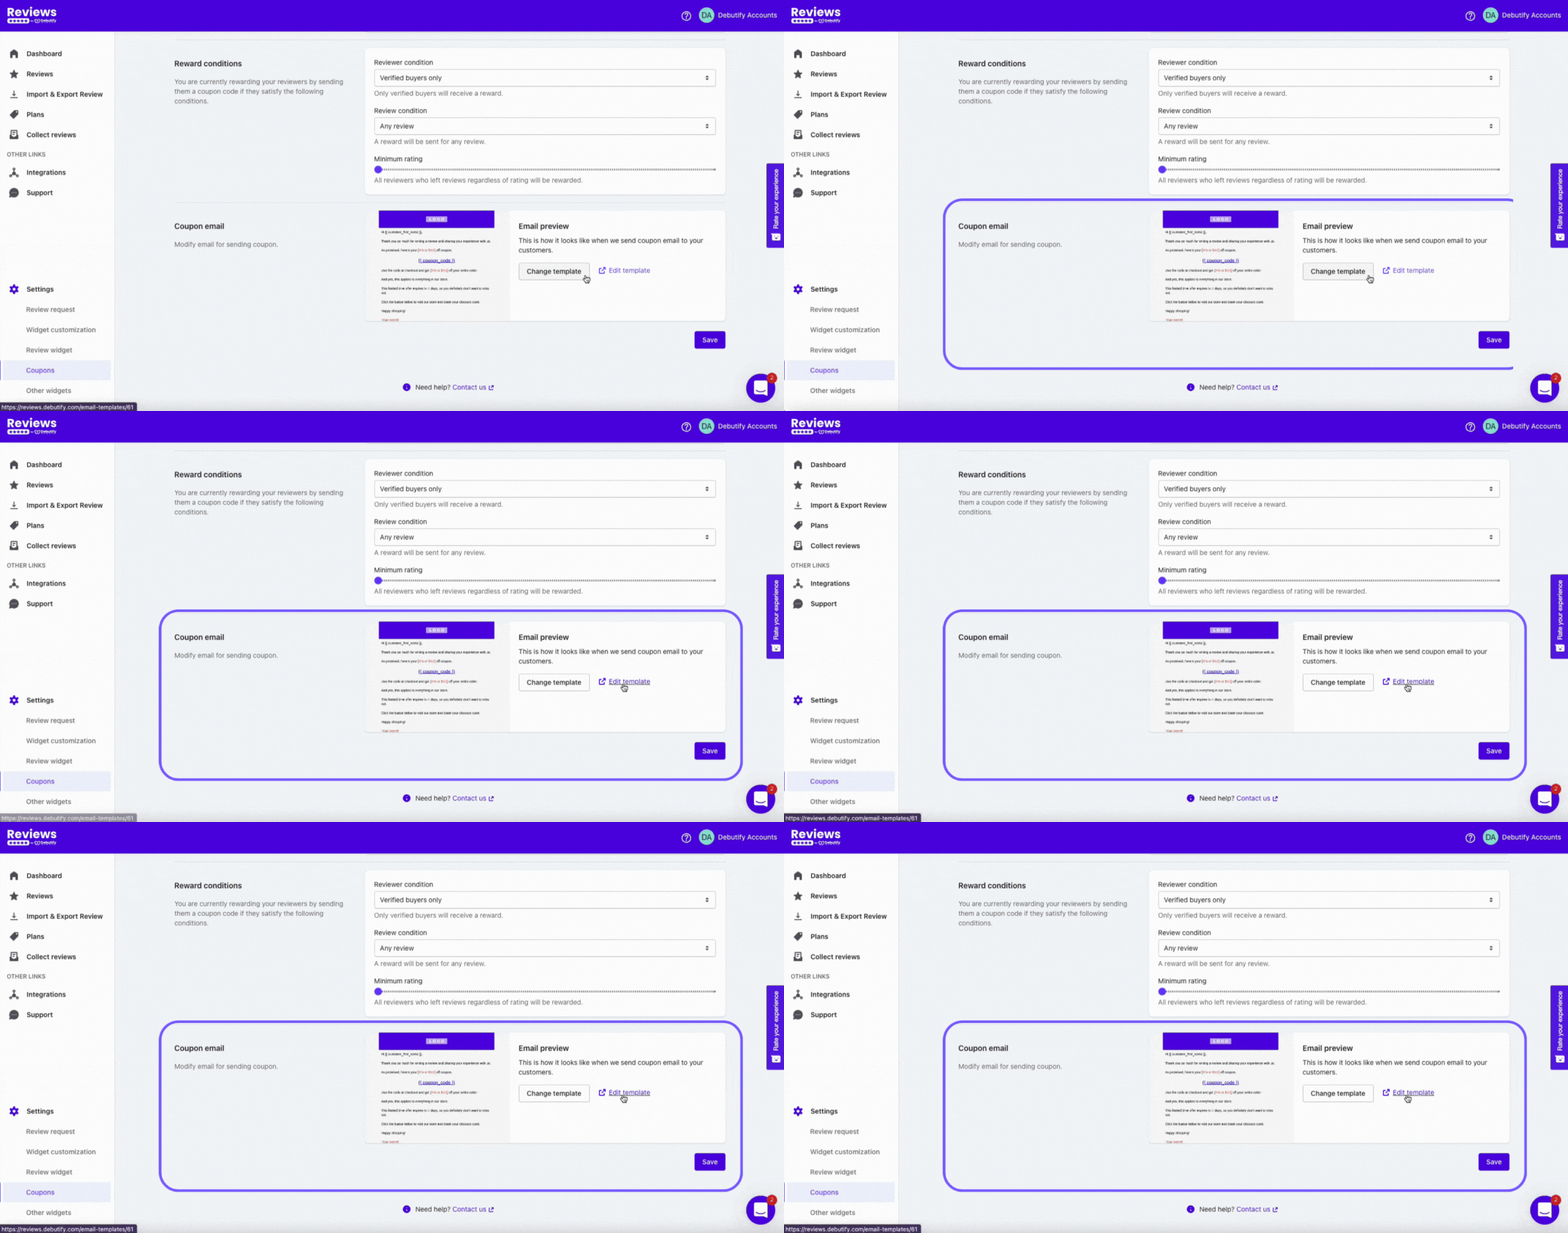
After setting your reward conditions, you can modify the email your customers will receive.
You need to highlight the coupon code, reward conditions, and how much they need to spend to avail of the rewards. This way, it's easier to grasp what they need to know.
7. Integrations
To go to Integrations, go to the left sidebar, and you'll see this:
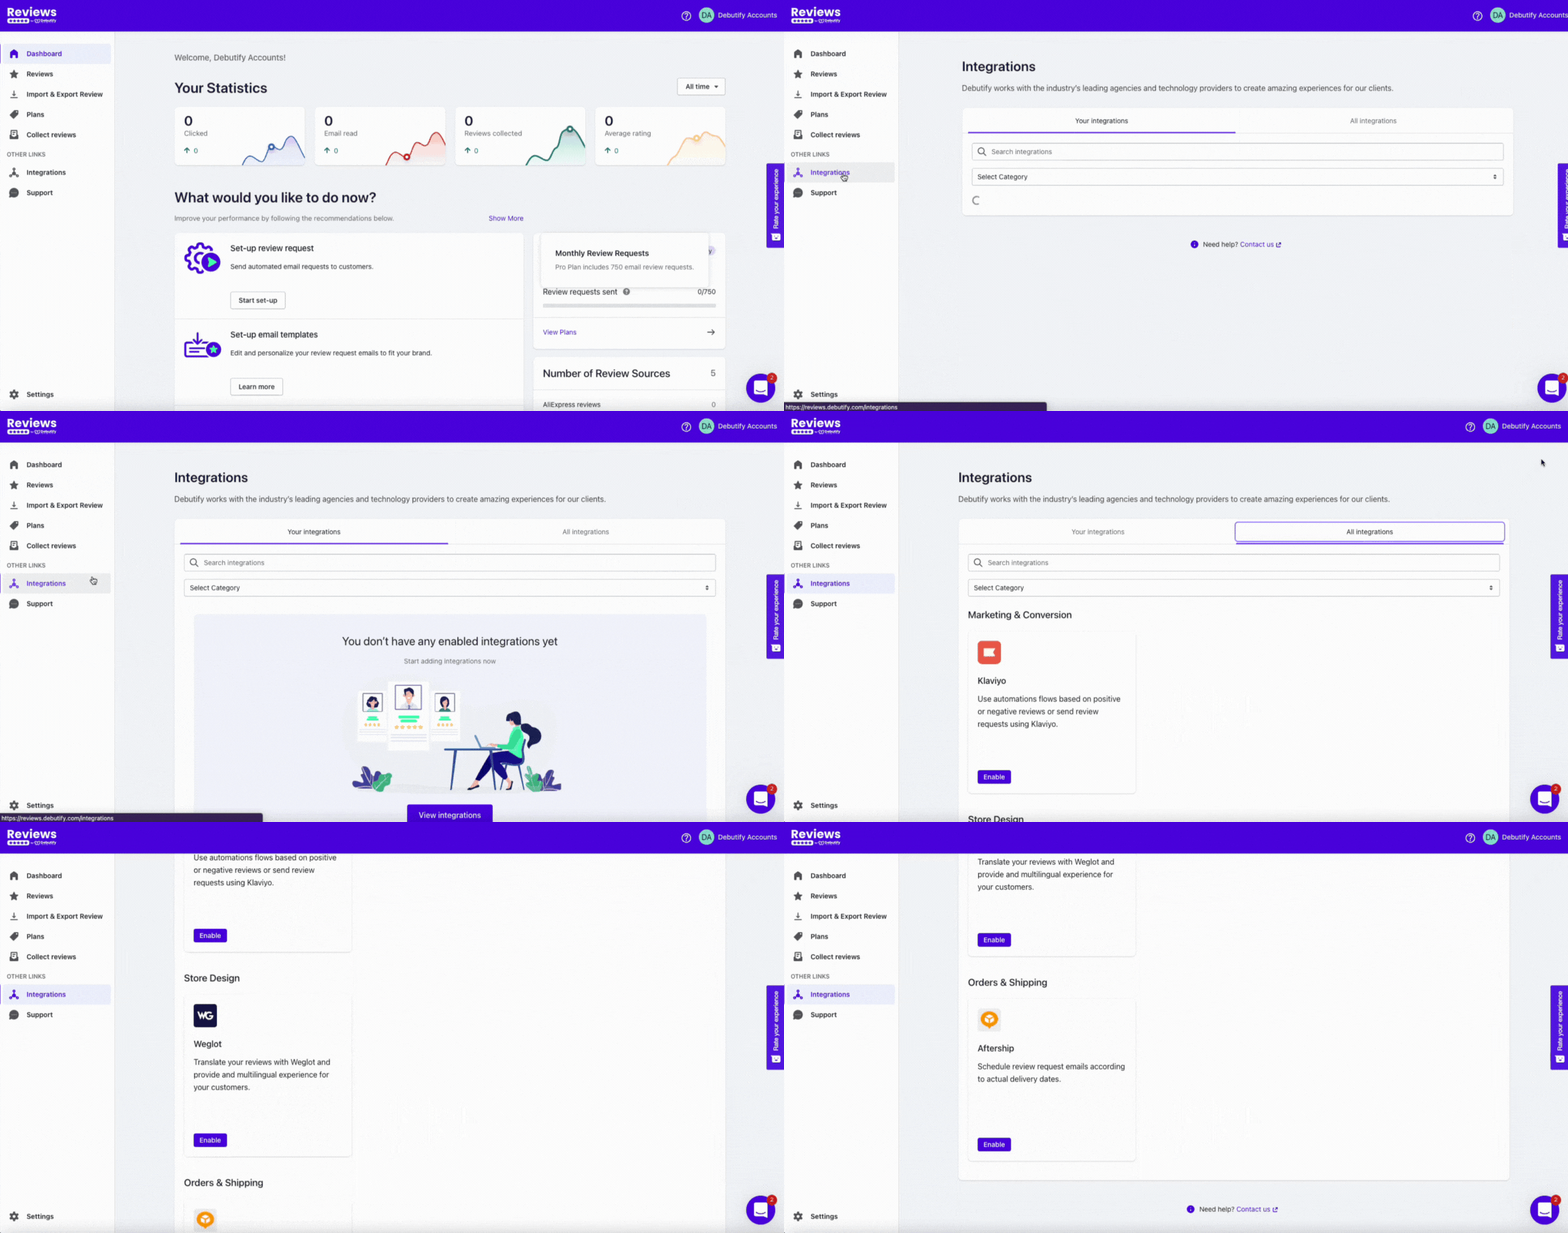
There are different integrations you can do with Debutify Reviews. There's Klaviyo under Marketing & Conversion, Aftership under Orders & Shipping, and Weglot for Store Design.
Klaviyo
You can use automation flows when you have positive or negative reviews. You can also send review requests through Klaviyo.
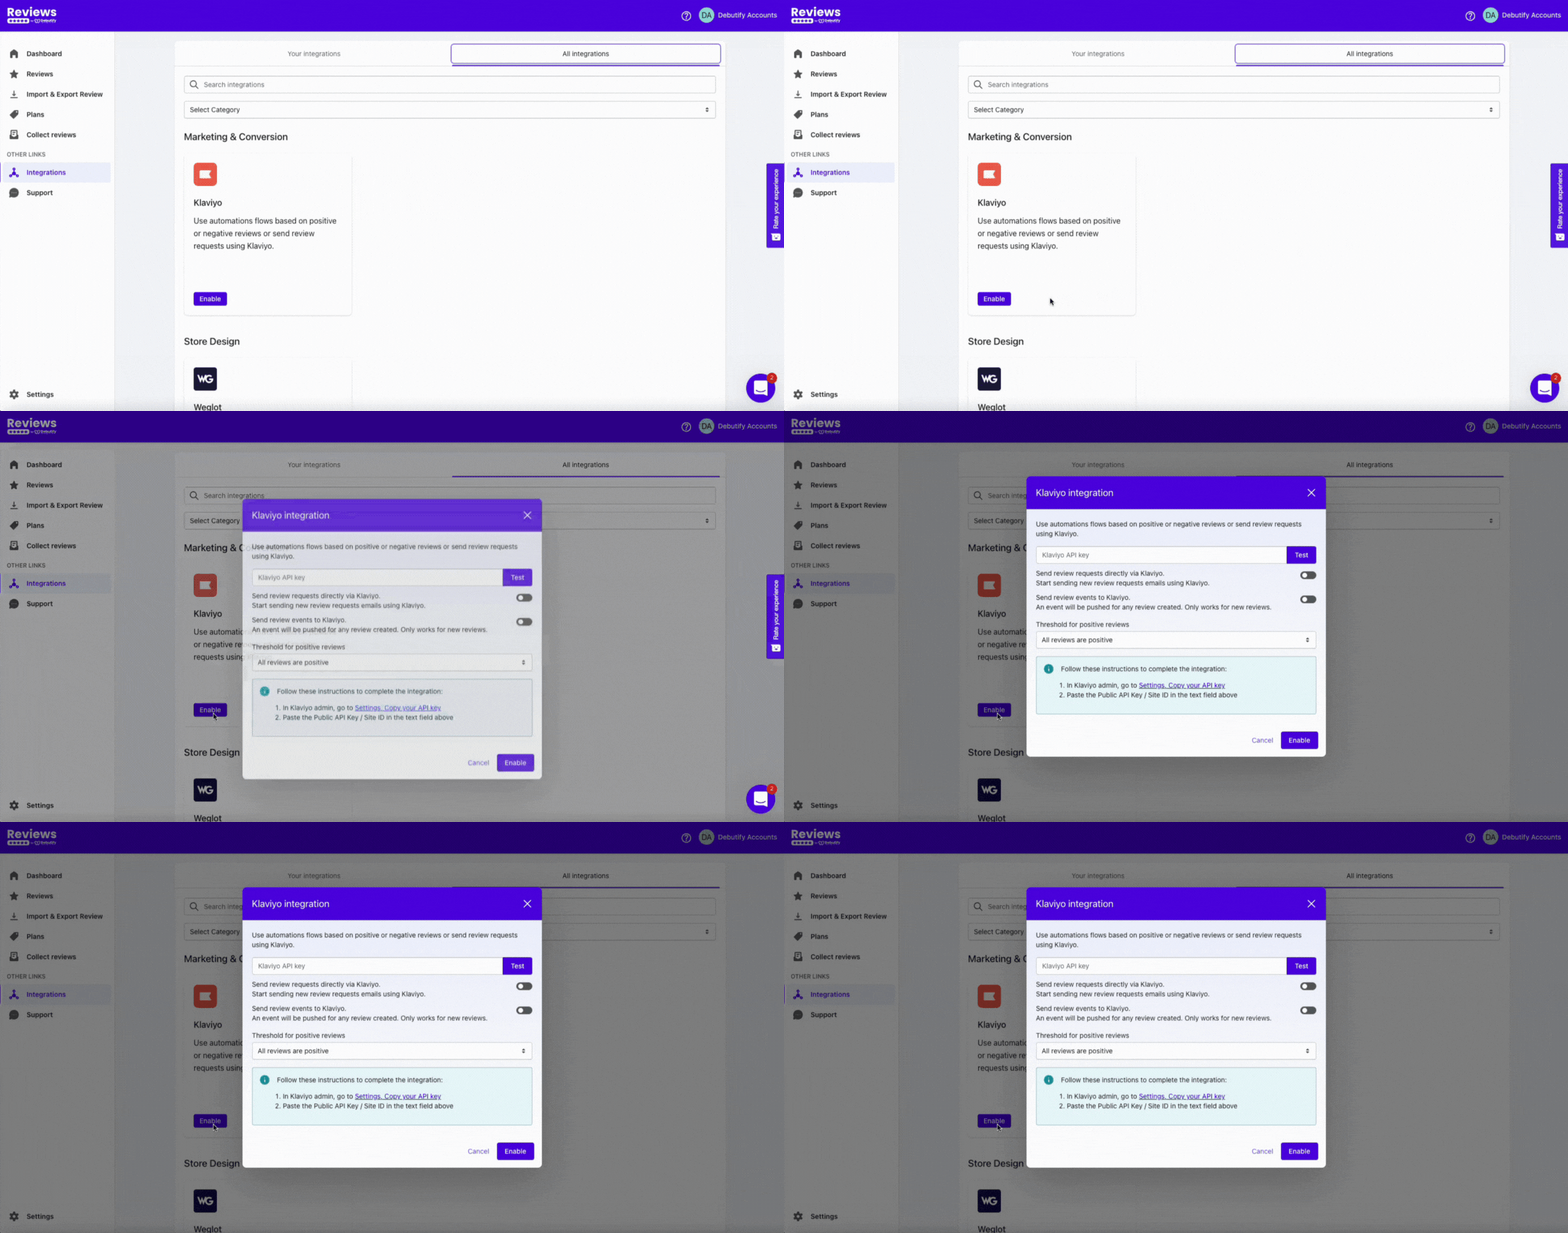
Here's how to integrate Klaviyo with Debutify Reviews:
- Go to Klaviyo Admin > copy your API key in Settings
- Paste the Public API Key or Site ID in the field above
There are two options for this integration:
- Send review requests through Klaviyo. This option allows you to send reviews through Klaviyo only.
- Send review events to Klaviyo. This only works for new reviews. But this option pushes an event if you receive new reviews.
You can also choose the threshold for positive reviews, which can be all reviews or two up to 5-star reviews.
Aftership
Timing is crucial in review requests. And Aftership can help you schedule review request emails according to the actual delivery dates instead of Shopify orders fulfillment.
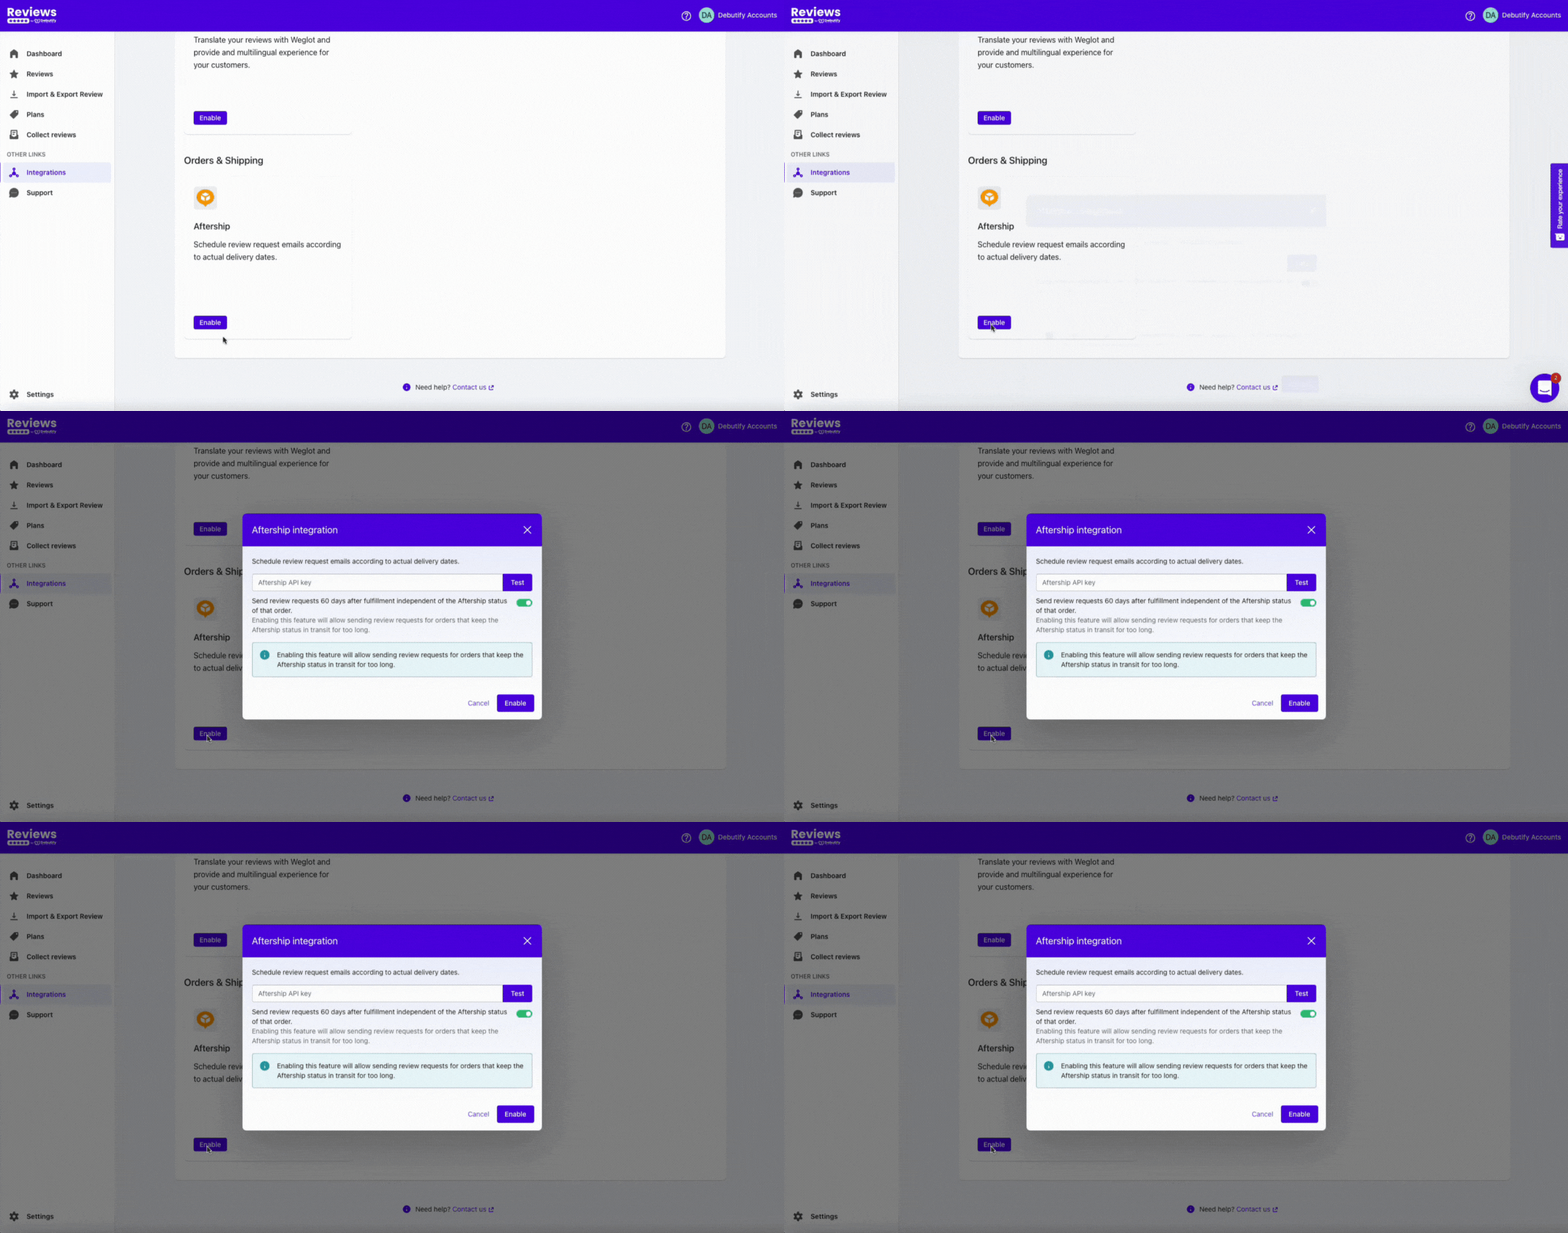
Here's how to integrate Debutify Reviews with Aftership:
- Get your Aftership API key
- Paste it in the text field, then enable it.
Weglot
Do you have customers worldwide? This integration helps you translate reviews to provide a multilingual experience to your visitors and customers. The best part? You can do it yourself!
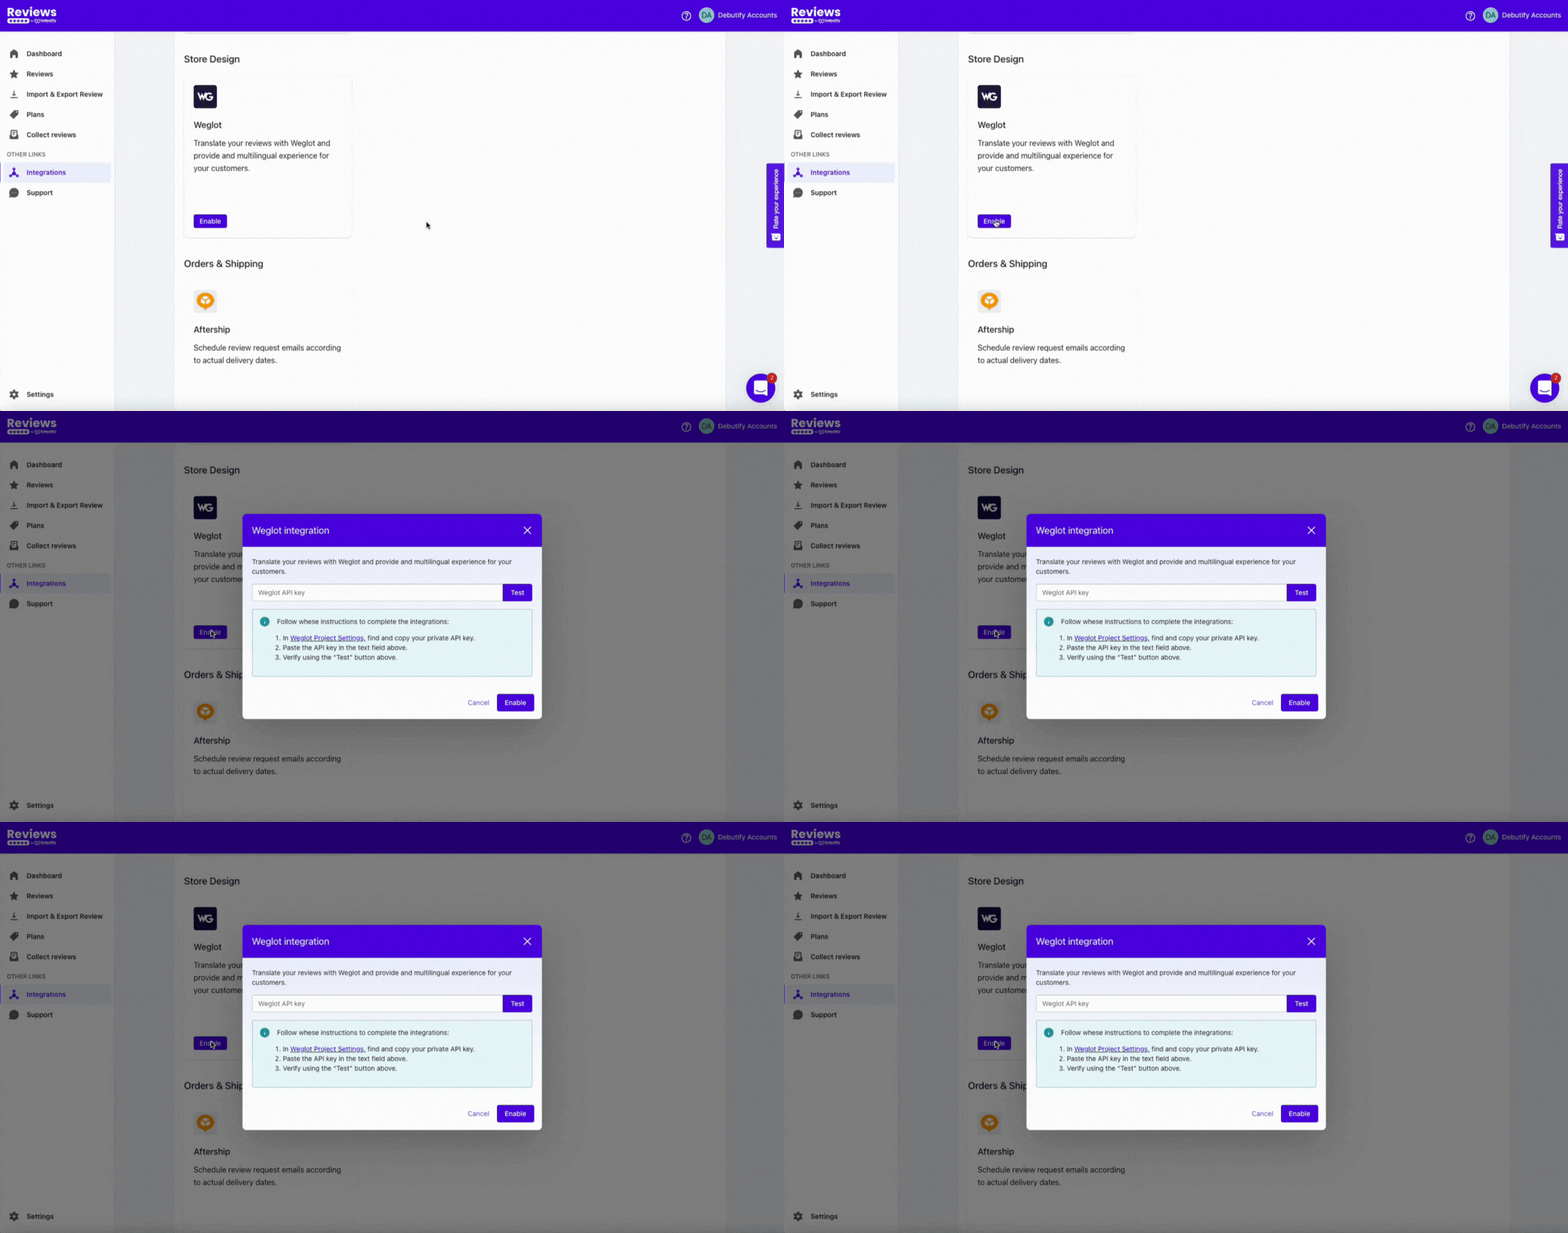
Here's how to integrate Weglot with Debutify Reviews:
- Go to Weglot Project Settings and copy your private API key
- Paste the API key in the text field
- Test to verify if it works
- Click Enable
If you encounter any problems with integrations, you can contact support... which we'll get into later.
8. Manage Reviews
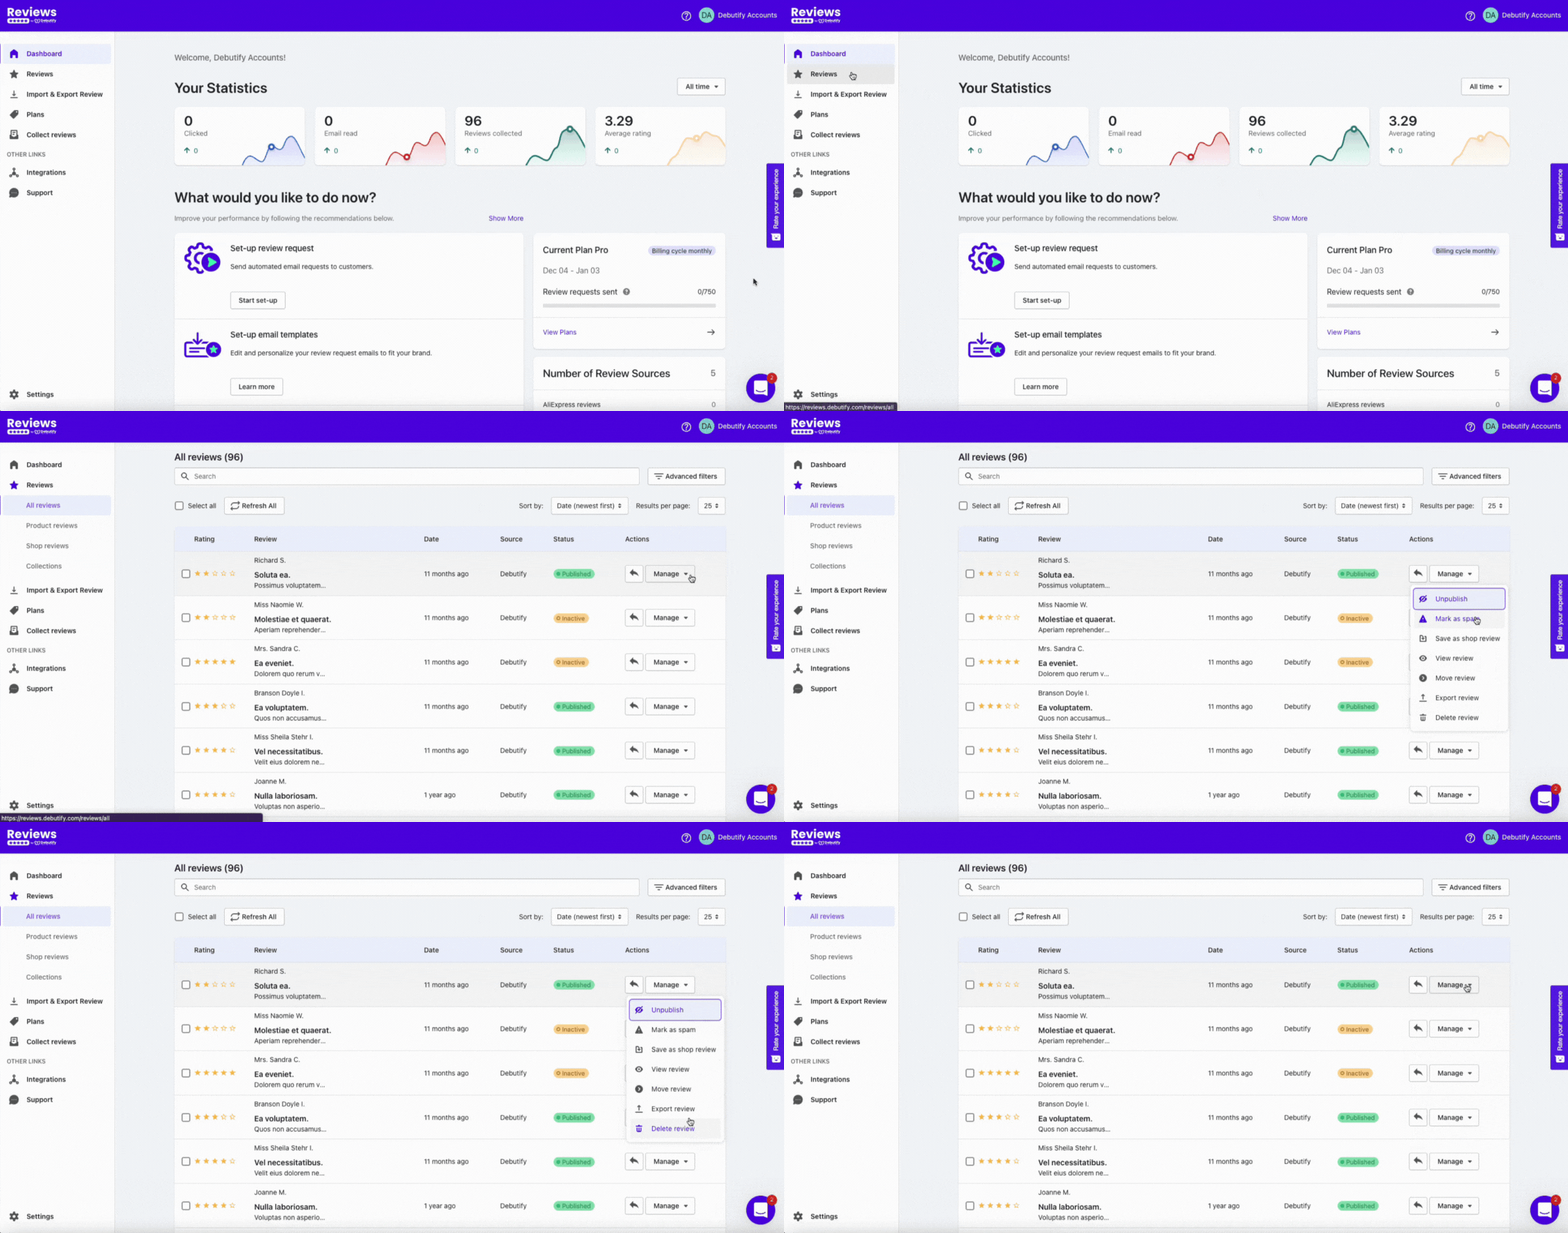
This is where you can manage all your reviews. You can see different settings when you go to your reviews.
You can see the ratings, reviews, date, source, and status of the reviews. You can also see the actions you can take under Manage.
Manage
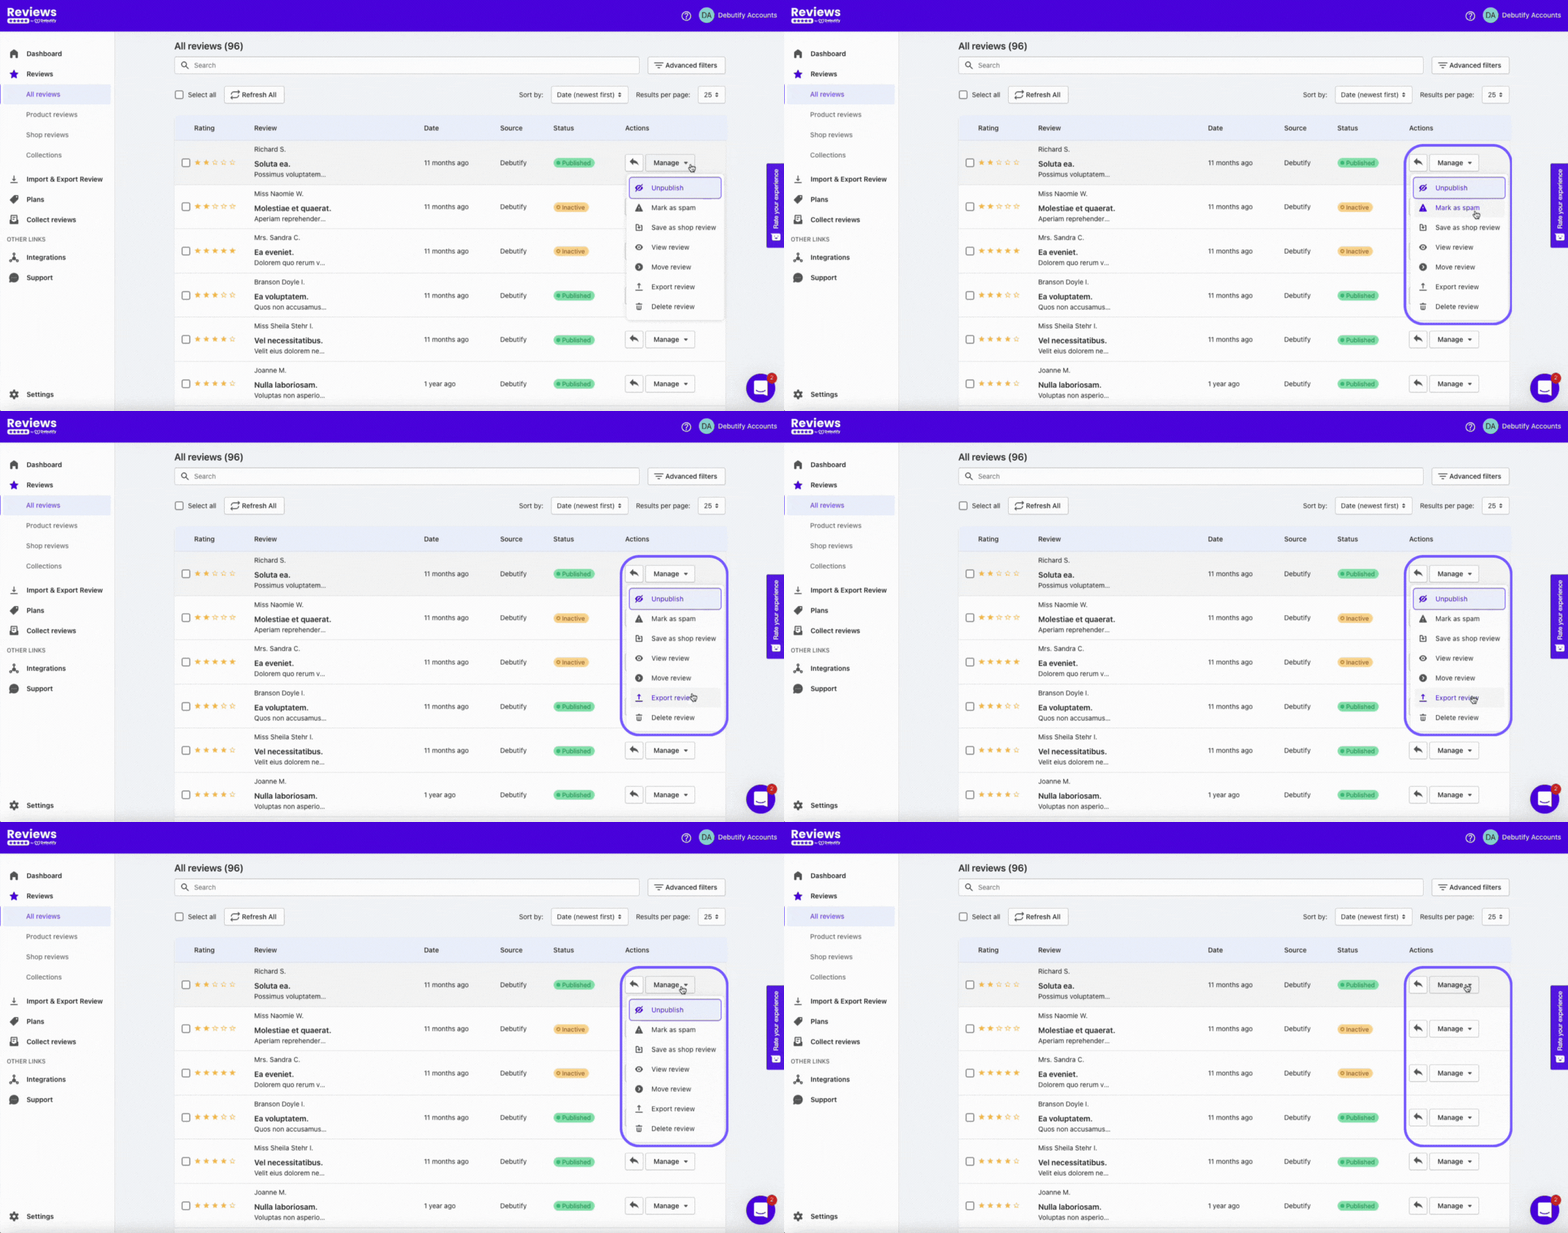
Under the Manage drop-down, you can choose to unpublish a review, mark it as spam, and save it as a shop review. You can also view, move, export, and delete a review.
Results per page
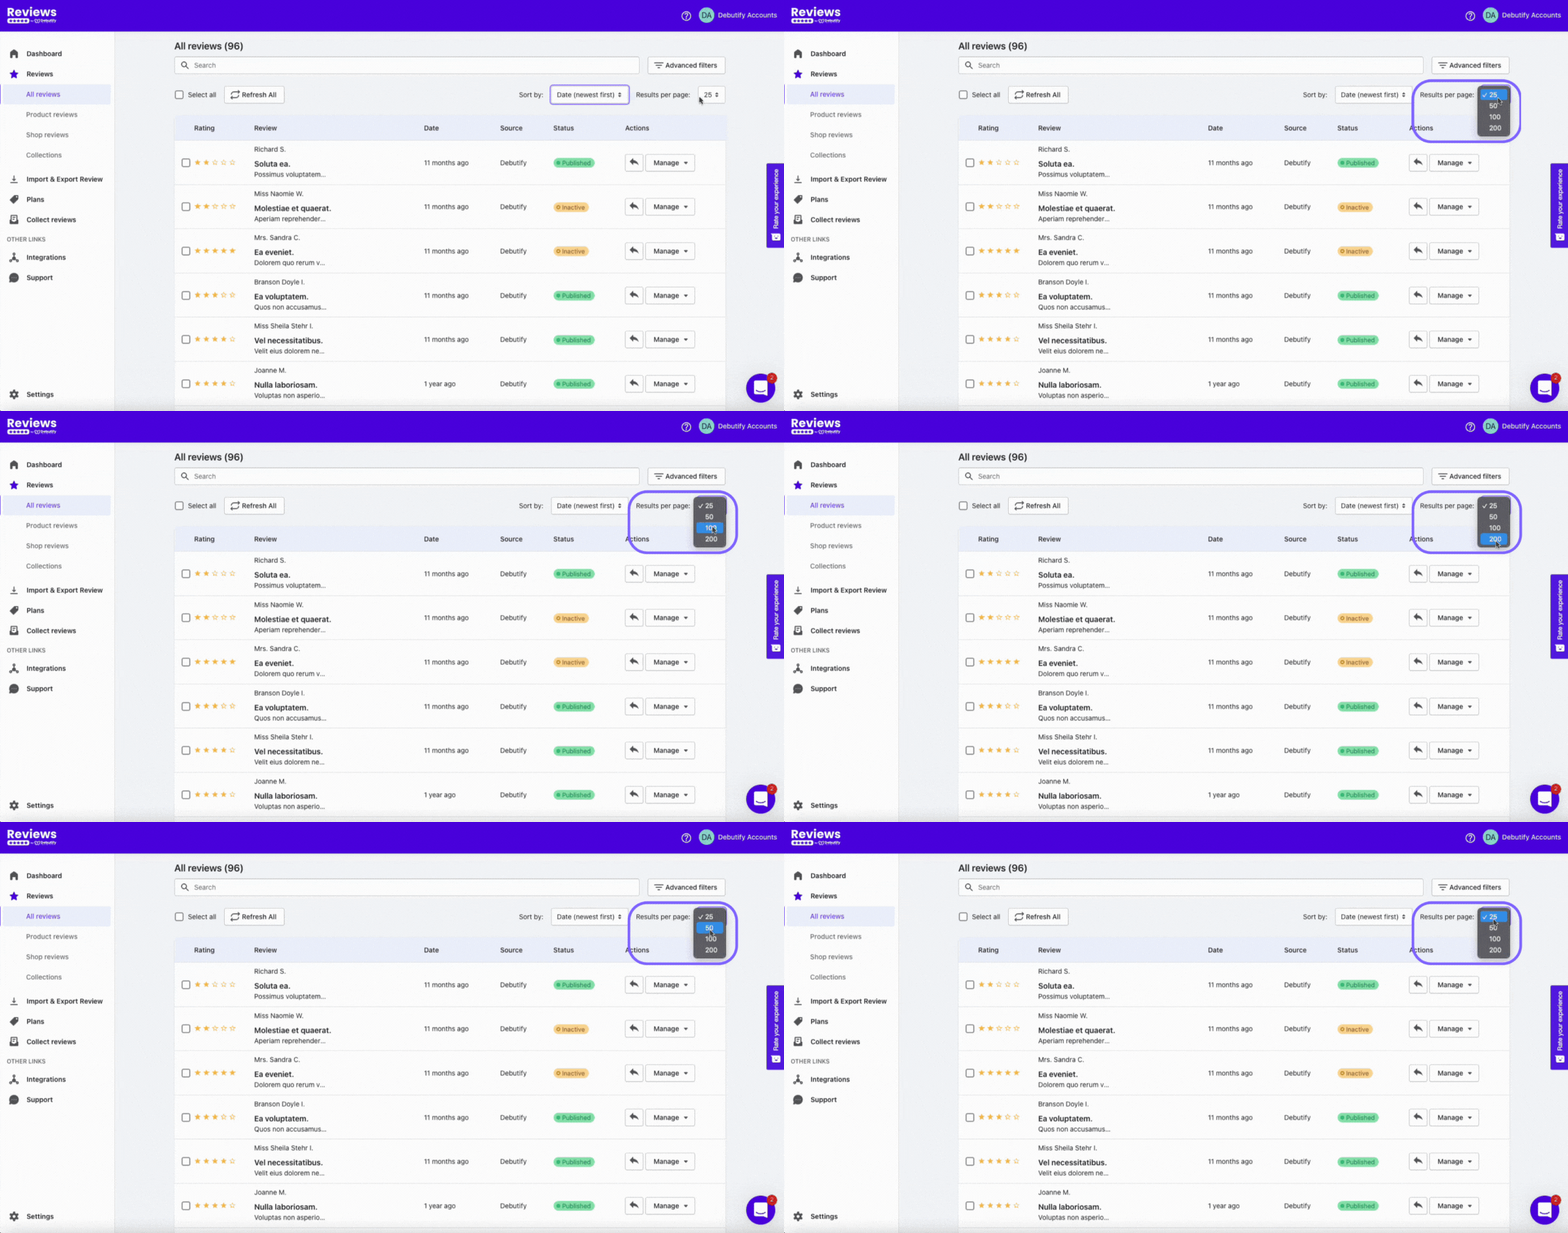
If you want to see hundreds of your reviews on a single page, you can select if you're going to display 25, 50, 100, or 200 reviews.
Sorting
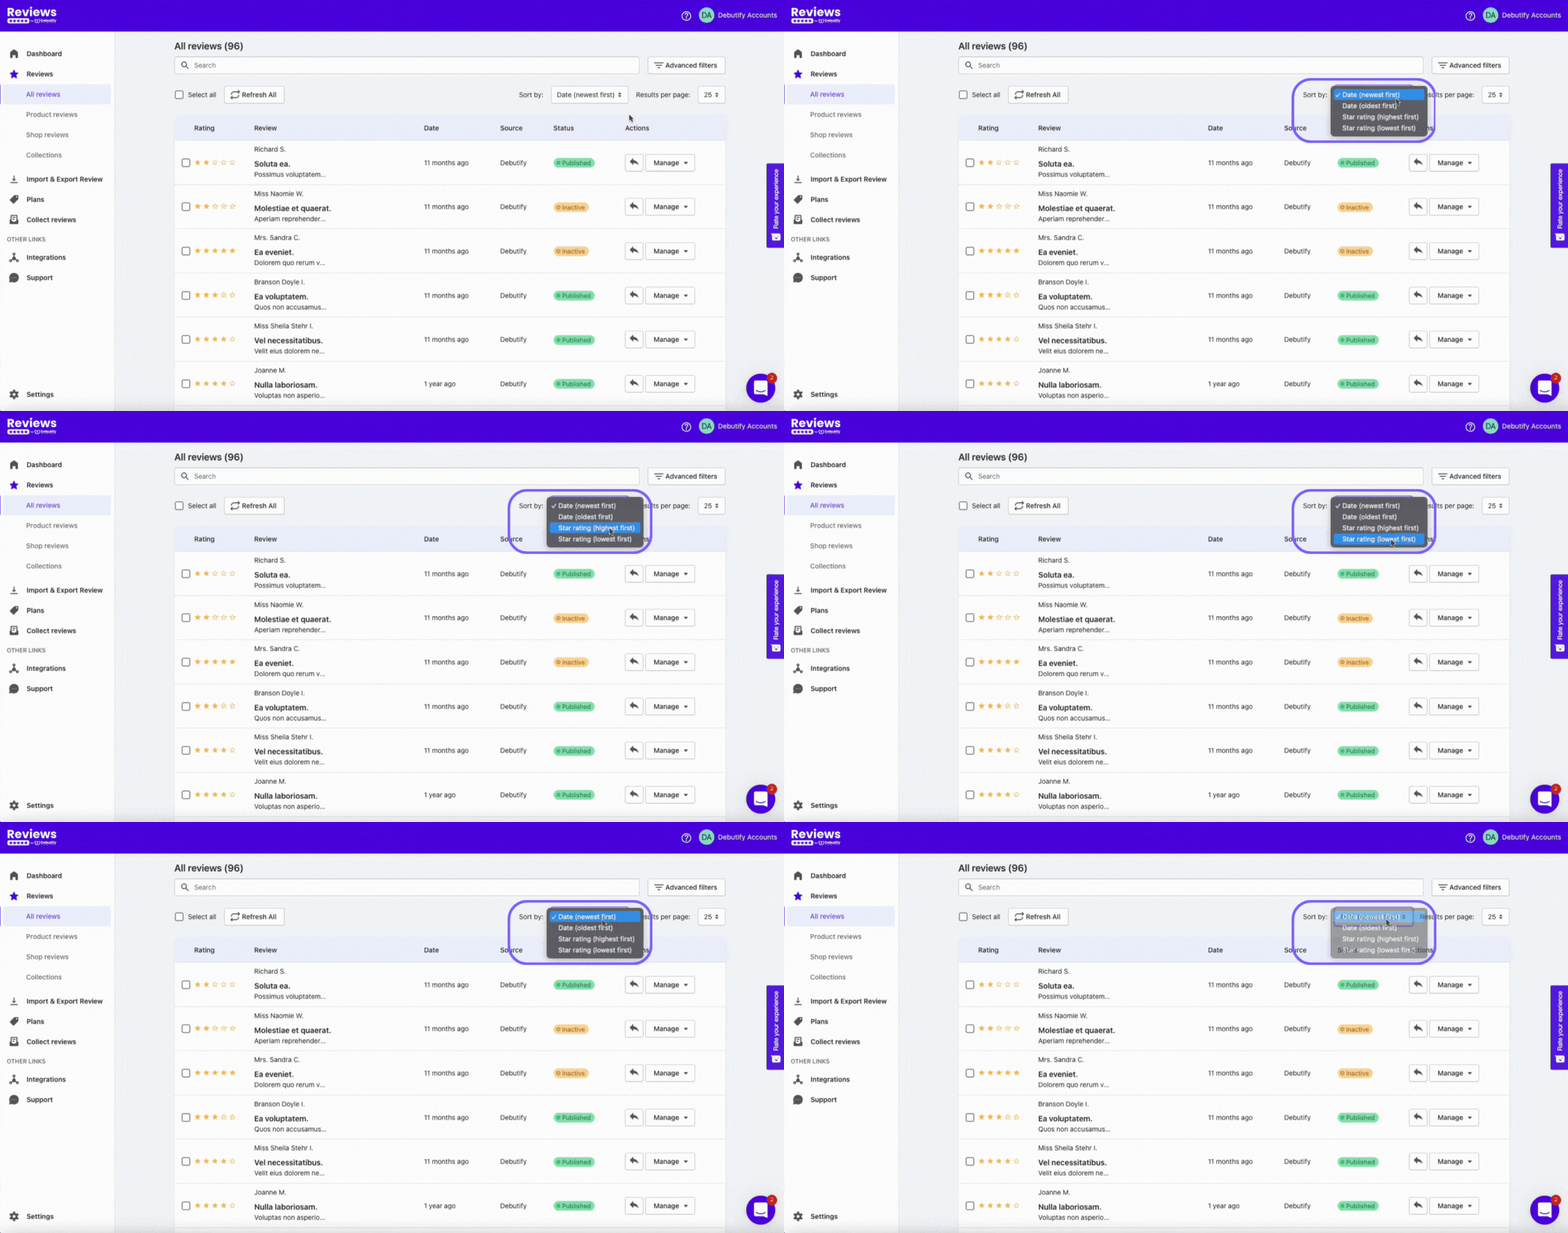
Debutify Reviews lets you sort your reviews based on your preference. You can sort reviews based on date (oldest first or newest first) and star rating (highest first or lowest first).
Advanced Filters
.gif)
You can go to Advanced Filters if you want a more granular sorting. In this setting, you can filter reviews based on...
- Product
- Date Range
- Star rating
- Status
- Review sources
- Visual media
- Verified purchase
Advanced Filters will make it more convenient for you to manage your reviews.
9. Support
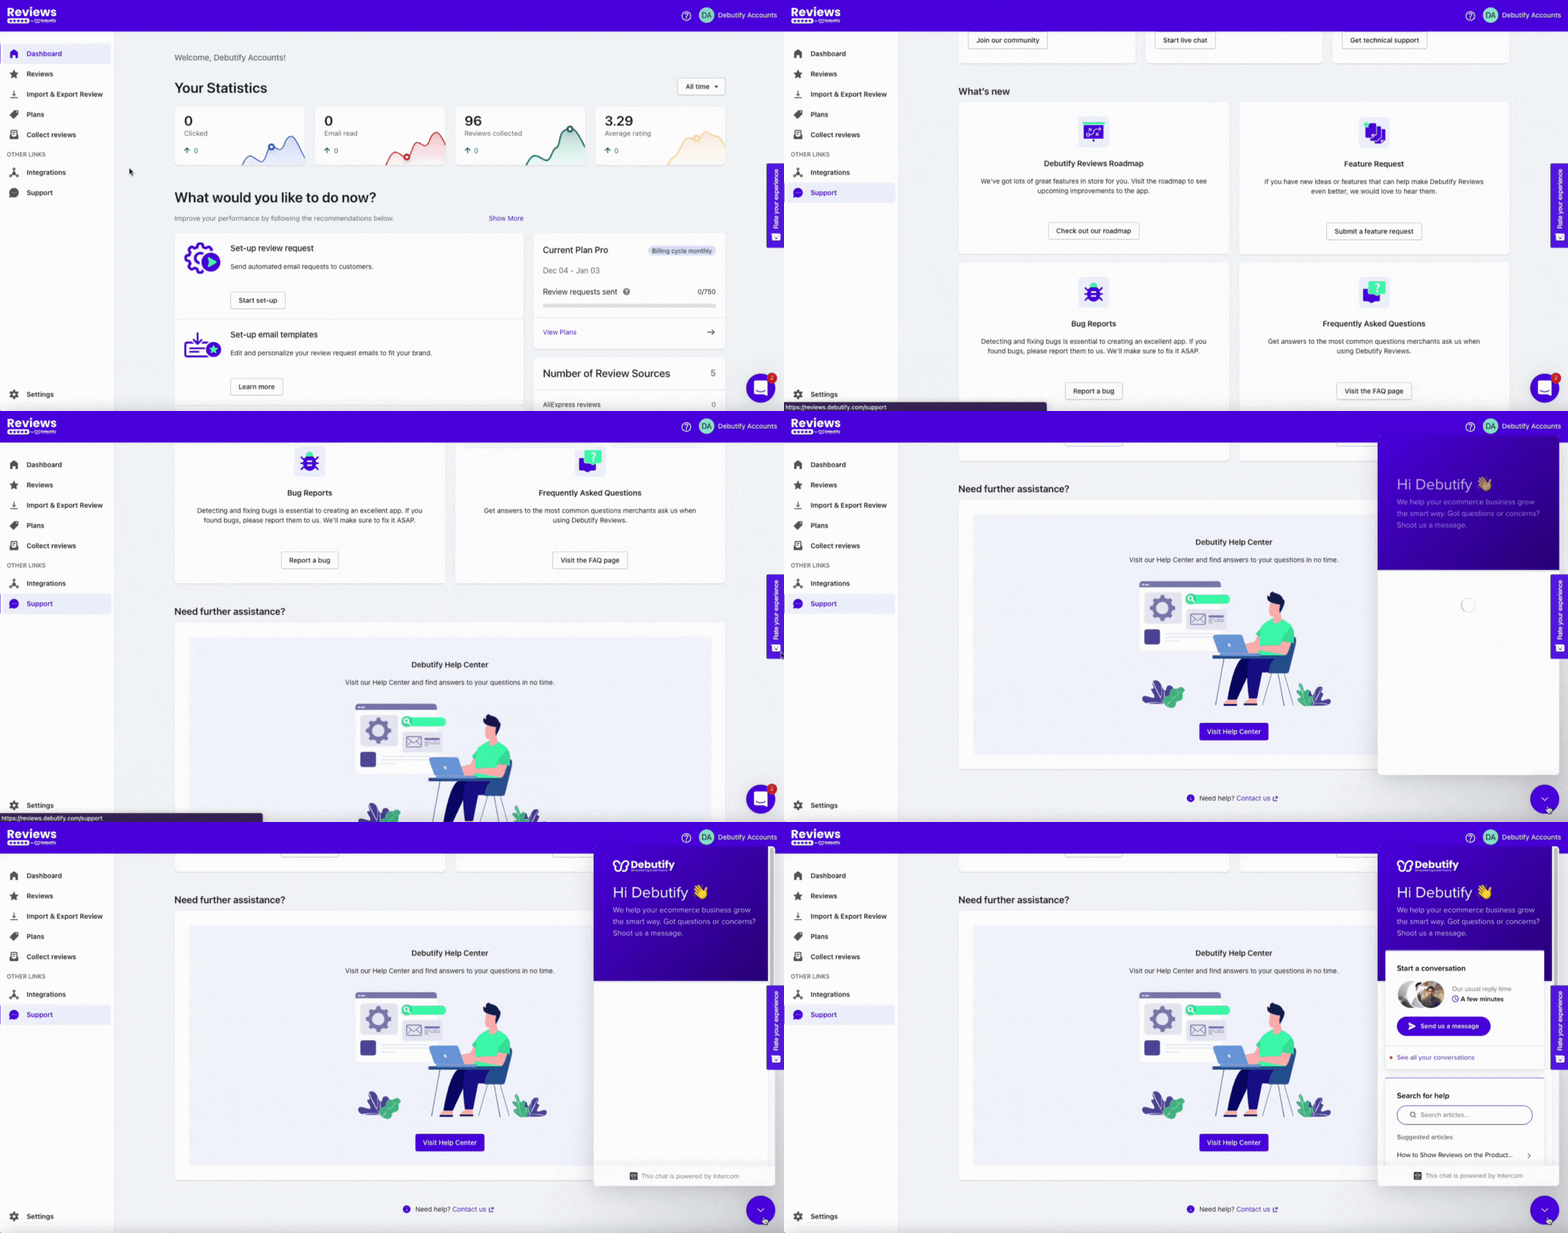
Debutify Reviews can support you if you have questions, too. You can get community support by joining Debutify Community's Facebook group. Or, you may also visit Debutify Reviews FAQ to get the answers to the most frequently asked questions about the app.
You can also get an account and technical support through live chat to help fix your problems.
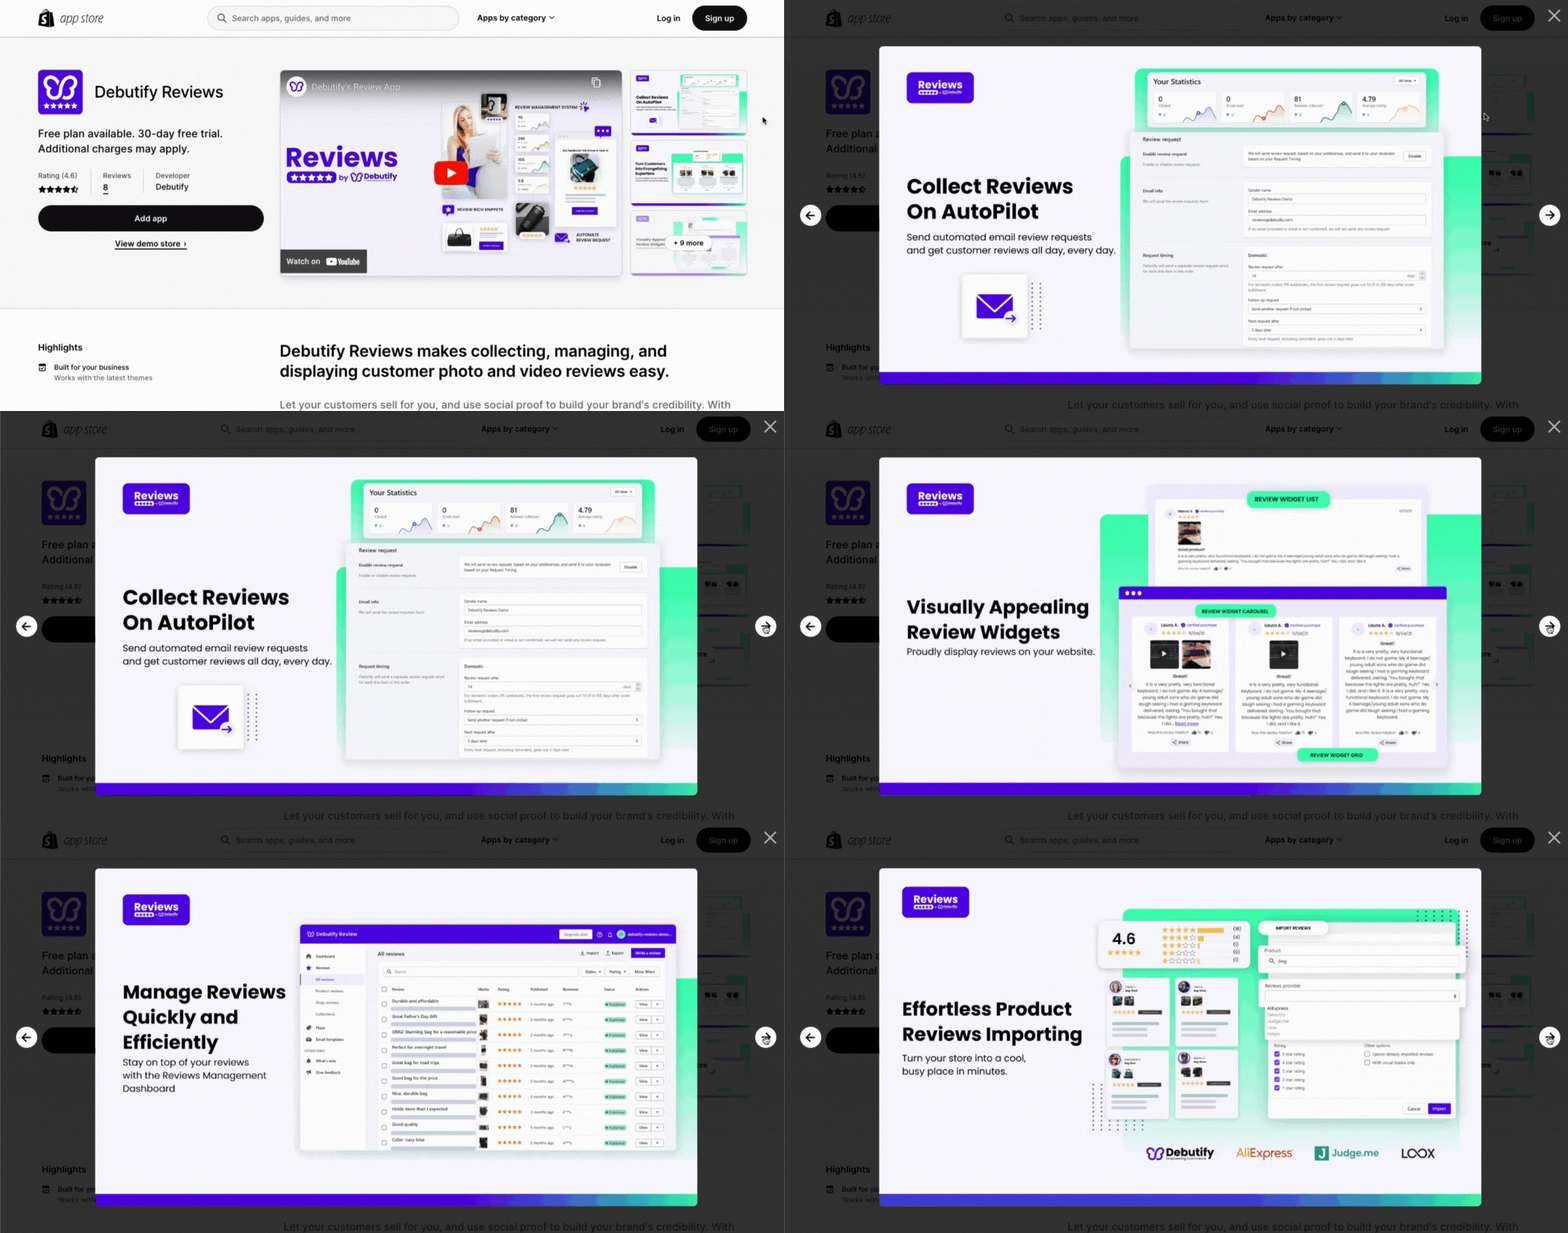
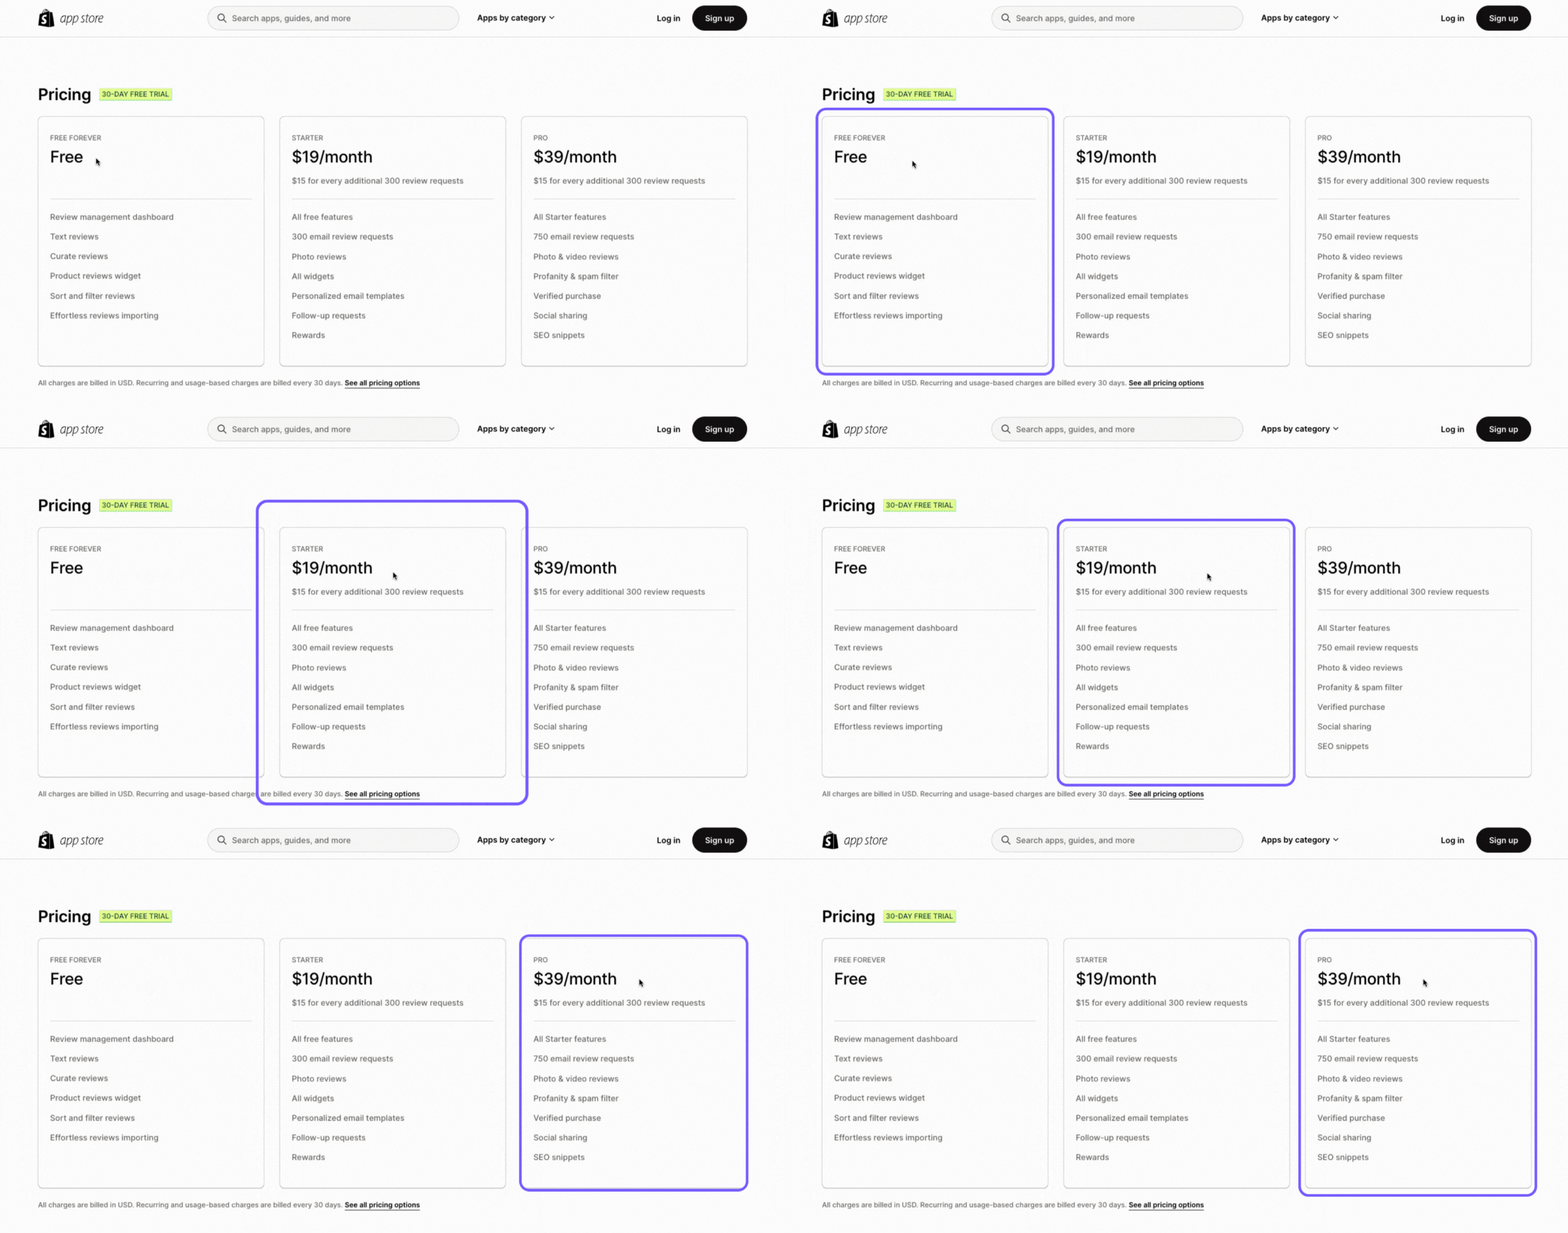
Did these features excite you?




.gif)



.gif)


.gif)


.gif)


